GIVEAWAY | Safaris & Sunsets

ss-giveaway(Pink | Blue | Lilac | White)

This latest giveaway is one of those prizes that kinda makes me want to rig the competition so I can keep the prize for myself! Let me introduce one of our newest sponsors, the lovely Sarah of Safaris & Sunsets. Aside from her beautiful blog, (have you seen her blog? Check it  out! Lady has some crazy skills behind the lens!) Sarah has a gorgeous print store over at Society6 showcasing her photography and design skills. She has just released a set of brand new floral prints and has graciously offered to host a giveaway exclusively for High Walls readers! Hooray!

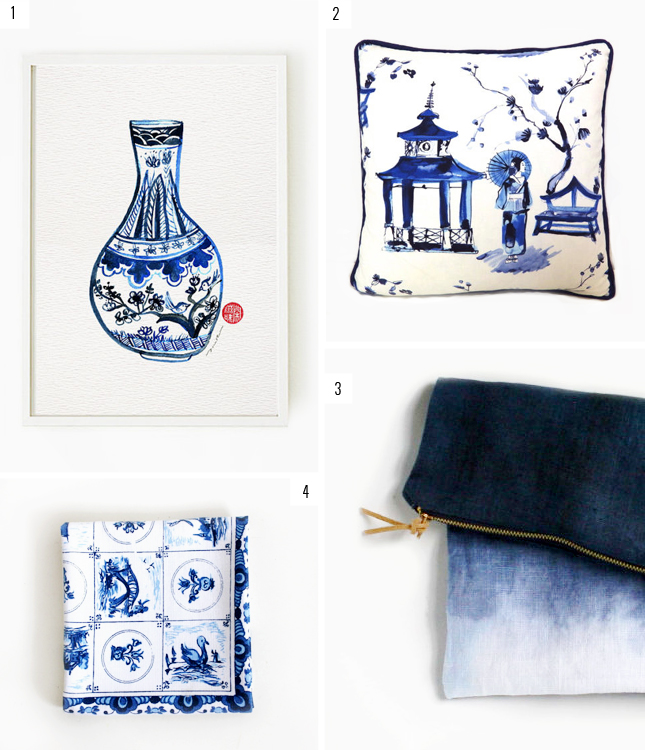
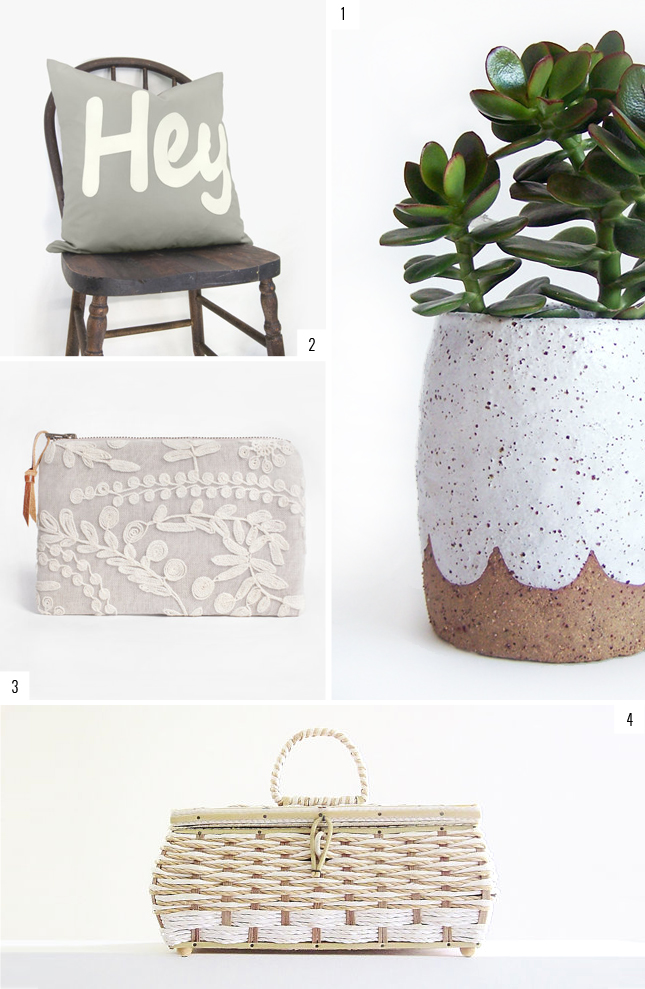
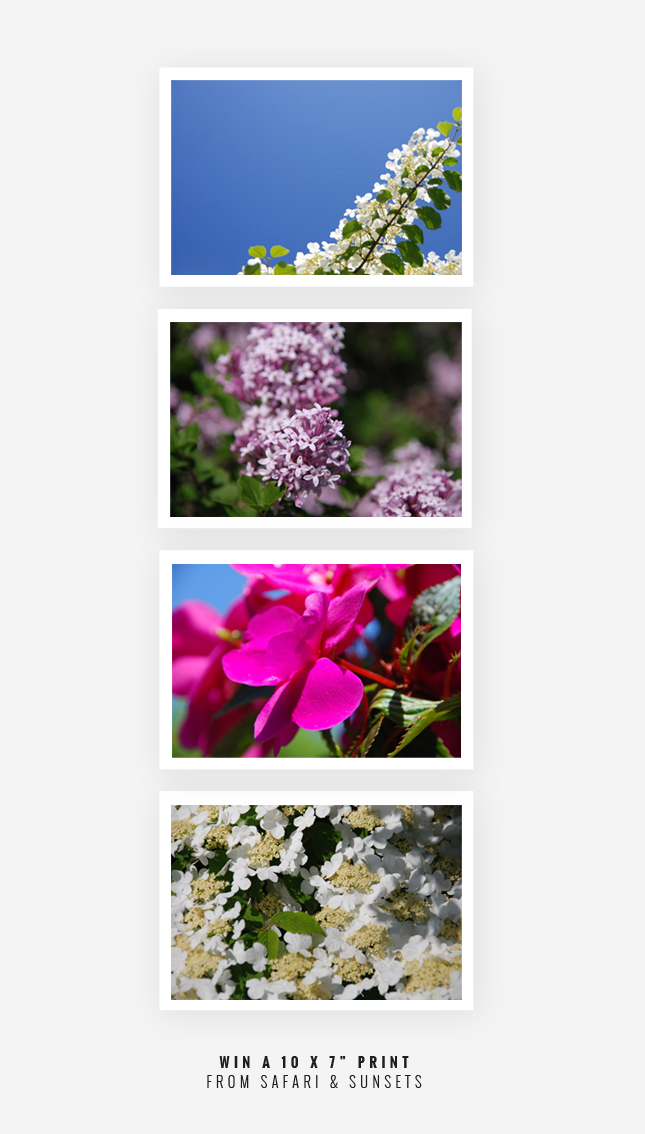
To Enter the giveaway simply follow Sarah on social media or bloglovin and leave a comment below with your favourite print from her collection. The winner will receive a 10 x 7″ print of their choice of the above four beautiful designs. So tell me, which print would you choose? I think Lilac is my fave, although it is so so hard to pick just one!

a Rafflecopter giveaway

Competition closes Friday the 30th of July with the winner be announced Friday the 1st of August 2014.

(Open to US residents only)

DIY | Guest Post over at Oh The Lovely Things

wood-transfer-13

I hope all of you are readers of Oh the Lovely Things, (For those of you who aren’t - shame on you! It is one of my most favorite blogs!) because I was lucky enough to be one of the guest bloggers while Clemence is away in Fiji. If you pop over now you can learn a super easy way to transfer images on to wood! It takes only a few minutes and you’ll be surprised how easy it is! I take no responsibility for how addictive this is once you get the hang of it!

PS. Speaking of which, a big hello to any readers who have found their way here via Clemence’s blog! Welcome :)

clicktoread

wood-transfer-7wood-transfer-12

thumb-affogato

EAT | Classic Italian Affogato

One for the coffee lovers - Homemade classic Italian Affogato | www.highwallsblog.com

Yes we are still celebrating Ice Cream Month here at High Walls, and this week’s addition is the Italian classic, Affogato. I’m sure you’ve heard of this before. Despite its fancy Italian name (which literally means ‘drowned’!) this one is deceptively simple! You take a shot of espresso pour it over a generous scoop of ice cream, allowing the hot and cold temperatures to meld the contents into a marbled cup of delicious.

I have to admit, even though I don’t drink coffee, this is one of my favourite recipes I’ve shot for this blog! I love the simplicity of it all. The swirl of melted ice cream against the dark espresso. It’s all very decadent without being expensive or time consuming. It’s one of those recipes that is perfect all year round.

We stuck with the traditional recipe, but if you’re in the mood for a late night alternative, you can always add in a shot of Frangelico or even your favourite whiskey or port. Nightcap anyone?

One for the coffee lovers - Homemade classic Italian Affogato | www.highwallsblog.com

INGREDIENTS:
Vanilla Ice Cream
1 shot of Espresso
per person
1. In a bowl or wide glass, place a large scoop of vanilla ice cream.2. Prepare a shot of espresso, preferably with a coffee maker - instant coffee is not really going to cut it here, and while still hot, pour over the ice cream. If adding alcohol, then pour this over at the same time.3. Serve immediately with a spoon.  If you normally take a lot of milk in your coffee you may want to add extra ice cream to taste.

One for the coffee lovers - Homemade classic Italian Affogato | www.highwallsblog.com

One for the coffee lovers - Homemade classic Italian Affogato | www.highwallsblog.comOne for the coffee lovers - Homemade classic Italian Affogato | www.highwallsblog.com

One for the coffee lovers - Homemade classic Italian Affogato | www.highwallsblog.com

Oh Etsy | Blue China

Oh Etsy: A collection of Etsy finds inspired by Blue China | www.highwallsblog.com

This week I made an awesome discovery in the form of a store selling imitation blue china on sale. Blue china has a timeless quality, so much so that even imitation or blue china inspired designs always seem so striking and a little bit classy. I bought a whole set of pretty bowls (I’m sure you’ll spot them in future photo shoots) and now I have a craving for some more. It doesn;t even have to be actual china, how about these pretty blue china inspired pretties…

1 | I am obsessed with ColorZen. OBSESSED I tells ya! This amazing China Vase Watercolor Painting is a great introduction if you haven’t seen their stuff before!

2 | Who wouldn’t sleep like a queen (Or king) on this Pillow case from The Happy Seamstress?

3 | This perfectly faded Ocean Blue Ombre Clutch by Hettle has my name all over it!

4 | A lovely Vintage Teatowel like this one from Cake Number 9 would be very happy in my kitchen!

thumb-photo-garland

DIY | Interchangeable Photo Garland

5 Minute DIY | Interchangeable photo garland (via www.highwallsblog.com)

If you really think about it, any fool can peg some photos to some string. That is literally what pegs were designed for! So, before we start, let’s get real for a second. This is not one of those ‘oh wow! So clever!’ kind of craft projects. It’s more, this is a more long term way of doing something we’ve all probably done a billion times.

Now that we’ve got that out of the way, I have a question for you… am I the only one who constantly loses things like pegs? Give me a small, useful object and before you can say “HEY! I just bought that!” I will have lost it down the back of a wardrobe or in the cushions of the couch. In fact, I am convinced that when we move, we will find mountains of bobby pins, tiny pegs and backs of earrings underneath all of our furniture!

I’ve been digging garlands lately (in case my floral and bee versions didn’t give that away) so I decided that instead of making a whole new garland every time the mood took me, I would set up a permanent line specifically for an ever-changing decoration. Then I remembered that I would have to go buy some more mini pegs because, as previously indicated - I had lost all mine. (Even my set of hot pink pegs. How do you lose 20 bright pink objects?!)

“No more!” I declared, upon arriving home from the craft store with yet another packet. So I set about making my new garland suitable for accident prone people like me.

5 Minute DIY | Interchangeable photo garland (via www.highwallsblog.com)

5 Minute DIY | Interchangeable photo garland (via www.highwallsblog.com)

MATERIALS:String
Pegs
Photos/decorations
1. Cut a length of string approximately 1/4 larger than you need.2. Take your first peg and thread the string through the wire loops in the center of the peg and push the peg to one end of the string.3.  Double knot the string around one ‘arm’ of the peg so that the knot sits flush against the flat outside. This will be the back of your garland.

4. Repeat with the rest of the pegs, spacing them along the string at least one hands-width apart. Be careful to keep all the pegs the same way up, or else you will get an uneven garland.

5. Hang or tie your garland where you want to display it and affix your photos (or decorations) to the string using the pegs. Enjoy the freedom to swap and change your garland as the seasons change or as the mood strikes. Also enjoy the fact that you will not lose these pegs, nor will you cat bat them around the floor at 3am because your dropped them everywhere!

5 Minute DIY | Interchangeable photo garland (via www.highwallsblog.com)

5 Minute DIY | Interchangeable photo garland (via www.highwallsblog.com)

thumb-icecream-pie2

Ice Cream Pie [ Take 2 ]

Try out Ice Cream Pie  - Click through for Full Recipe

So how did you like yesterday’s Mixed Berry Ice Cream Pie recipe?  As promised, I thought I’d share another spin on this delicious dessert for those of you looking for a more ‘low-key’ version.

This time we’re using wafer biscuits (for that more ice cream cone style crunch) in the crust, fill it with vanilla ice cream (or you favourite flavour) and load up with your favourite toppings.  These guys are great to have pre-prepared in your freezer for a last minute dessert you can tailor from person to person. Also great for letting the little ones get involved, as they can go crazy with sprinkles and toppings!  Some of our favourite vanilla combinations include; Pistachio and dark chocolate chips, chocolate sauce, crushed honeycomb Crunchie bar and sliced banana with honey. Yuuuuuuum!

What ice cream / topping combo’s would you try? Chocolate with Peanut butter? Salted Caramel? Oreo? The choices are endless!

Try out Ice Cream Pie  - Click through for Full Recipe Try out Ice Cream Pie  - Click through for Full Recipe

INGREDIENTS:

1 packet of Vanilla Wafers

1 cup of butter

1/3 cup of sugar

1 pint of vanilla ice cream

Toppings of your choice1.  Place the wafers in a food processor and blitz until reduced to crumbs. Transfer to a bowl to a large mixing bowl. Along with the sugar (you can omit the sugar if you prefer).

2. Melt the butter and allow to cool slightly before using. Add gradually to the crumb mixture, mixing as you go until the mixture starts to clump together. (you may not need all the butter)

3. Divide the mixture into 4 - 5 mini pie or tart tins,  pressing down to form a thick crust. The mixture should come together as you press down. Place in the freezer to set for 30 minutes.

4. Remove the crust from the freezer and fill with the ice cream. Ensure that the crust is completely filled and smooth down the top. Wrap in plastic wrap and return to the freezer for 30 minutes to an hour.

7. To serve, remove the pie from the freezer and finish with your favourite toppings. Return to the freezer or serve immediately.

Try out Ice Cream Pie  - Click through for Full Recipe

thumb-icecream-pie1

EAT | Mixed Berry Ice Cream Pie

Mixed Berry Ice Cream Pie | www.highwallsblog.com

Our next stop on the runaway train that is Ice Cream Month, is the city of Pie Town. Now I know a lot of you out there will be we acquainted with Pie Town in the form of its’s flaky pastry, fruit filled exports like the all American apple pie. But today I’m going to introduce you to its little known cousin; Ice cream pie.

Similar to cheesecake, this little guy has a sugary cookie crust encasing its cream insides.  Add in some mixed berries that, when combined with vanilla ice cream, give the pie that sweetness and tart you didn’t realise you’d been craving. This is ice cream for grown ups people. Your friends are going to suspect that you are perhaps secretly a chef in you spare time, after you whip this one out at parties. (Do people whip out desserts at parties? Maybe I have the wrong idea about what happens at parties… or maybe the parties I’m attending are totally awesome!)

Of course if berries aren’t really your wheelhouse, you can substitute them for other ingredients, but we’ll get back to that tomorrow with a slight variation on this recipe. For now, sit back and revel in the knowledge that you only need a few simple ingredients to make something oh-so amazing.

Mixed Berry Ice Cream Pie | www.highwallsblog.com

Mixed Berry Ice Cream Pie | www.highwallsblog.com

INGREDIENTS:1 packet of Nice Biscuits

1 cup of butter

1/3 cup of sugar

1 pint of vanilla ice cream

1 packet of frozen mixed berries

1.  Place the biscuits in a food processor and blitz until reduced to crumbs. Transfer to a bowl to a large mixing bowl. Along with the sugar (you can omit the sugar if you prefer).2. Melt the butter and allow to cool slightly before using. Add gradually to the crumb mixture, mixing as you go until the mixture starts to clump together. (you may not need all the butter)3. Press the mixture evenly into a pie or tart tin, pushing up at the sides and smoothing the bottom. The mixture should come together as you press down. Place in the freezer to set for 30 - 40 minutes.

4. Meanwhile allow the vanilla ice cream to soften in a large bowl. Place the 3/4 of the frozen berries in a food processor and pulse a few times to break down into smaller pieces.

5. Mix the berries (and any juices) into the softened ice cream. If you are feeling it, add in some finely chopped chocolate as well.

6. Remove the crust from the freezer and fill with the ice cream and berries. Ensure that the crust is completely filled and smooth down the top. Wrap in plastic wrap and return to the freezer for at least an hour.

7. To serve, remove the pie from the freezer and allow to sit on the bench to soften slightly before cutting into slices. Top with the remaining frozen berries and dusted with icing sugar if you so desire.

Mixed Berry Ice Cream Pie | www.highwallsblog.com

Mixed Berry Ice Cream Pie | www.highwallsblog.com

Mixed Berry Ice Cream Pie | www.highwallsblog.com

Oh Etsy | Pretty Things

oe-09

Normally when I put together these collections, I end up choosing picks that fall under an overall theme. A colour or style to tie all the items together neatly. But that is all out the window  this week. This week I haven’t had anything in particular inspiring me. No themes or gimmicks. This week it’s just a few pretty things to brighten your day. And really, what’s not to love about that?

1 | We’ve recently talked about my love for planters, so it should come as no surprise that when I came across this Scalloped Pottery Planter  by Susan Simonini, I couldn’t help but share it.

2 | I’d love a daily greeting from a Pillow! Say ‘Hey’ to this cheerful pillow cover from Classic by Nature

3 | Don’t you just want to reach out at touch the combination of patterns and textures on this stunning Linen & Lace Clutch (by eclu)

4 | This Vintage Sewing Basket from Jarm Farm has me itching to take up sewing or embroidering.

thumb-brooch-board

DIY | Brooch Display Frame

  Got a collection of brooches hiding away in the bottom of your jewellery box? Why not display them with this easy DIY | www.highwallsblog.com

This week’s DIY project takes literally 10 minutes to make. I know a lot of projects claim this but this one is legit! You don’t even need to measure if you don’t want too. Is your cutting wonky? No problem! Essentially, this is craft for the un-crafty. This project is so forgiving that you simply can not screw it up and even if you make mistakes, your friends will still think you bought the end product from a store!

Now,  I can’t take all the credit for the idea on this one. The wonderfully talented Meredith Crawford (aka One Sheepish Girl), shared her corkboard version on Instagram a couple weeks ago. As soon as I saw it I was like ‘Damn! I need me one of them!’ However, the cork version wasn’t going to work with my brooches, so I decided to put my own spin on her brilliant idea. No longer shall my brooches and pins be relegated to the bottom of my jewellery box! Now they can be displayed as the art pieces that they are!

Got a collection of brooches hiding away in the bottom of your jewellery box? Why not display them with this easy DIY | www.highwallsblog.com

MATERIALS:A Photo frame

Fabric padding

Fabric in your choice

1 Piece of card

A stapler

1. Start by separating the glass from your photo frame – most should easily pop out when you remove the back. Dispose of the glass panel carefully, OR if you decide to keep it, run a line of masking tape around the edges and in a cross formation across the surface. I kept my glass for a future craft project; the tape will not only protect you from any nasty cuts, but will also make the panel easier to see in storage!2. Take your piece of card and ensure that it fits into your frame- cut to size if necessary. Then take your fabric padding and cut a piece the just smaller than your card. Place the padding on the card.

3. Cut a square of fabric roughly  1 inch larger than your card. Don’t worry too much about it being straight, just make sure that the fabric piece can cover the card and padding and wrap around the back of the card.

4. Lay the fabric over the padding and turn over so that the back of the card is facing up. Starting at one corner, fold the fabric onto the card and staple to secure. Then swap the other side and repeat this with the alternating corner, ensuring that you pull the fabric so that it is tight, but not so much that it causes the card to bend.

5. Continue around the edge of the card, alternating sides as you go, always making sure that the fabric is pulled flat. You can open up your stapler from it’s base so that you can staple down directly onto the card ( just be careful of your crafting surface as the staples may go through to whatever is underneath!)

6. Before you finish off the final corner, flip the piece over and check the fabric side. Make sure that there are no ripples in the fabric and if any of the staples are showing, you can gently slide your hand under the fabric and un-hook them so that they are inside. When you are happy you can staple the final corner.

7. Lastly, place your fabric ‘board’ into the photo frame and close up securely. Pin your brooches onto the fabric like you would a shirt or jacket and display them for easy access (and because they are damn pretty!)

Got a collection of brooches hiding away in the bottom of your jewellery box? Why not display them with this easy DIY | www.highwallsblog.com

Got a collection of brooches hiding away in the bottom of your jewellery box? Why not display them with this easy DIY | www.highwallsblog.com

Got a collection of brooches hiding away in the bottom of your jewellery box? Why not display them with this easy DIY | www.highwallsblog.com Got a collection of brooches hiding away in the bottom of your jewellery box? Why not display them with this easy DIY | www.highwallsblog.com

Motivation Monday 02

motivational-mondays

We rarely find ourselves where we thought we be.  No one ever said life runs in a straight line, but sometimes it feels like we’re getting off track. Even though it can be hard, Don’t let the world get you down. Try to enjoy all the twists and turns along the way (even the kind of lame ones!) Happy Monday friends! 

[ image via death to stock photo - quote source unknown ]