thumb-diy-cat-toy

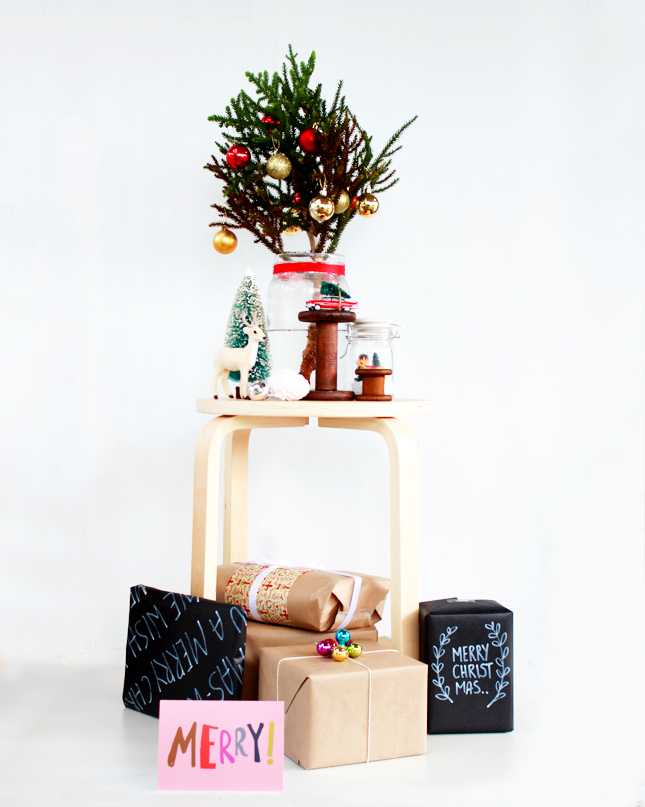
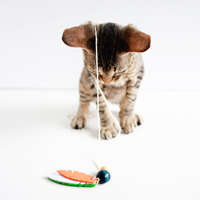
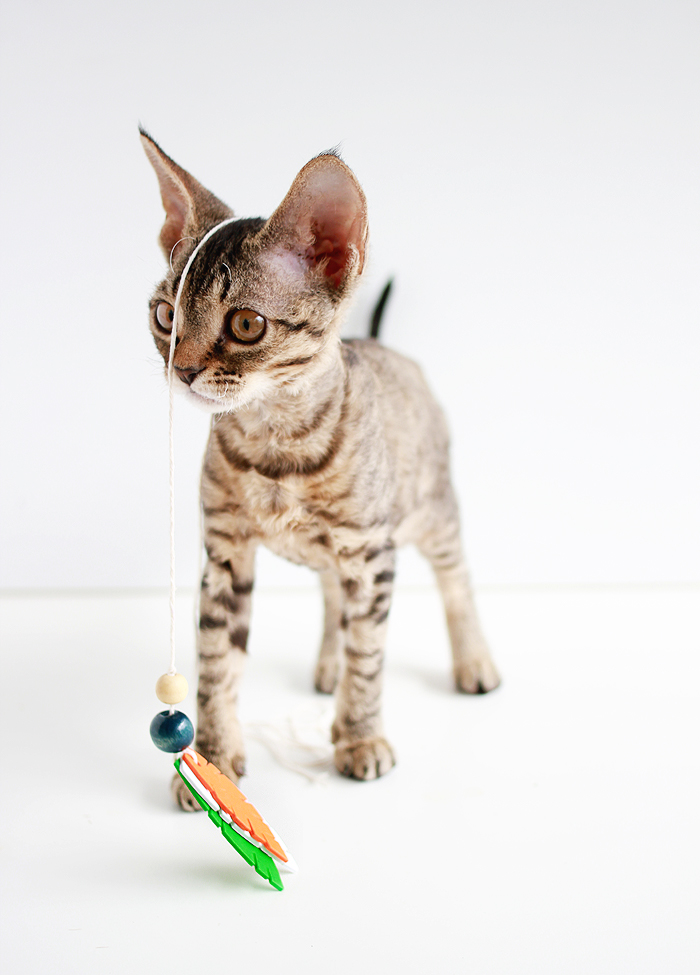
DIY | Feathered Cat Toys

Entertain your feline friends: DIY Feathered Cat Toys | www.highwallsblog.com

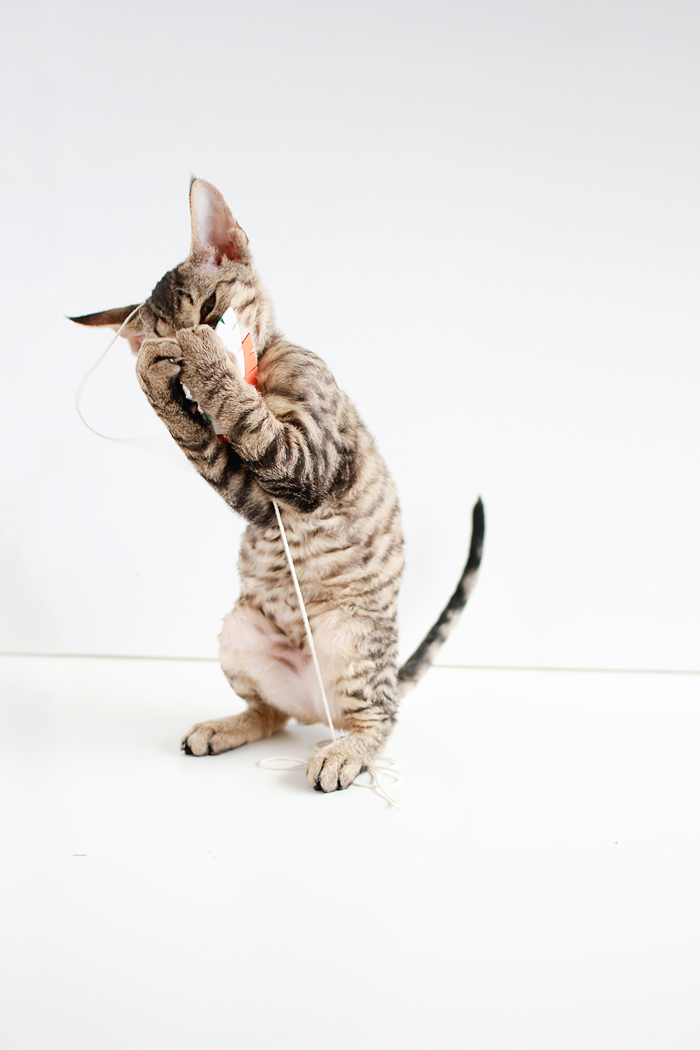
First of all, let me apologise for the image overload in this post. And when I say ‘apologise’ I mean in one of those ‘sorry-not sorry’ ways, because just LOOK at that FACE! If it seems like I’ve been a little distracted lately, it’s because of that pretty little face! I can’t resist it!

For those of you who have been here since the early years of this blog, you may remember my devon rex, Loki, used to pop up a lot in my posts. He was, for a long time, our un-official mascot of the blog.  Sadly,we lost Loki to a careless driver over Christmas. Ever since there has been a kitten shaped hole in our home and in our hearts. Devon’s have such strong personalities, his presence was sorely missed. But as you may have guessed, recently this little girl came into our lives…

Entertain your feline friends: DIY Feathered Cat Toys | www.highwallsblog.com

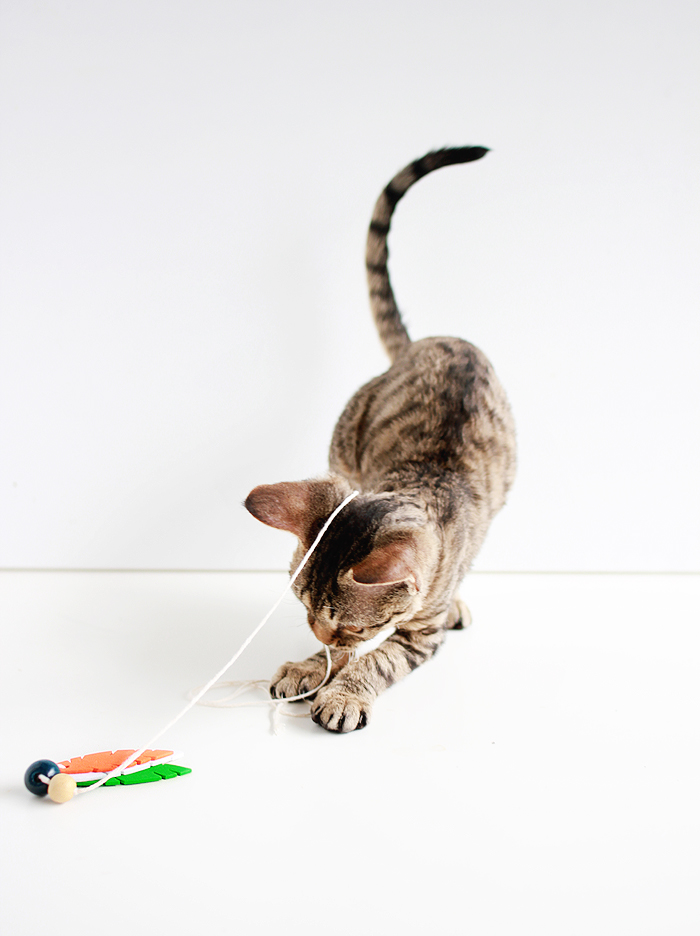
Without further ado, let me introduce you to Navi! Our new baby is also a devon and she has the sweetest, loveliest temperament of any kitten you are likely to meet. She is SO friendly, loves cuddles, and she is teeny tiny! Like, I still cant get over exactly how small she really is!

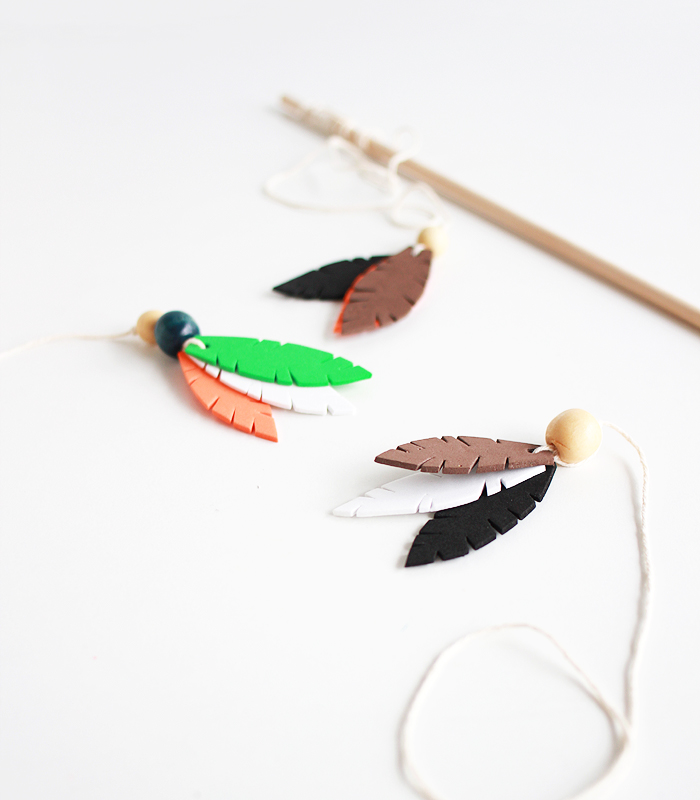
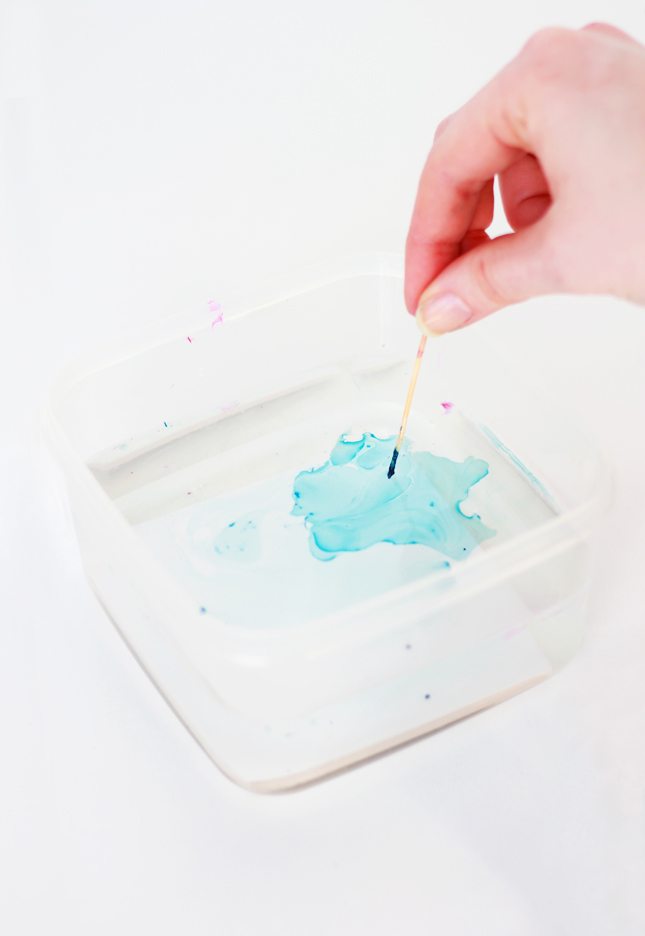
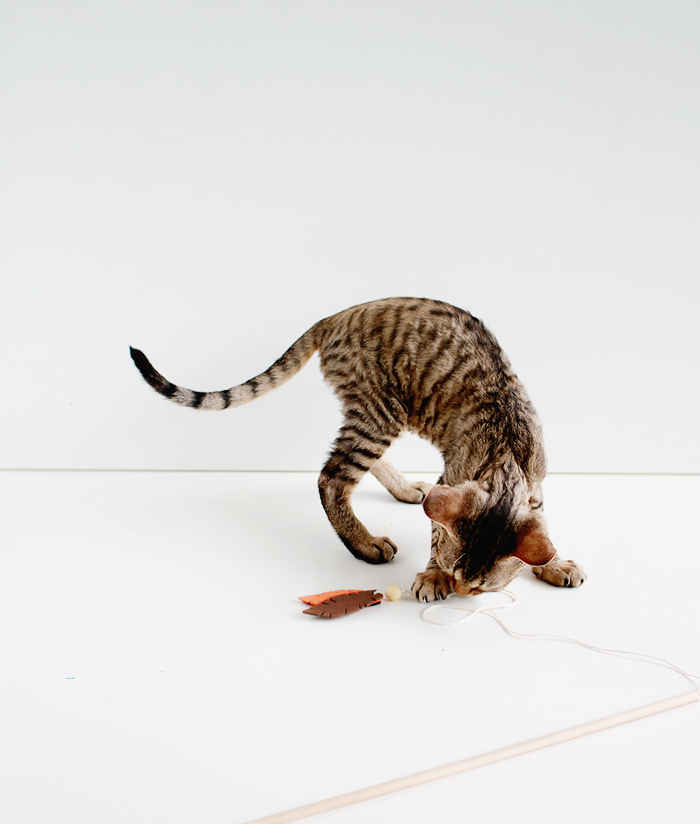
As the newest member of the family, I thought it only fitting make a little welcome gift for the new baby! Being a kitten, she is super playful, so a toy was the obvious choice. (and you can make one too!) This DIY takes minutes to make and will set you back a quarter of what you would pay at a pet store. You save some pennies and your kitty gets spoilt! Everybody wins and your fur baby will love you ;)

Entertain your feline friends: DIY Feathered Cat Toys | www.highwallsblog.com  Entertain your feline friends: DIY Feathered Cat Toys | www.highwallsblog.comEntertain your feline friends: DIY Feathered Cat Toys | www.highwallsblog.com

READ MORE

thum-diy-bead-garland

DIY | Simple Bead Garland

It only takes 5 minutes to make these simple wooden bead garlands!

Now that we are officially into the new year,  its time for the Christmas decorations to come down. What a bummer! The house always seems so boring and dull once you take away the tinsel and baubles, so this year, instead of taking away all the fun, I am merely swapping it out for something a little more simple and a little less ‘seasonal’.  These beaded garlands are super cheap and only take a few minutes to make, which is perfect, because I already spent all my ‘decorating patience’ on taking down my beloved Christmas decorations…

It only takes 5 minutes to make these simple wooden bead garlands!    It only takes 5 minutes to make these simple wooden bead garlands!

All you need  is some plain wooden beads and bakers twine and of course some strong tape or pins to secure it all once you’re done.

Cut a long length of thread (long enough to string across your chosen area, plus an extra metre. Thread three beads onto the string and push to the centre of the string. Tie off a large knot at either end of the beads, securing the beads from moving along the string. Thread another three beads onto the string and line up around 15-20cm from the first group. Tie off as you did previously and repeat along both sides of the string until you have filled it completely. String up and secure with strong hold tape or some push pins. Too Easy!

It only takes 5 minutes to make these simple wooden bead garlands! It only takes 5 minutes to make these simple wooden bead garlands! It only takes 5 minutes to make these simple wooden bead garlands!

thumb-recipe-diy-lemonade-bottled

Bottle your own Home Made Lemonade!

Download these FREE Lemonade Bottle Labels PLUS a recipe for the best home made lemonade!
After the holiday celebrations we found ourselves with a surplus of empty bottles, and in particular, these glass soda water bottles caught my eye. So naturally, I liberated them for some home grown recycling.

After a soak in some warm soapy water, their ugly store labels scrubbed right off, leaving them clean and ready for something a little nicer. It only takes 5 minutes to print a set of these adorable Home Made Lemonade labels (Print onto an A4 sheet of adhesive paper) and give your cheap-o supermarket bottles a new lease on life!

Fill your pretty ‘new’ bottles with some home made lemonade (you wouldn’t want that label to be a lie, now would you?) and your done! I’ve even supplied my favourite recipe for classic home made lemonade below! Take them to work or send them to school with your little ones, just generally show em off! Convince your friends you have your own exclusive brand. I wont tell ;)

click-to-dowloadDownload these FREE Lemonade Bottle Labels PLUS a recipe for the best home made lemonade!

Homemade Lemonade
 
Ingredients
  • 1 cup of freshly squeezed lemon juice (around 6-8 lemons)
  • 6 cups of water
  • 1 cup of white sugar
  • Soda water (optional)
Instructions
  1. Place the lemons on a hard flat surface and with the palm of your hand, firmly roll the lemons back and forth to soften the insides. Cut each lemon in half two and using a citrus juicer, extract the juice into a bowl and set aside.
  2. Place the left over lemon rinds into a large bowl and set aside also.
  3. Meanwhile, bring 4 cups of water to the boil.
  4. Place the sugar in a bowl and pour over 1 cup of boiling water. Mix until the sugar has dissolved.
  5. Pour the remaining boiling water over the lemon rinds, cover and allow to sit for at least an hour.
  6. Discard the lemon rind and combine with the sugar water, lemon juice and an additional 2 cup
  7. Cover the lemon rinds with the other 3 cups of boiling water and let this sit for about an hour and you will have lemon infused water. Discard the rinds.
  8. In a large pitcher, combine the lemon juice, the dissolved sugar water, the 3 cups of lemon infused water and the remaining 2 cups of water (or substitute for soda water if you prefer more fizz!). Mix well before decanting into your prepared glass bottles.
  9. Chill this in the refrigerator for a few hours or overnight before serving for a deeper flavour or else serve with a few extra wedges of lemon to garnish.

Download these FREE Lemonade Bottle Labels PLUS a recipe for the best home made lemonade!Download these FREE Lemonade Bottle Labels PLUS a recipe for the best home made lemonade!

thumb-diy-xmas-display

No tree? Why not make a
Christmas Display instead?

Short on space this Christmas? Can't fit a full sized tree? Why not make a pretty Christmas themed display instead? (Your presents need somewhere to live leading up to the big day!)

Not everyone lives in a big house, and sometimes, even a small tree is just not feasible! I know that I am very fortunate to have always lived in a house that not only had room for a decent sized tree, but also room for lights and various other festive flairs that others might not be able to cater too. So if you’re finding yourself a little short on space this year, why not make a Christmas Display to store your gifts under?

All you need is a stool and a few decorative items to get your display looking like ‘Christmas’! Bottle brush trees are inexpensive and can be found at most craft stores. You can never go wrong with a few deer figurines. Cram one of each into an upturned mason jar with a little Styrofoam ‘snow’ and you have yourself a ready made ‘snow globe’. If all else fails and you feel yourself really pining for a tree, a pruned branch in a vase with a few baubles and tinsel will certainly do the trick!

Do you have any clever tree alternatives that you use when you’re short on space? Honestly, even though I have a tree, I sometimes like to make little displays for hiding presents in other rooms all over the house. But I’m a little crazy like that… ;)

Short on space this Christmas? Can't fit a full sized tree? Why not make a pretty Christmas themed display instead? (Your presents need somewhere to live leading up to the big day!)Short on space this Christmas? Can't fit a full sized tree? Why not make a pretty Christmas themed display instead? (Your presents need somewhere to live leading up to the big day!)

Short on space this Christmas? Can't fit a full sized tree? Why not make a pretty Christmas themed display instead? (Your presents need somewhere to live leading up to the big day!)Short on space this Christmas? Can't fit a full sized tree? Why not make a pretty Christmas themed display instead? (Your presents need somewhere to live leading up to the big day!) Short on space this Christmas? Can't fit a full sized tree? Why not make a pretty Christmas themed display instead? (Your presents need somewhere to live leading up to the big day!)

thumb-diy-wreath

DIY | Wooden Christmas Wreath

DIY Beaded Christmas Wreaths (click through for the easy steps!)

Can we all agree that it is basically Christmas now and so putting up decorations is totally okay? Phew! I’m glad we agreed on that one, now I don’t have to be embarrassed to admit that I put up my tree and decorations around the house today! Hooray! I never love my house more than when it’s all prettied up for the holiday season.

Every year I like to buy a few new decorations to add to my collection. However, this year I am a little strapped for cash, which is not conducive to my expensive taste in decorations. So instead of going for spending big on pricey baubles, I have been getting my crafting on. Like, a lot! I was going to save my Christmas crafts for December, but seeing as we have all agreed that the Christmas season is well and truly upon us, I think it’s as good a time as any to start sharing some crafty goodness; starting with a super stylin beaded wreath tutorial!

DIY Beaded Christmas Wreaths (click through for the easy steps!)

DIY Beaded Christmas Wreaths (click through for the easy steps!)

 MATERIALS:
Wooden beads
Wire
Pliers/wire cutters
Ribbon
string
 1. Take a length of wire around 1.5 inches longer than you need.

2. Thread the beads onto the wire. If you are using various colors or sizes, thread the beads in patterns of your liking.

3. Once the beads are all threaded on (still leaving exposed wire at each end), bend the wire into a circle - You may wish to bend the wire around a vase or a glass to help shape it correctly.

4. Secure the the wire by wrapping the exposed wire around itself into a knot. Ensure there are no gaps in between the beads and that the wire is knotted neatly. Trim away any excess wire.

5. Cover the wire knot with a strip of ribbon and tie into a large bow.

6. Hang with a length of string, attached behind the bow.

DIY Beaded Christmas Wreaths (click through for the easy steps!)

DIY Beaded Christmas Wreaths (click through for the easy steps!)

thumb-diy-xmas-plate-decals

DIY | Christmas Plate Decals

5 Minute Christmas Crafts: Makes these Christmas Tree Plate Decals (click through for the full tutorial)

Now that our Christmas Gift Swap is up and running for another year, I’m really getting into a festive mood! I’ve mentioned it many, many times before, but Christmas really is my favourite time of year. I love buying presents, I love coming up with fancy ways to wrap said presents, I love the food, the drinks, the friends and family and of course; the decorations. Last year I didn’t get around to as much Christmas crafting as I would have liked, but this year I’m back - with a vengeance! 

Probably one of my most favourite DIY projects from this year was the Monogrammed Mugs we made all the way back in July. I figured, those mugs turned out so well (and are still going strong after all this time), why not extend my new-found skill to decorating some more kitchenware with something a little more festive! They turned out pretty well, dontcha think? I decided to go with good old Christmas trees for the design, but feel free to experiment with different shapes or even different coloured vinyl.

5 Minute Christmas Crafts: Makes these Christmas Tree Plate Decals (click through for the full tutorial) 5 Minute Christmas Crafts: Makes these Christmas Tree Plate Decals (click through for the full tutorial)

To make these decals yourself is super easy; you’re going to need some adhesive vinyl, a small hole punch, sharp scissors and of course some plates, bowls or cups!

1. Cut a piece of vinyl big enough to accommodate for your shapes.

2. Sketch out a Christmas tree shape (three triangles, stacked on top of each other), or if you are not confident in your tree drawing abilities, you can print out a tree image and use as a guide like we did in the mug tutorial. Your trees should be around 10cm high.

3. Carefully, cut out each tree shape and trim away any rough edges.

4. If you would like to add tinsel/bauble lines onto your trees, take a small hold punch and punch a line of holes in a zig-zag pattern across the tree.

5. Wipe down the surface, where you are going to stick your decals and make sure it is completely dry before proceeding.

6. Remove the backing paper and carefully smooth the vinyl onto the plate surface, making sure there are no air bubbles as you go. You may want to measure out and mark the center before you stick anything down.

Voilà! These decals should stay firmly adhered to your plates or bowls as long as you take care of them. No dishwashers and hand wash with warm soapy water  (do not soak). That said, if you decide you no longer want festive plates, it can always been removed and the glue residue scrubbed off.

5 Minute Christmas Crafts: Makes these Christmas Tree Plate Decals (click through for the full tutorial)   5 Minute Christmas Crafts: Makes these Christmas Tree Plate Decals (click through for the full tutorial)

thumb-clipboard

DIY | Geometric Clipboard Notice Board

DIY Geometric Clipboard Notice Board

Let’s get organised folks! I’m sharing a fun DIY over at Drifter & the Gypsy, a quirky little notice board you can customize to your liking! As someone who is forever trying to find pen and paper, I am seriously loving this project! It’s not only fun and colorful, but super useful as well! Check it out!

clicktoreadDIY Geometric Clipboard Notice Board


thumb-chopsticks

DIY | Decorated Chopsticks

DIY Decorated Chopsticks | highwallsblog.com

Just like sandwiches taste better if you cut them into triangles, noodles are enhanced by eating them with chopsticks. It’s a scientific fact! Sure, using chopsticks is a skill that takes time to master, but you know I’m right when I say that they certainly improve the whole dining experience! We always keep a stack of pilfered chopsticks in our cutlery draw for when we have noodle based dishes. Chopstocks stolen from our local take out store are fun and all, but we are grown ups.  So we need grown up chopsticks…. you know, ones painted with polka dots and stripes…. That’s pretty grown up, right?

DIY Decorated Chopsticks | highwallsblog.comDIY Decorated Chopsticks | highwallsblog.comDIY Decorated Chopsticks | highwallsblog.com

I don’t know what to say, guys; this project is pretty self explanatory! You’re going to need some washi/masking tape, nail polish and of course some sealed wooden chopsticks - but other than that, it’s all up to you!

Tape off the chopsticks at least 1/3rd of the length of the handle (the thicker end) and again at the very tip. Keep your lines straight and ensure that all chopsticks are taped at the same levels. Paint the taped area with thin, even coats of nail polish. Allow to dry in between coats. Once you have a base color you can decorate to your hearts content! Use skewers to stamp polka dots, paint lines free-hand or tape off alternating color-blocked areas. Go nuts!

You can of course, paint your chopsticks in matching pairs, but Pfffft! Fuck pairs! Make ’em all different! That way, not only do you get to be super creative - you also don’t have to worry about trying to match up your patterns. Just think, you will never have to dig through your draws to find the right pair. Grab any two and get busy stuffing yo face!

DIY Decorated Chopsticks | highwallsblog.comDIY Decorated Chopsticks | highwallsblog.com

On a more serious note: please remember to keep your chopsticks clean while you are working. Always use sealed chopsticks and try to keep your painted areas away from the ‘eating’ end of the chopsticks. Remember, these things have to go in your mouth, so keep it food safe!
DIY Decorated Chopsticks | highwallsblog.com

thumb-tray

DIY | Display Tray Makeover

make over a bamboo display tray to hold your jewellery and knick knacks!

For my 21st birthday, a group of my friends pooled their money and bought me the most beautiful jewellery box. It even has a lovely inscription to mark the occasion. I keep all of my nicest jewellery safely tucked away within its compartments. My daily jewellery, ie: the stuff I chuck onto my bathroom sink every night, does not have a home as nice as that. So, in the interest of being organised (and stopping any hurt feelings on behalf of said jewellery) I gave a mini display tray a pretty makeover. Now my jewellery has someone nice to live, and as an added bonus, it gives the impression I am more organised than I actually am! You can see the full steps for this project over at Drifter & the Gypsy! Check it out!

clicktoread

make over a bamboo display tray to hold your jewellery and knick knacks!

thumb-marbled-coasters

DIY | Watercolored Marbled Coasters

Make your own marbled watercolor coasters | highwallsblog.com

Did you know you can buy loose tiles from the hardware store? and for peanuts! PEANUTS I say! While browsing the shelves of my local hardware store I discovered this fact and so, naturally, I stocked up. Then I got home and had no idea what to do with the damn things. They sat with my craft supplies gathering dust for months until I suddenly realised: with a simple nail painting technique and a bit of patience - I had the makings of some super sweet watercolor marble coasters at my fingertips!

I’m kind of obsessed now. Everything I own will soon be watercolored and marbled!

Make your own marbled watercolor coasters | highwallsblog.com Make your own marbled watercolor coasters | highwallsblog.com

Make your own marbled watercolor coasters | highwallsblog.com

MATERIALS:
Loose Tiles
Nail Polish
Plastic container
Felt
1. Take a plastic container just bigger than your tiles and fill it it room temperature water.2. Place a single tile into the water with the surface facing up. Allow any bubbles that form to dissipate.

3. Carefully, drip nail polish onto the water surface; the first few drops will spread out across the water. keep dripping until you have a few different levels of colour on the surface.

4. Using a toothpick, swirl the nail polish until you are happy with the pattern.

5. Very delicately, dip your fingers into the water along the rim of the container and pick up the tile, lifting so that the nail polish coats the surface as you bring it out of the water.

6. Set aside and allow to air dry completely.

7. Before using, glue a square of felt onto the underside of each tile.

Make your own marbled watercolor coasters | highwallsblog.com

TIPS & TRICKS:
- Practice a few times prior to starting. It will take a few tries to get the hang of it.

- Change water in between colors of nail polish.

- If you don’t like the marbled effect on a tile you can easily remove the color with some nail polish remover and a cotton ball.

- For darker patterns, instead of putting the tile into the water, leave it out and place it face down onto the water surface after adding the nail polish. This is slightly easier, but this method wont yield patterns as soft as those pictured here. (See below for a coaster made with this method)

Make your own marbled watercolor coasters | highwallsblog.comMake your own marbled watercolor coasters | highwallsblog.comMake your own marbled watercolor coasters | highwallsblog.com Make your own marbled watercolor coasters | highwallsblog.com Make your own marbled watercolor coasters | highwallsblog.comMake your own marbled watercolor coasters | highwallsblog.com