

October 9, 2012
In
DIY
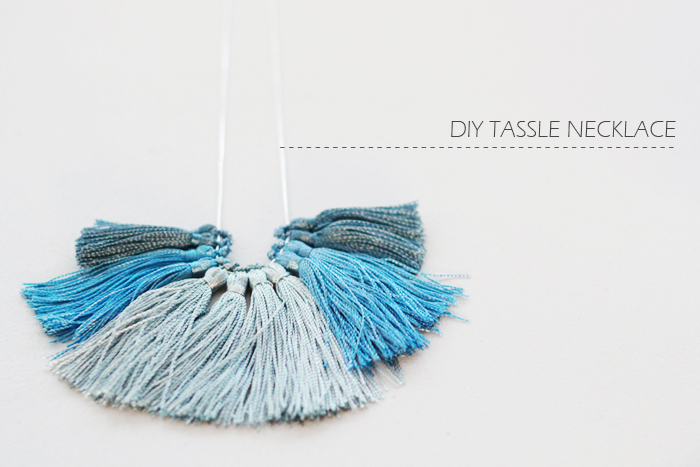
DIY Tassle Necklace
I remember when I was a child I loved playing with the tassels around the house. I loved how soft little ‘brush’ end of the tassels were. My mother had a teeny tassel on the end of the key for the glass cabinet in our living room. I used to steal it from the door and play with it while I watched TV. Man, did she get mad when I would inevitably forget to put it back! Hoo boy!
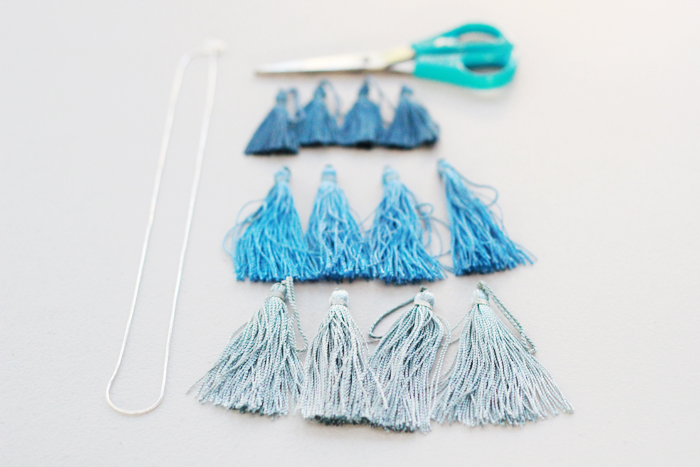
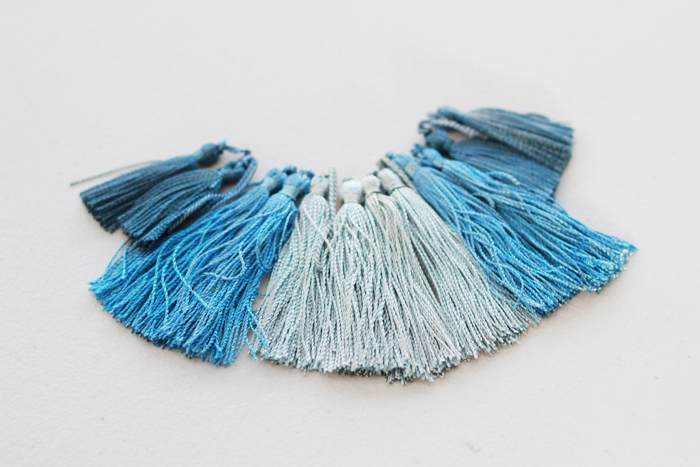
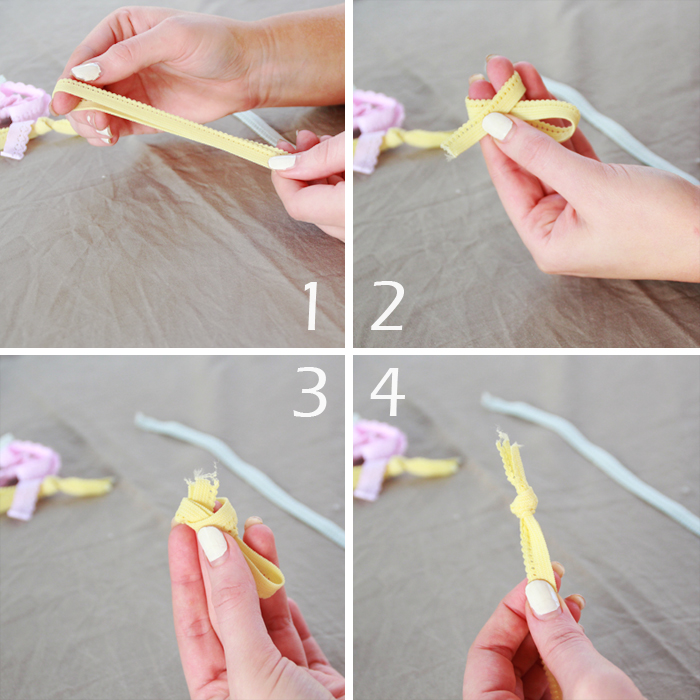
Now that I’m a grown up, I can play with whatever the hell I like, (I mean, except when I’m visiting home…. ‘Hi Mum!’) So when I spotted this necklace I just had to have one, but for $175 it was a little out of my price range. ‘I could totally make one myself’ I decided and high-tailed in to the nearest craft store.One thing you’ve probably noticed by now that all of my DIY’s are… how shall I put this? Stupidly easy? I can’t help it! I guess I’m inherently lazy. Anyway, this one is no exception. Sure, you can make the tassels yourself if you are more patient than I am, but for $3 for a pack of 4, I was willing to take the lazier option. In actual fact, this project cost me around $9 (as I already had a spare chain laying around) and roughly 15 minutes of my time. Talk about a bargain!What I ended up making isn’t really the same as the necklace in question, but I actually would wear this version more. (You could still make one similar by getting a series of different colours in the same size, as opposed to the colours and sizes I chose. The method is still the same!)

 I’ve mentioned this already (probably a few too many times) but it’s my birthday on Thursday, so it’s pretty much birthday week around me at the moment! As I share my birthday with a co-worker, I thought it might be nice to make cupcakes to bring into work for her (read: us) on the day. But cupcakes weren’t festive enough apparently. Nope. I decided to add that little extra something to make them a little more exciting, and it was so simple I had to share it with you. All you need is some washi/MT tape, some toothpicks and some string (although the last one is optional).


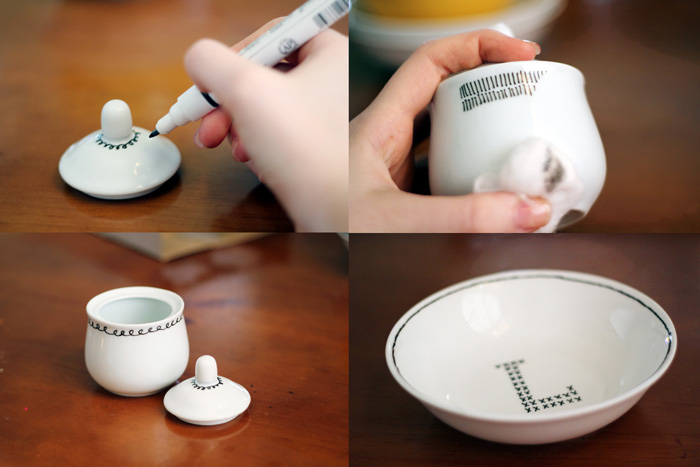 4. Because the pen is basically a marker you can just draw on your porcelain as you wish, I found that the pen would start to run out of ink after a few lines, so keep a small piece of paper or cardboard close by to re-load the tip and test the flow. (To do this press down on the tip a couple of times until the ink starts to come out again - Be careful you dont get too much!)
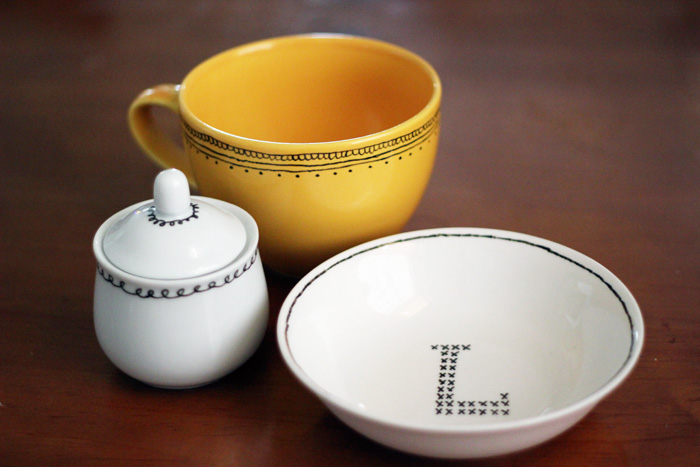 My test subjects turned out even better than I had expected! I already have plans to try this again, next time with more colours and patterns! My dinner sets wont know what hit them!