I have a tendency to buy something for a single use, but instead of keeping it stored away for the next time I need it, I devote hours to finding random uses for said item.Which is pretty much exactly what happened when I recently purchased a can of spray paint. Originally, it was purchased to touch up a couple of scratched palings around my house. However, it wasn’t long before I starting thinking: “What else can I spray paint?”
In my defence, spray painting is stupidly fun. There really is no other cheap medium in which you can get such a smooth even finish so easily.
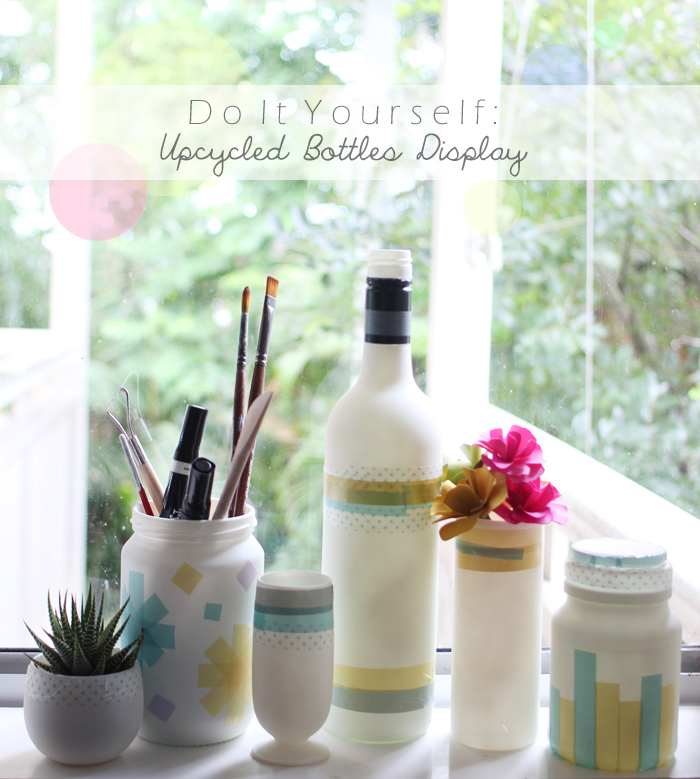
I had actually wanted to do this DIY for ages, inspired by these beautiful painted bottle - I had intended to create something similar. I popped down to my local thrift store to find a few bottles to use, only to find that they were having a sale on glassware! I picked up all you can see here (with the exception of the wine bottle – which I ‘emptied’ by myself) for a measly $2! Bargain! My good luck inspired me to get a little more exciting with my DIY-ing (especially as I only had white spray paint).
What you will need:
Old glass or plastic bottles/jars/glasses
Spray paint in your choice of colour – I stuck with my trusty white
A drop cloth/newspaper - something to spray over
Washi/decorative tape
1. First things first, you need to clean your bottles and soak off any labels. You want the surface of your glassware to be free of dust and dirt. Make sure they are completely dry before you start painting. Tape up any areas you don’t want painted.
2. In a well-ventilated area, put down a drop sheet or newspaper to spray your bottles on. Remember that paint will spray everywhere so be careful you’re not going to ruin your floors! Put your bottles down on the paper, any cups or jars should be face down.3. Shake the paint can well and spray your bottles/jars in short, thin, even strokes. Spray from around 30 cm away or else your paint will be too thick and start to run. Let each coat dry in between painting. Be patient and do as many coats as you need to get the depth of colour you want.
If you have unusual shaped glasses/jars, you may need to turn them over to ensure you are getting all areas evenly – just make sure they are touch dry before handling them! Once you are happy with the colour, let them dry properly – overnight if possible.
4. Once dry you can (carefully) remove the taped areas. I chose to leave the metal neck around the wine bottle, so I had taped it up prior to painting. You could also do this if you wanted to leave clear bits.5. If you have chosen a more vibrant colour you can leave your bottles as they are at this point and have a lovely simple display. I was tempted to leave them all white to sit on my mantle – however, I decided to jazz them up a bit instead and busted out my collection of washi tape.
6. I chose 4 colours to use and started to cut strips and applied to each bottle/jar/cup in different patterns.Take your time applying the tape slowly and smooth it down gently as you go. The best thing about washi tape is that it isn’t super adhesive, so you can take it off and reposition it without ripping your paint.
7. When you are happy with your designs you are ready to display your new fancy bottles around your home! The insides are paint free so you can still use them as a vase or for a small plant - just remember the washi tape will peel away if you get it too wet.
I filled mine with plants, art supplies and some paper flowers I have collected, but depending on your bottles/jars, you can put anything you want!


What a cute idea! Love the addition of the washi tape. I was wondering what kind of cactus you have featured in the picture?
Hi Alex! It’s called a Zebra plant (I think the proper name for it is Haworthia fasciata?…. definately one of the Haworthia family)I love their stripey little leaves!