
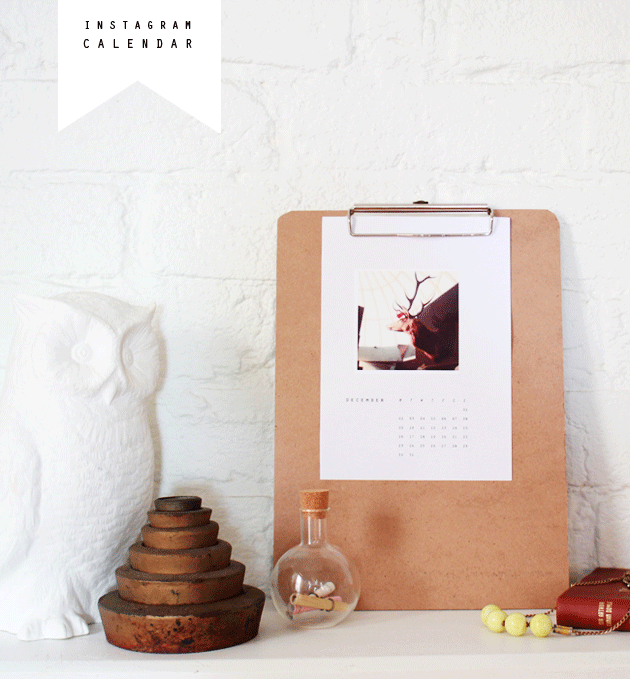
Instagram Calendar DIY
 We all have that friend who loves Instagram just that little bit too much. You know the one. She takes a photo of her feet in the sand in front of the ocean and its all #dayatthebeach #beachdayez #beach #vacation #holiday #sand #sun #surf #clouds #hermitcrab #seagull #fun #omg #tan …oh my god - hashtag STOP!
I understand if you are promoting your brand, art etc on Instagram, you would include relevant tags to encourage a wider audience see’s your pictures. But I really don’t understand why my 18 year old cousin needs everyone to see a Valencia filtered picture of her hot chocolate (#winter #treats #yum #naughty #chocolate #coffee) If you love your Instagram shots that much and want the world too see them, why not do it the old fashioned way? Put them up around your house!
I still haven’t gotten around to putting up a calendar at home, so I mocked up this little monthly calendar using some of my favourite instagram photos from the last 12 months. There are many online services that will do this for you, but why not do it yourself? It takes about 15 minutes (once you’ve selected your photos) and all it costs is the price of a clipboard and 6 colour prints!
What You Need:
a clipboard
6 A4 sheets of paper
a craft knife or scissors
access to a colour printer
12 Instagram photos
What You Do:
1. Choose your photos - You can download your photos in one of the following ways:
On a Mac you can get them through Preview
- Plug your iPhone into your Mac
- Launch Preview
- From the File menu navigate down and select “Import from iPhone…”
- Select “Import All” to get all the pictures, otherwise individually select pictures and click ‘Import’
- Look in your ~/Pictures/ folder for the photos from your iPhone
On a Windows PC you can open the device as a folder when you plug it in:
- Plug in your iPhone to the computer without iTunes running
- Wait for a popup asking you what you want to do with the device
- Select “View Content”
- Find your photos through the folders that are displayed
- Copy from the folder to your preferred location.
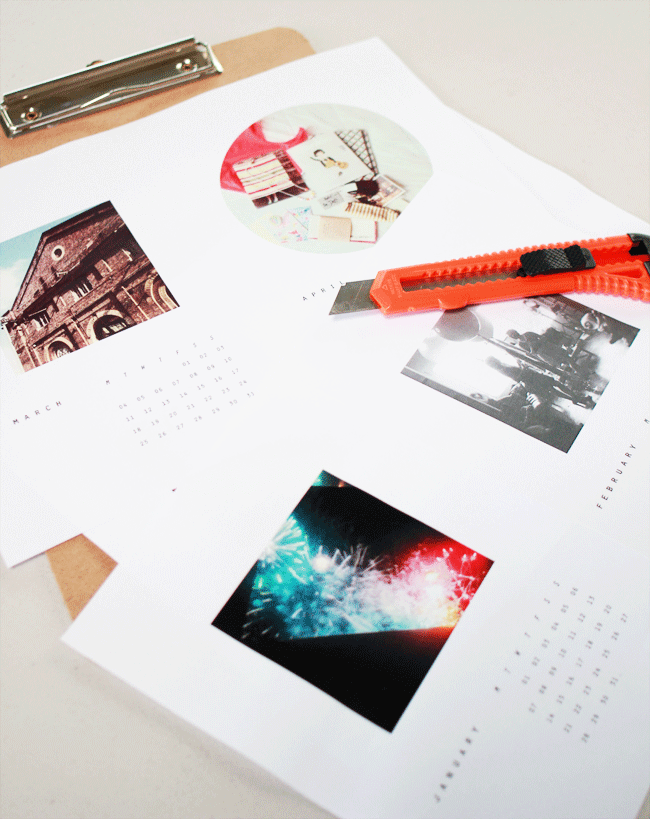
2. I made up some quick calendar templates which you can use for yourself, just click HERE (EDIT: 2015 Calendar!) to download the images. Open up with Photoshop and all you need to do is open each image and paste your Instagram photo into the blank space above the month layout. (If you aren’t familiar with Photoshop you can use any photo editing program or even insert the images on top of each other in Word.
3. Print em out! 2 to a page so that you can cut in half - and do so with your knife or scissors.
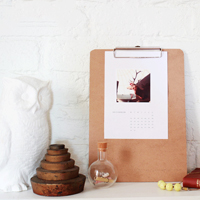
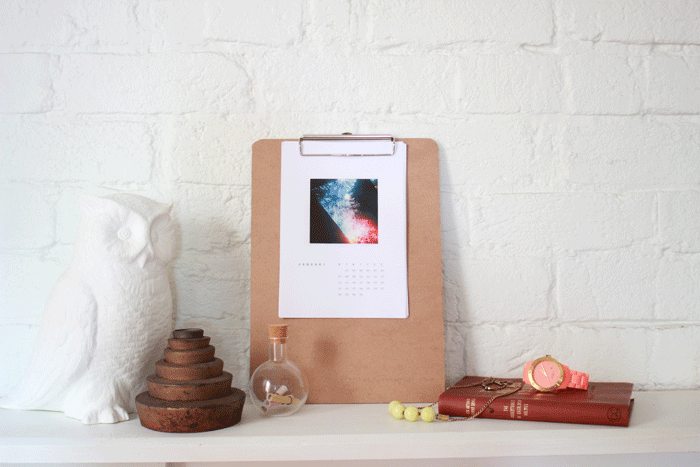
4. Now all that’s left to do is put them in order and secure with the clipboard. You can hang on the wall or prop up on a shelf to display.
How easy is that! Aren’t you glad you didn’t shell out $40 to get someone else to do it for you! Obviously, the nicer the paper and printer you use the better quality your calendar will be. Try to choose photos that fit the months, for example - in December I used a picture of a deer head wearing a Christmas hat and for September I used balloons because that when my birthday is! You can tailor them to your own personal taste because they are your photos! Maybe you can even make one for that special Instagram-loving friend. If you can’t access their phone, you can always try using their Instagram photos from their profiles (http://instagram.com/’profilename’) Maybe your lovely gift will help to stop the hashtag abuse… ;)
#calendars #DIY #instgram #mylifeinpictures #easyaspie #months #photos #organise #dates (#justkidding)

