DIY | Stamped Clay Christmas Ornaments
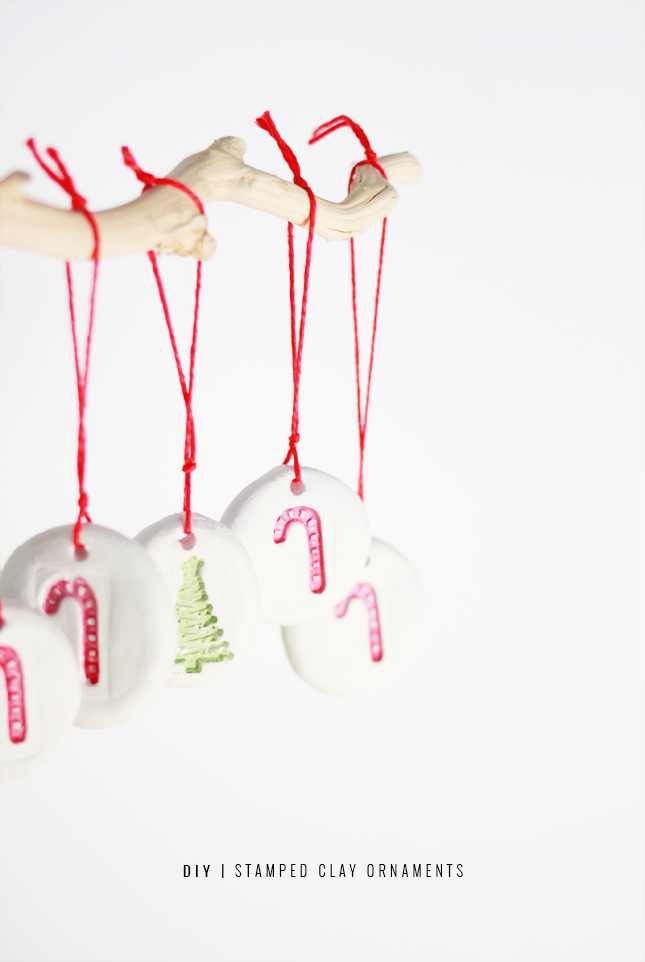
The sad passing of my old laptop meant that I am a whole week behind in my Christmas posts this year! The upside of this, is that it means that I have a whole bunch of extra content to get through before Santa gets here next week! So I hope you’re ready for all Christmas-All-The-Time here at High Walls.
Today’s project is simple and dead easy. My favourite. Christmas has a tendency to get a little over the top and kitschy, so there’s something to be said for understated decorations and ornaments. My tree and decorations this year are all in porcelain, glass and silver hues, so I really wanted to create some ornaments to match with this theme.
These ornaments are made with store bought Christmas themed stamps, but if you don’t want to go out and buy a whole set for this project, you can of course make your own indentations with things you can easily find around your house. Think stars or trees traced with toothpicks or knife blades.
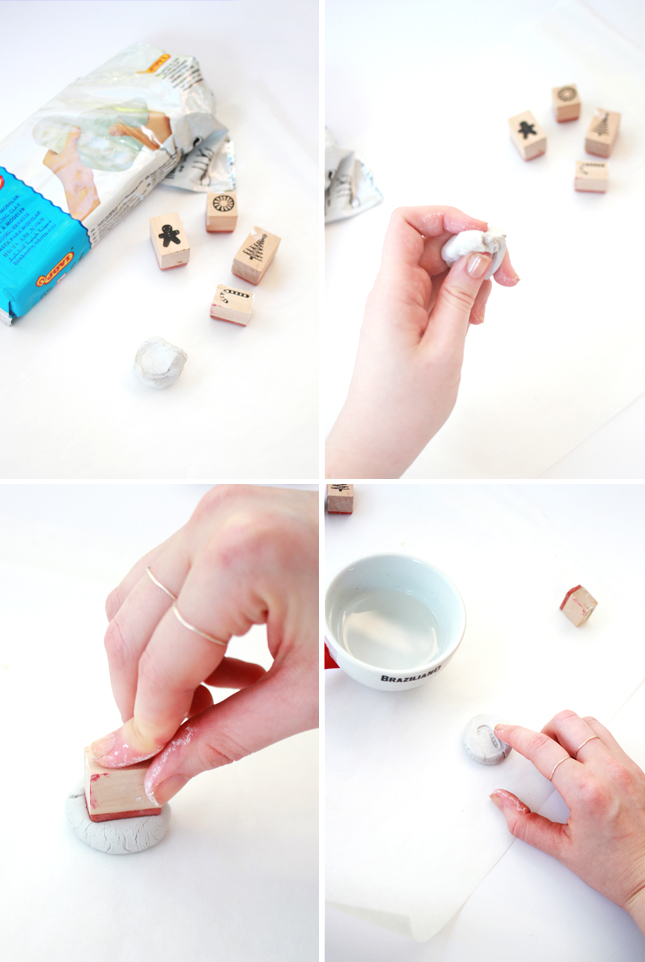
What You Need:
Air Dry or Oven Bake Clay
Christmas Stamps
A Wooden Skewer
1 Cup of Water
Twine or String
Acrylic/Water based Paint
Extra fine paint brush
Fine sand paper (optional)
What You Do:
1. Tear off a large pinch of clay, around the size of your thumb. Knead the clay until smooth and pliable and roll into a ball.
2. Line a flat surface with a sheet of baking paper. Using your fingers, press down on the ball of clay to flatten into a disk around 5mm thick.
3. Take a Christmas stamp, ensuring it is smaller than the size of your disk, and press into the clay firmly to leave a strong imprint.
4. Dip your finger into a cup of water and gently smooth over the surface of your clay in circular motions. The water will help to slowly to smooth away any rough marks or square lines made by the stamp block. Take it easy as you don’t want to damage the main imprint. If you find the clay is getting too moist, set aside to dry slightly and continue again later.
5. With the blunt end of a wooden skewer, push a hole in the top of the clay for you to thread through later. Smooth down any rough edges.
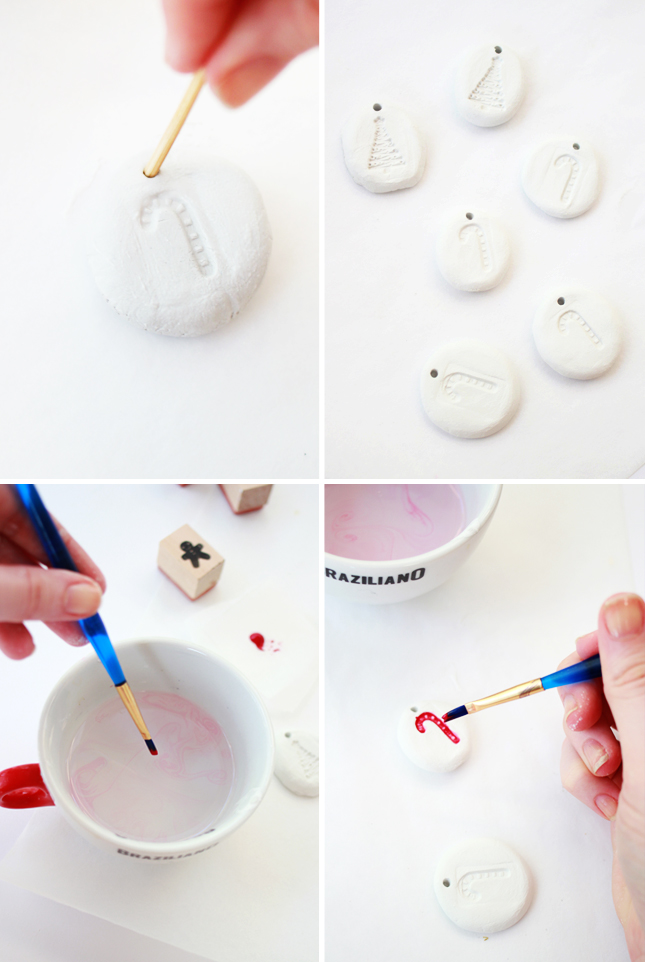 6. Depending on what type of clay you are using, set aside to dry overnight or bake in the oven according to the instructions.
7. Once hardened, if you wish, you can further smooth the clay using fine sand paper before proceeding to the next step.
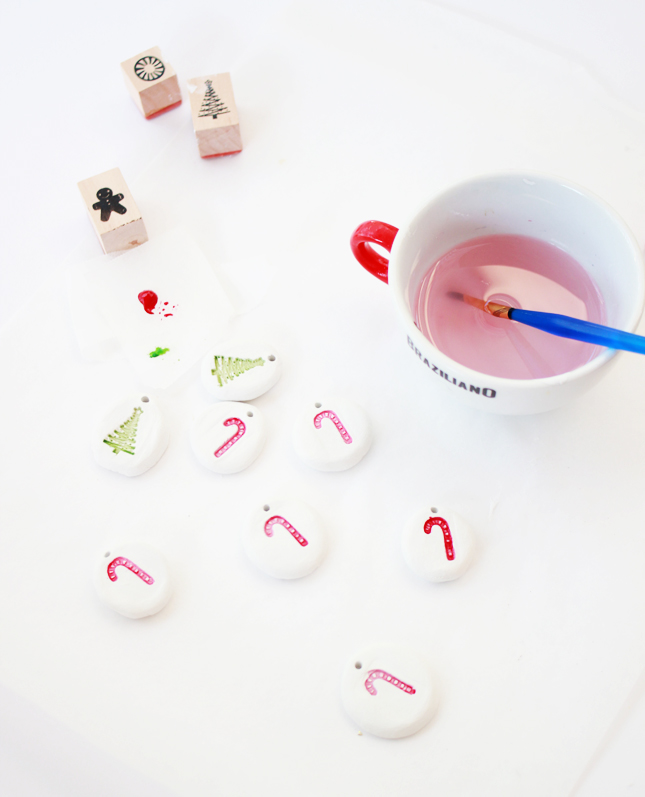
8. Using a small, fine paintbrush, dip the bristles into water based paint and then dip into a cup of water. Swirl around slightly so that the paint turns into a light wash.
9. Very carefully, drip a small amount of paint/water mixture into the stamp indentation, allowing the water wash to fill in the ridges. Repeat if necessary until the imprint is coloured completely. Set aside to dry. If you find that the colour isn’t dark enough you can repeat this step once the first coat has dried.
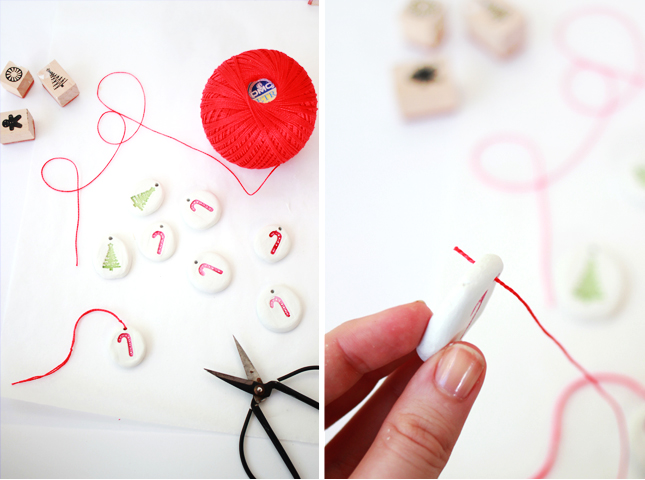
10. Thread a length of string through the hole in the top and tie off in a loop to allow the ornament to be hung up.


emma
December 18, 2013 at 1:23 amI love these! They look so fun to make :) Thank you for sharing!
Walter Silva
December 18, 2013 at 1:43 amGreat idea!
kittenhood
December 18, 2013 at 3:09 amThey look lovely! I love those tiny trees.