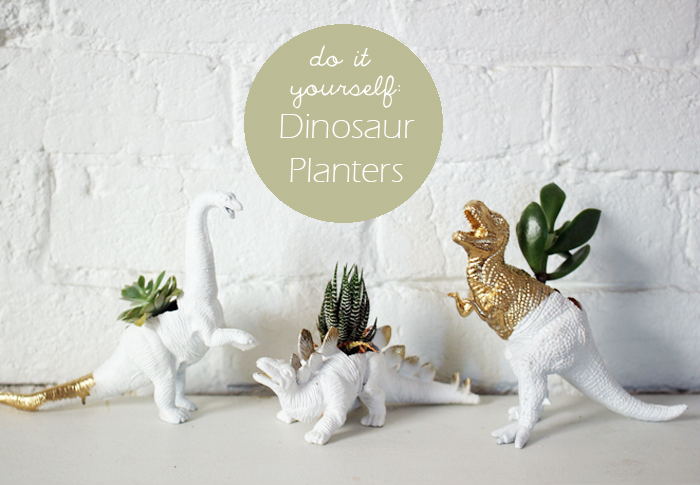
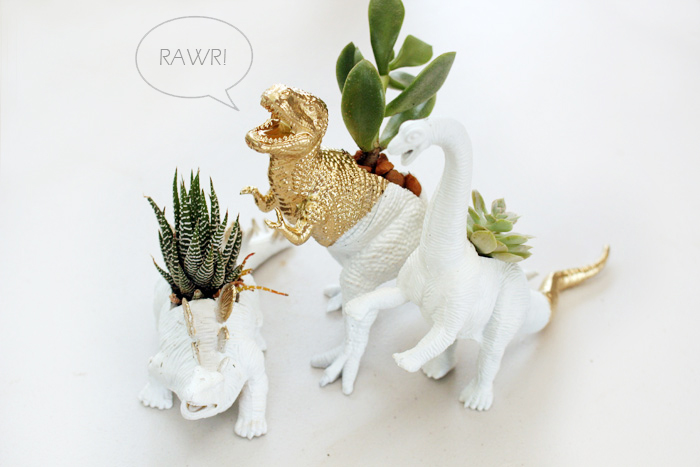
A few months ago I spotted dinosaur planters on etsy and was smitten with the idea. I had wanted to buy one of my own, but when I came across some rubber dinosaurs in the toy section of my local department store for only $2 each, I thought I’d give it a try myself.My love of white is well documented on this blog as well as my love for a feature colour combination. As such, I chose white and gold for my dino’s but you can obviously tailor yours to whatever colour you want. There were so many colours to choose from at my local hardware store!
What you Need:
Rubber dinosaur toys/figures (as many as you want to make)
Box Cutter/Exacto Knife
Large Sewing Needle
Spray paint in your choice of colour/s
Small plants – I chose Succulents as they are
Newspaper/dropsheet for painting on
Rubber dinosaur toys/figures (as many as you want to make)
Box Cutter/Exacto Knife
Large Sewing Needle
Spray paint in your choice of colour/s
Small plants – I chose Succulents as they are
Newspaper/dropsheet for painting on
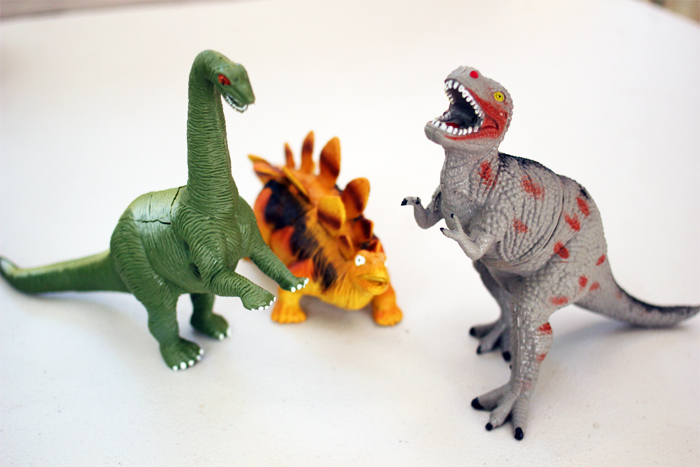
What you Do:
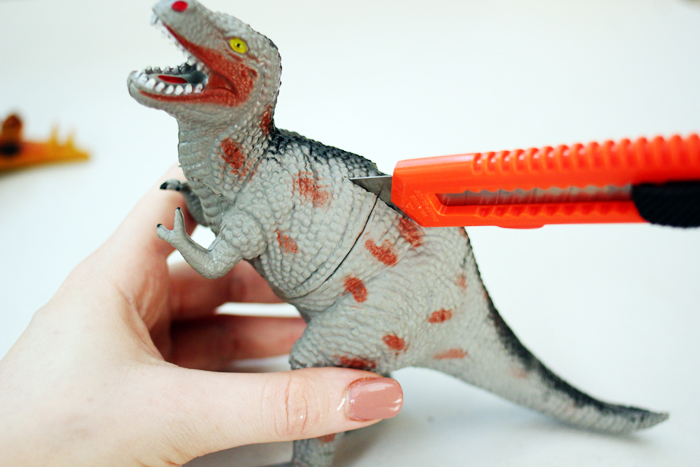
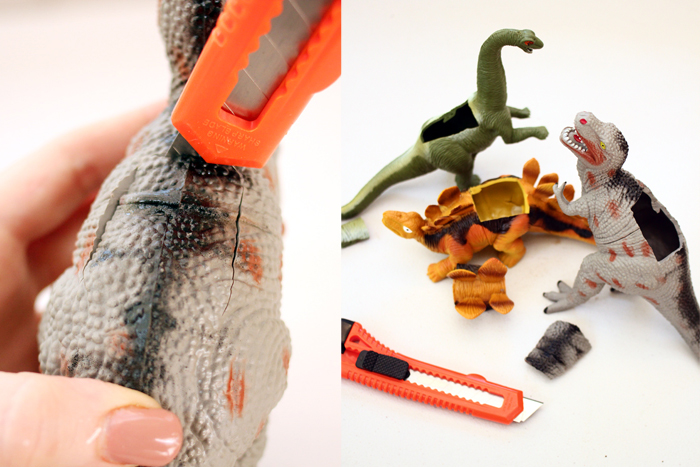
1. Carefully cut a hole in the back of each figure to pot the plant in. Decide which plant will go in which figure so that you can cut a smaller/bigger opening if need be. Make sure your figures are rubber as this can be fiddly depending on the size and shape. Trying to cut into hard plastic is only going to increase your chances of injury.2. Next using a large sewing needle poke some drainage holes into the underside of each figure. Again, be careful! I found that one of my figures was too thick to get the needle through, so I chose to use my knife again to cut some small holes/slits. Decide what is going to be better for you.
Also take note of the shape of the figure, if it slopes downward towards the tail you may want to put the holes lower so that you don’t have water pooling inside.
3. Give each figure a wash to remove any excess dust and dirt and then let dry completely.
4. Place figures on the newspaper/drop sheet with enough distance apart to spray all sides of each dinosaur.
5. Give the spray paint a good shake and apply thin even coats to each figure. Be patient with this stage. Leave each coat so it’s at least touch dry in between painting. Your figures will have lots of small, awkward parts to reach so you will need to do many coats from different angles before you have even coverage.I found it easiest to do the top sides then once they had dried completely, I turned them over and did the under sides. It probably took around 3 repeats of this process to get my figures to the depth of colour I wanted all over.
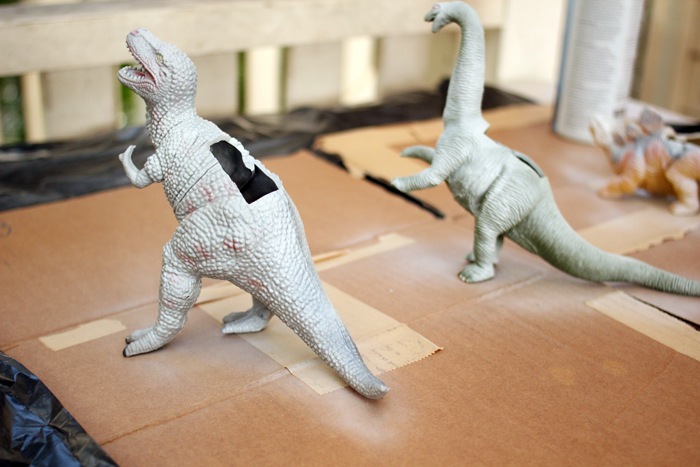
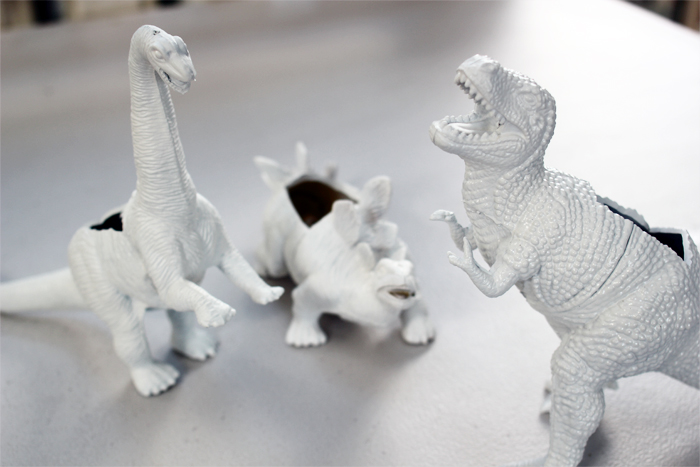
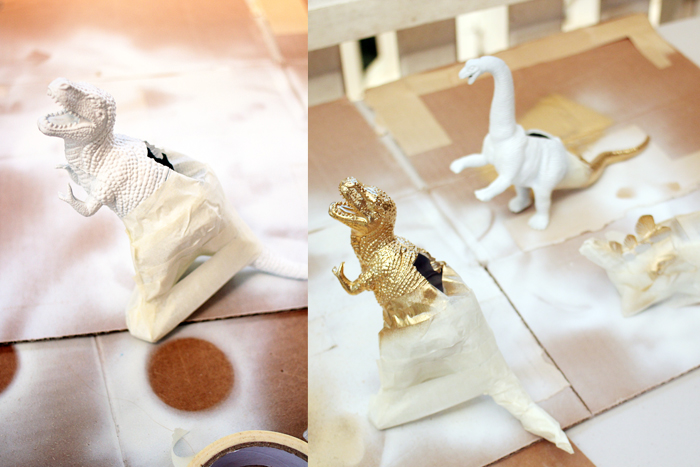
6. Let dry overnight before adding a second colour.7. If you are adding a second colour, tape off the areas you want to stay the first colour. I want to make mine look dip-dyed in parts, and only the spines of my stegosaurus, so I taped off all other areas. Again it is important that your first colour is completely dry at this stage or else you will rip off the paint!8. Using the same method as before add thin coats of the second colour to the un-taped areas. I found that I only needed 1 or 2 coats with this gold, but you may find you will need to do a few depending on your colour choices.
9. Once completely dry you can remove the tape. If you have a sealer, you can do a layer now, I couldn’t find any but so far it hasn’t mattered too much. The paint hasn’t chipped or discoloured or anything.
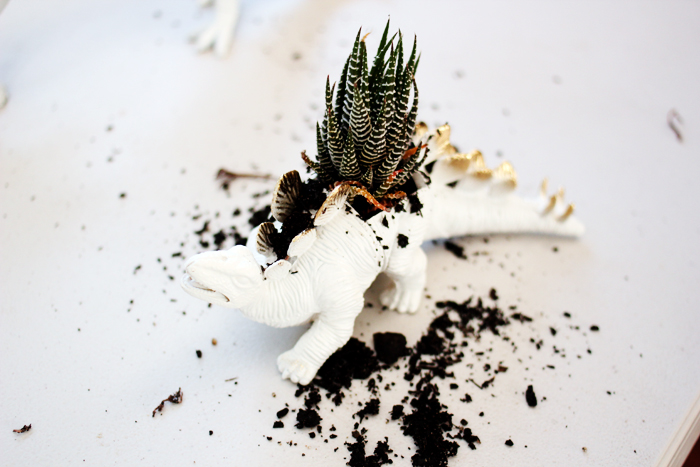
10. Now you can pot your plants. Again, this may be a little fiddly due to the size of the planters, but try to ensure you fill each one firmly with soil other wise your plants are going to sink once you water them a couple of times.11. Clean off any excess soil and water your plants and you’re done! Place your new dino planters somewhere sunny and remember to water them according to what kind of plant you have chosen. I only need to do mine once a week. I pop them on my kitchen sink or a tray when watering to catch any water that drains out through the holes.Hope you like your awesome new planters! Much more interesting than boring pots! :)





These are amazing! Such a clever idea. I’m definitely going to try this out.
Send me some pictures if you do! I’d love to see them!
These look fabulous! It really is a great idea, might stop my cats from knocking over my potted plants ;)
These are so great! Will share on pinterest! http://www.flourishandfancy.com
Thanks :)
What a darling idea! This is really stunning!
xo,
jasminblancboutique.blogspot.co.uk
Those are aROARable! Ha, ha, couldn’t resist! What gold spray paint did you use? Thanks!
grrrrrreat great great idea ! I love this idea of painting dinos and other animals… some beast are still waiting in my cupboard to share the same destiny as your dinos. :)
I’d love to see them when you make them! :)
These will look awesome in my pretty new flat! Awesome idea, thanks for sharing!
Muy inteligente y cretiva
wanted to buy some dinos from the designer. He said he would ship to Italy (normally he would not do it), but then never answered my e-mails anymore, and i sent quite a few. So i looked for my own dinos to paint etc. I swapped three with my kids (they had the best available among their toys!!!) and… i’m going to try. I love this wild pots :-) Thanks for your help and greetings from Cagliari, Sardinia, Italy. Andy.
Ok, that is very cool. There are all sorts of ideas for painted plastic animals too, I’ve posted some of them today and have included your idea here and linked to it - thanks!
This is the best! My boyfriend’s girlfriend has recently become obsessed with dinosaurs and now I know what to make her for christmas :)
These are FABULOUS and would totally crack me up, everyday. I love a fierce T-rex in gold! Such a genius idea.
I saw dino planters in the uncommongoods.com catalog for $45, then discovered your DIY - BRILLIANT! SO GREAT, I REPOSTED: http://wp.me/p3yOVk-ax. THANKS FOR THE GREAT DIY!