thumb-washitapestickers

DIY | Halloween Washi Tape Stickers
halloween-sticker-title

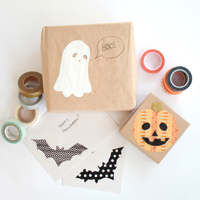
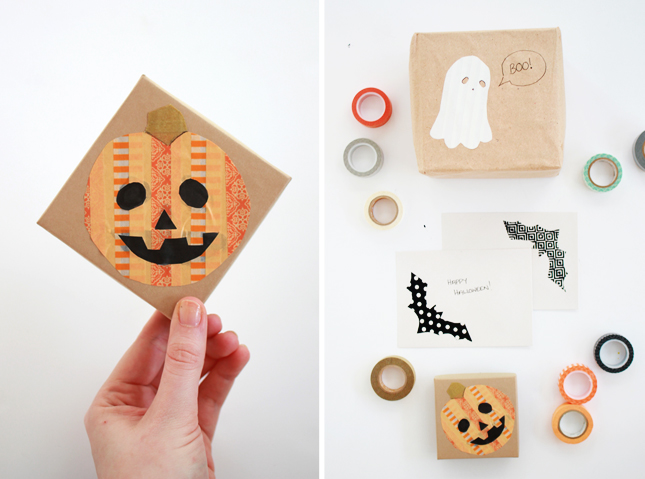
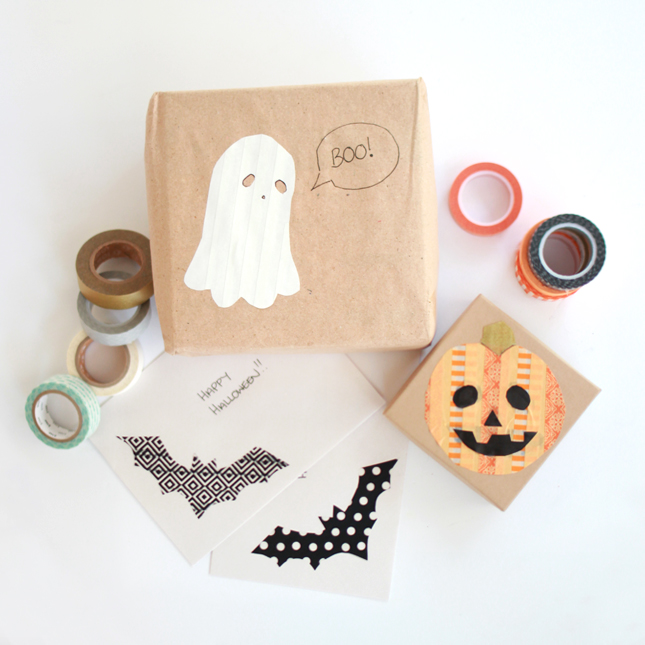
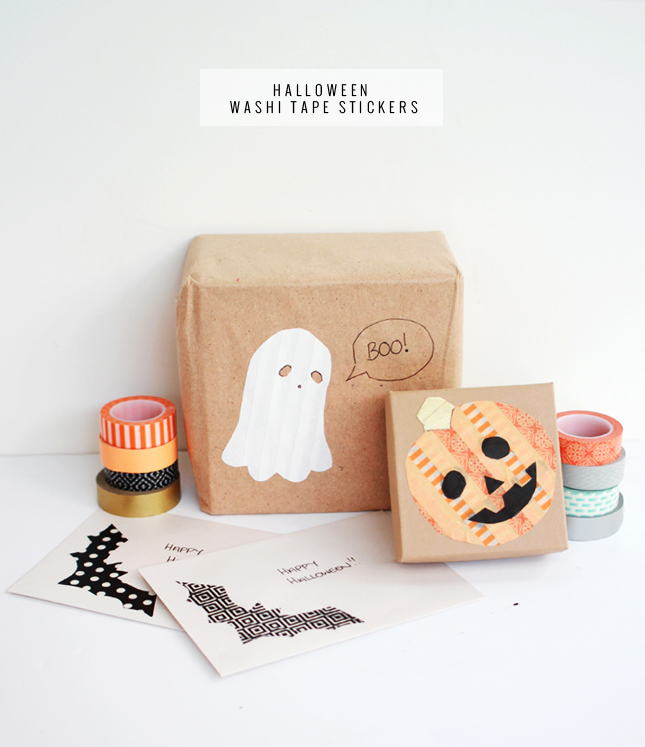
I’ve always wanted to get involved in the Halloween craze that hits the blogging world every October. I (unfortunately) don’t really get to celebrate the holiday, so it seems silly to carve a pumpkin or make elaborate Halloween decorations when I’m not really going to use them.  This year however, I finally had a solid reason to get into the spirit! A friend is holding a Halloween Party for her little ones, so after picking up a couple of gifts I thought it would be awesome to style the wrapping appropriately with some home made stickers.

My favourite craft ‘supply’ would have to be washi tape. Ever since I discovered it, I’ve been obsessed. I have a box full of the stuff and I use it for pretty much everything. The best thing about it is that it is strong, but not super sticky. Generally, it wont damage something if you stick it to it. It’s the perfect material for awesome, stripey stickers…
halloween-sticker-AWhat You Need:
Paper & Pencil
Washi/paper masking tape
Baking or parchment paper
Sharp scissors
Exacto knife (optional)

What You Do:
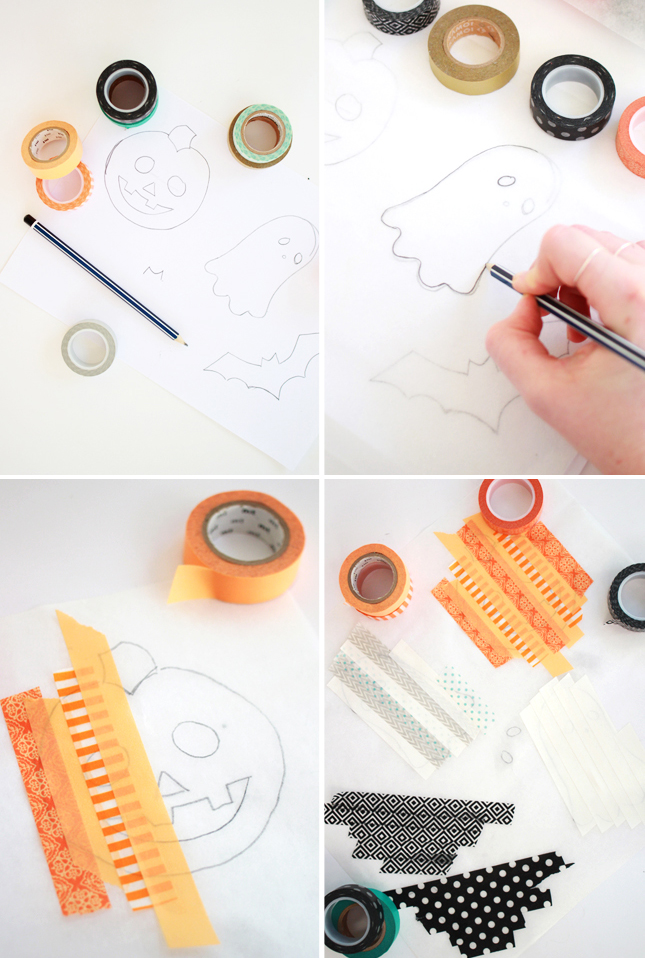
1. Start by choosing your sticker designs; You want images that are made up with block shapes. The more detail required, the more you are going to need to make intricate cuts in the sticker which will weaken the piece as a whole. Once you know what you want, sketch out your design, or find a template online and print out onto standard paper.

2. Place a piece of baking paper (or wax paper if you can get it) on top of your images and weigh down while you trace them onto it. Baking paper has one side that is slightly shiny and one side that is rougher - you want to draw onto the non-shiny side.

3. Flip the baking paper over (onto the shiny side) and, starting from one side of each image, stick down a strips of masking tape  so that they cover the image. Each strip of tape should overlap the previous piece. This ensures that your sticker holds as one whole shape. The tape should cover a little bit more than the template so you can trim away edges later.
halloween-sticker-B

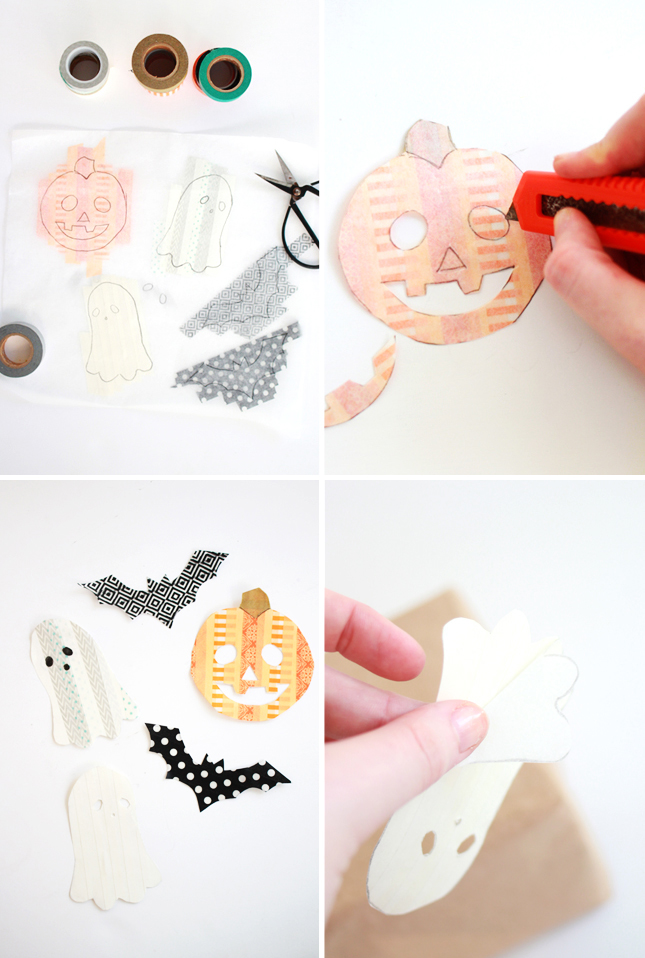
4. When each shape is covered with layers of tape, you can cut out each sticker, trimming away the excess tape. Be careful as you trim as the tape may come away from the paper if you are not gentle.

5. Now you can make any finishing touches to your sticker. For example; I added a stem piece of different coloured tape to the top of the pumpkin sticker. Using an exacto knife or craft blade, cut away any interior pieces like eyes and mouths.

6. Your sticker is now ready to go! To use, just carefully peel the paper away from the tape layer side. Stick down on your chosen surface  and smooth down.

You can use these stickers where ever you like! On cards and gifts, stick onto card and use as decorative art piece, even use as a paint safe wall decal in your home! Basically, you can stick them pretty much anywhere! Go nuts!

halloween-sticker-6 halloween-sticker-5

thumb-papergems

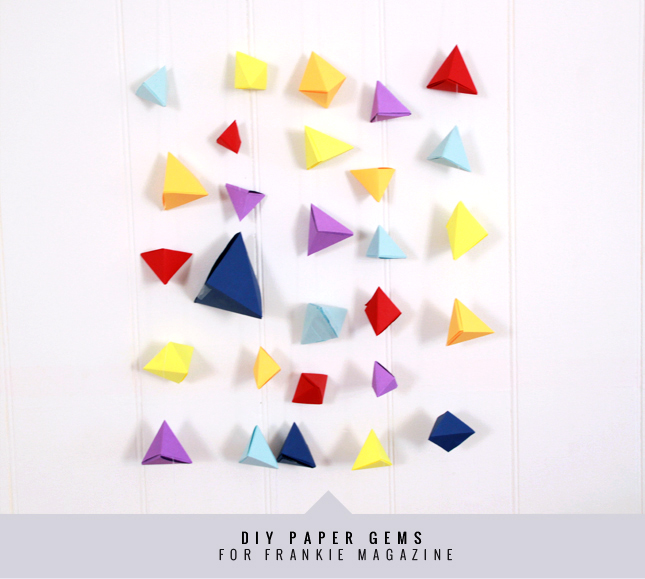
Frankie DIY: Paper Gems

DIY Paper Gems for Frankie Magazine | by www.highwallsblog.com

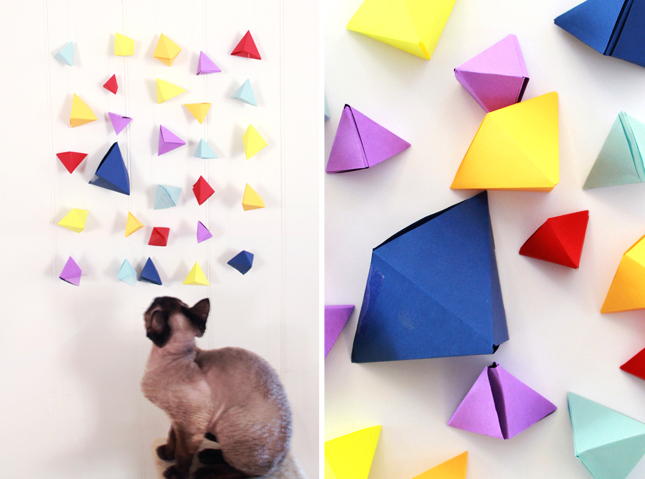
Did you ever wish you could make your own diamonds and gems at home? Just think of all the bling-bling you could have if you could! Okay, so these gems are made of paper, not precious stones, but with this simple DIY you can create a rainbow of gems with just a few clever folds!
Read the full instructions  HERE at the Frankie Magazine blog!
DIY Paper Gems for Frankie Magazine | by www.highwallsblog.com

thumb-terracottadinnerware

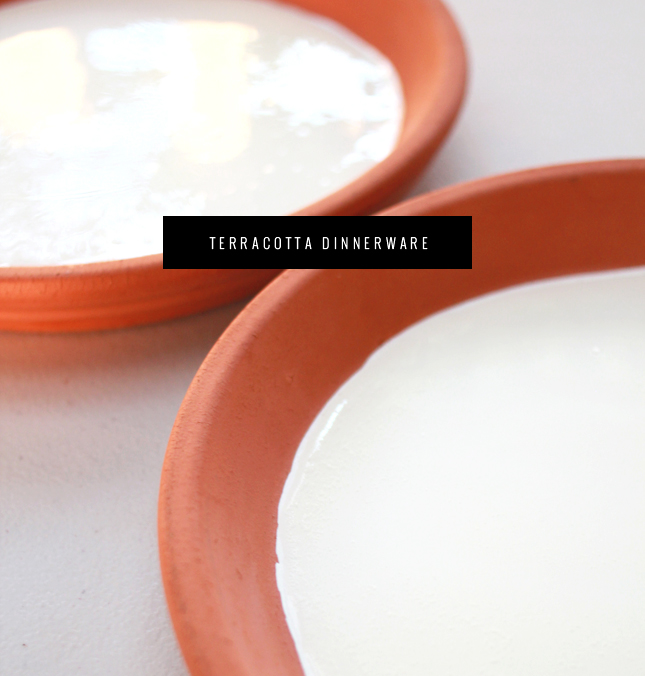
From the Garden to the Table: DIY Terracotta Dinnerware

From the Garden to the Table: DIY Terracotta Dinnerware | www.highwallsblog.com

Ever since I made that Terracotta Food Cover a few weeks ago, I’ve been having these strange dreams. Dreams of terracotta pots as dinnerware.  Strange huh? Pots (with the exception of the aforementioned food cover) are not really the most practical of items to have at ones dinner table, so what gives? I wasn’t really sure what my brain my trying to tell me.

Then I spotted these terracotta bases being used as plates and suddenly it all made sense. As soon as I saw them I thought, ‘now there’s an idea!’ Bri was using the bases with baking paper to separate the food at the base, but I wanted something a little more permanent, so I came up with a cimple method of sealing the inside of the saucers so that you can eat straight off em!

This project takes a little patience and the right materials,but in the end you will have a lovely set of unique plates to add to your kitchen. I chose to  start with a trio of medium sized bases as I think these work best as serving dishes. A paint and acrylic base will protect your plates from food etc, but  with use you will start getting marks from knifes and forks so I would avoid serving steaks off of them (Besides, have you ever scraped cutlery over terracotta? Yikes! I can’t stand that sound!) Foods that can be eaten with your hands or a simple spoon or fork are probably best bet to ensure the longevity of your new plates.

From the Garden to the Table: DIY Terracotta Dinnerware | www.highwallsblog.com

What You Need:

Terracotta Bases  - you cant get these from your local gardening  or hardware store
Enamel Paint (or clay glaze if you have it)
Liquid Acrylic

What You Do:

1.  Take your terracotta bases and give them a thorough wash. As discussed before, unsealed terracotta is super absorbent so you want to wash it with hot soapy water and rinse thoroughly before using to make sure there is no dirt or nasties going to get in your food. Allow to dry completely before going on to the next step.

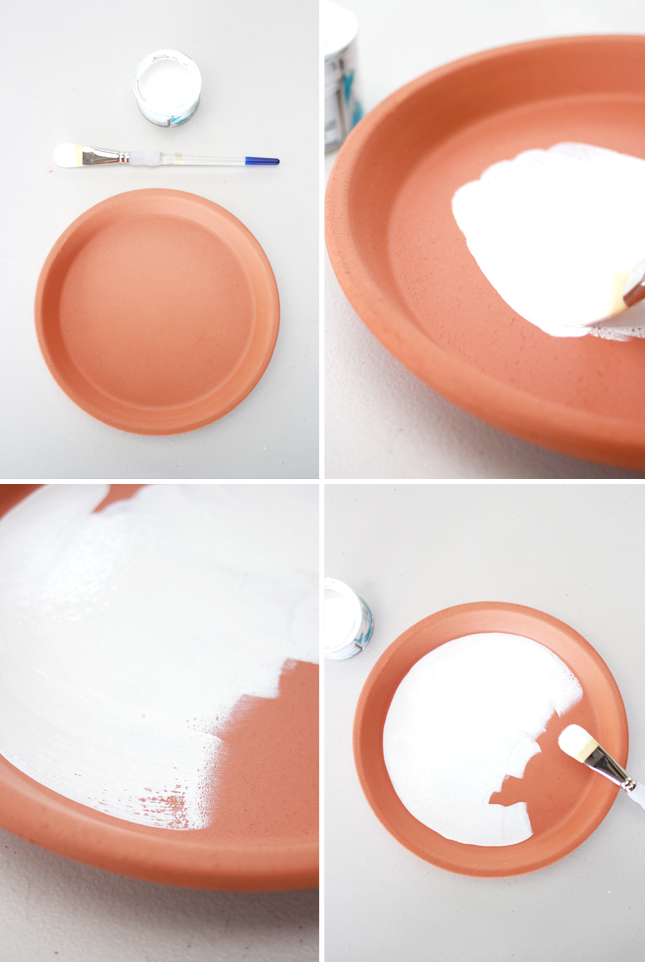
2. Using a large flat brush, paint the inside of the plate with a thin even layer of paint. You can paint the whole inside up to the outer rim or just the base as I have done. Don’t worry too much about making it perfect, the look of the ‘plates’ lends itself to a rough, imperfect feel, so just paint it on free hand. Repeat with as many coats as necessary until you have an even solid colour.

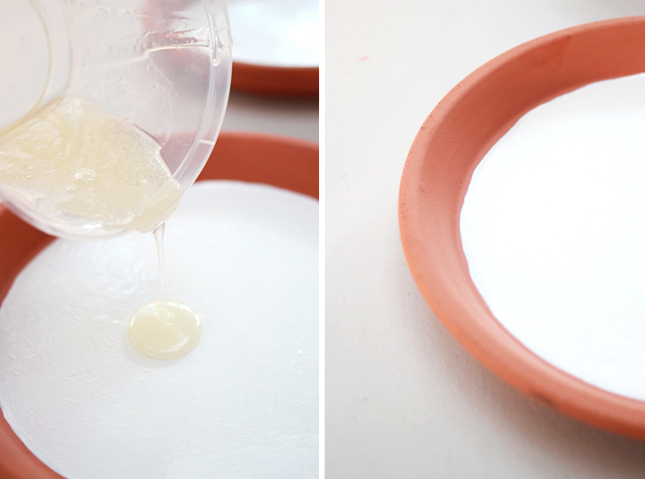
3. Mix together your acrylic  as per the instructions on the bottle; mine is a simple 1:1 parts of each mix. Pour a small amount onto the center of the plate and using the back of a spoon or a spatula, gently move it outwards until the whole of the painted area is covered (add more acrylic to the center as needed). Go slowly around the edges – any acrylic that comes into contact with the unpainted terracotta will discolour so try to stop at the edge of the painted area.

If you find you still have any air bubbles gently pop them with a tooth pick and smooth the area over. The acrylic should settle and smooth out after a couple of minutes of sitting. Leave to dry completely overnight or longer.

———

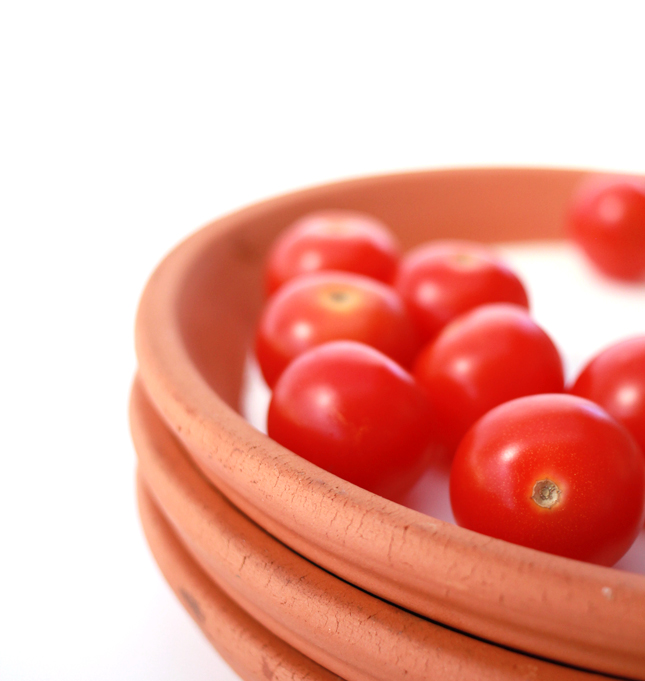
I loved how my first set of plates turned out. I’m already planning a couple more. My next set will include little palm sized bases for serving herbs and spices, in a range of colours. I may even make a few sets to give away as gifts, they look so lovely on the table. (Stay tuned for this weeks recipe to see these babies in action!)

From the Garden to the Table: DIY Terracotta Dinnerware | www.highwallsblog.com

From the Garden to the Table: DIY Terracotta Dinnerware | www.highwallsblog.com

thumb-bookmark

DIY Heart Shaped Bookmarks for Drifter & the Gypsy

bookmark1B

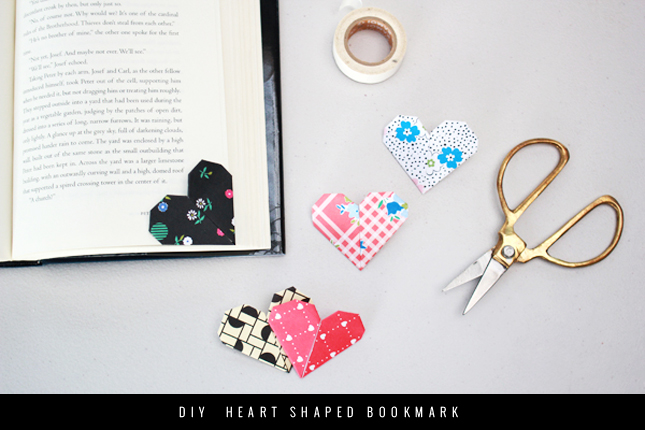
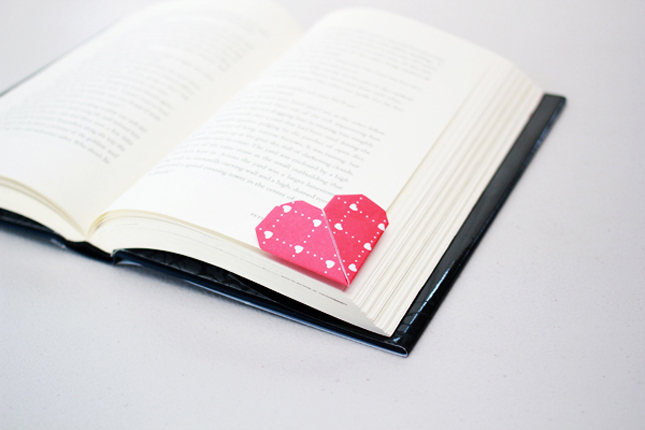
Oh hey, I nearly forgot to mention; this month’s DIY Craft post is up over at Drifter & the Gypsy. This time around I’m sharing some of  my mad origami skills from my childhood and showing you how to make these adorable heart shaped bookmarks. My childhood bedroom was always full of the damn things. They are so easy to make, and admit it; you’ve never had a bookmark this cute before!

Read the post with full instructions HERE

bookmark3A

thumb-ombrecutlery

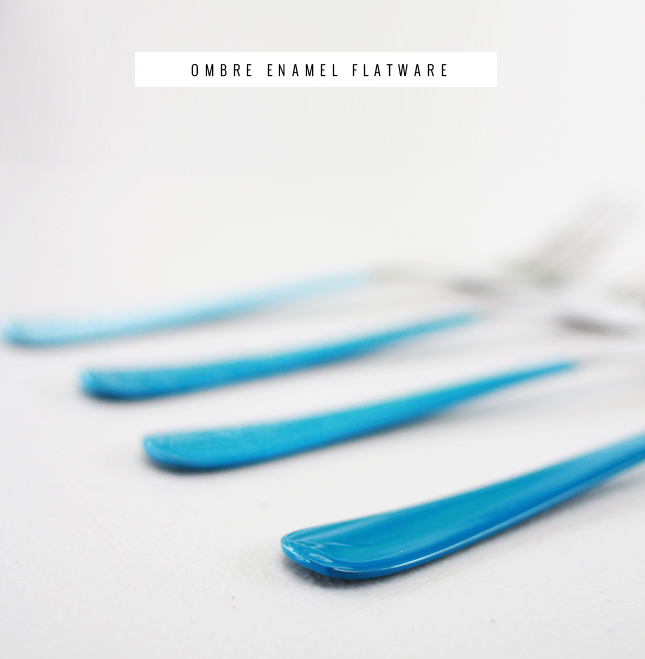
Ombre Enamel Flatware

DIY Ombre Enamel Dipped Flatware | www.highwallsblog.com

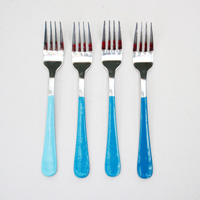
As soon as people started dipping wooden spoons in bright colours I knew this was the project for me. Simple, elegant and something that can be totally personalized to your own taste.

My researched brought me to the conclusion that enamel paints were the way to go; the glorious thick paint is perfect for even coverage and should stand the test of time. ‘Plain silver and a rainbow of pastel colours,’ I thought, ‘What a good idea! And so much cheaper than buying the same thing in the stores. Dani - you so smart!’ and off I skipped to my local hardware store to choose the perfect shades for my apparently brilliant project.

So… enamel paint is expensive. (Alright, that’s not entirely true.) Hardware stores charge between $10 - $16 per teeny can and when I had my heart set on 8 different colours that’s a pricey DIY! Sure, I could get them online where they are half that price, but then I can’t see the true colour in person prior to buying and besides, ain’t nobody got time for that! (So maybe I’m not the most  patient of people…)

Besides my monetary issues, I also couldn’t find the colours that I wanted either! I almost abandoned the whole thing altogether when I suddenly had a stroke of genius: What colour scheme do I love for a DIY? That’s right kids, it’s another ombre DIY!  This meant I only had to buy 2 tin’s of paint instead of 8. As I don’t have a lot of use for enamel paints, this was the perfect compromise to not only bring down the cost, but also stop a lot of wastage.

Disclaimer: This method is what I found was best to reduce wastage of your paint. You can of course mix a series of different shades from lightest to darkest, but chances are you will not use all of the paint, so you will either need to store each colour separately for later use, or discard it all.

DIY Ombre Enamel Dipped Flatware | www.highwallsblog.comDIY Ombre Enamel Dipped Flatware | www.highwallsblog.com

What You Need:

1 tin of enamel paint in white
1 tin of enamel paint in your choice of colour
A selection of flatware/cutlery to paint
A tall jar or container - the height of your handle
A piece of polystyrene foam large enough to hold your set

What You Do:

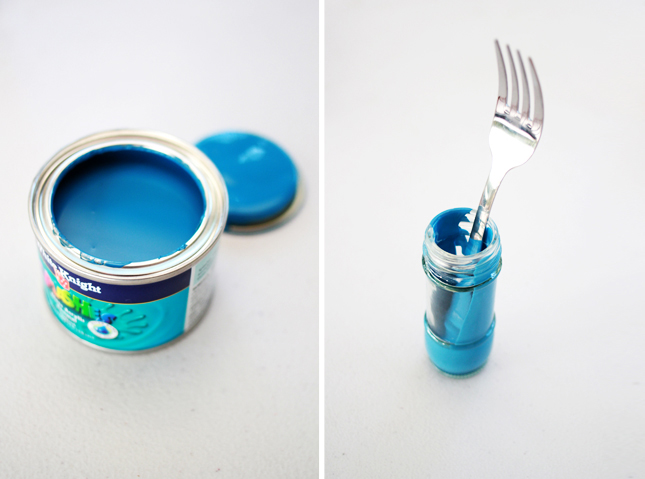
1. Take a tall jar or container that is roughly the height of the handle part of your cutlery (narrower is better) and pour some of your coloured paint into said jar. You want to fill around 1/5 of the jar - but this will vary depending on your container.

2. Lay down a drop cloth/newspaper - this is going to get messy! Take the polystyrene foam and set up a “table” over your prepared cloth/paper; I used two cans of spray paint as the ‘legs’ with the foam as the top. This is where we are going to hang our flatware while it dries. Return the foam on a flat surface for now.

3. Take you flatware pieces that you want in the darkest shade; dip the end into the paint and gently tip the jar to one side, allowing the paint to slide down the side of the jar - over the handle until covered to your desired height. Turn the piece over while in this position to ensure even coverage on  both sides. If you don’t rush this step you will get nice clean lines.

4. Remove your piece from the paint and hold over the jar so that any excess can run back into the jar. Check the coverage and re-dip if you need to touch up any areas.

5. Once the drips have almost stopped, firmly skewer your piece into the polystyrene foam by the fork/blade end and prop back onto your pre-prepared ‘table’ set up so that it  can continue to dry. As the paint dries off it may leave a little lump where it dripped off, so push each piece it at an angle with the front facing up. This way, if you need to smooth down the lump later, any imperfections will be at the back of the handle.

6. Take your neck piece and using the handle end as a kind of spoon, decant a small amount of while paint into the jar and mix with the handle thoroughly until a shade just lighter than your oirginal colour. Be patient and mix slowly so as to avoid making air bubbles. Once ready, repeat Step 3  and 4 to cover the piece you just used to mix with.

7. Repeat for the next pieces, adding a little more white each time to get lighter and light colours. Allow to hang overnight to dry completely.  Once dry you can wash and use straight away.

A Few Tips:

- If you find any air bubbles occurring when you dip, take a toothpick dipped in paint and gently pop and smooth out any bubbles. If this doesn’t help, just dip again over the first coat.
- The enamel paint can be peeled away when it is touch dry. If you have any drips, or mistakes on a piece and you want to start again. Just allow it to dry slightly and you can quite easily scratch the paint away. It isn’t as easy once it is fully dry.
- Rotate your pieces while they hang to dry, alternating angles so that they dry evenly (and hopefully without any ‘drip lumps’)

thumb-housecutout

Cut Out Art

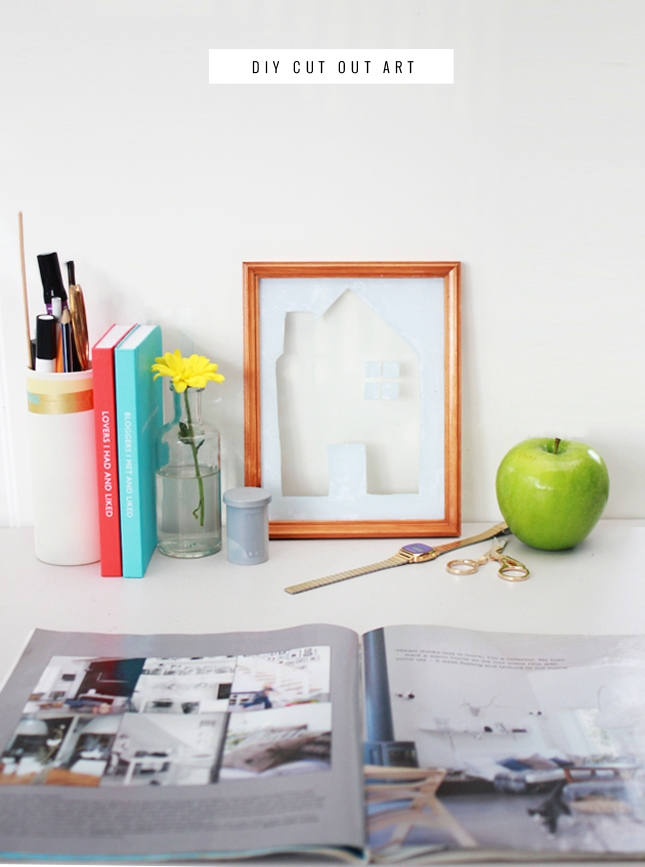
DIY Cut Out Art | www.highwallsblog.com

Sometimes you come across something and you think ‘oh my god! I must have this!’ Maybe you see it in a magazine, or on TV. Somewhere there are no handy links to where you can pick one up yourself. So you cry. Curse the heavens for bestowing such sorrow on your life. Then you realise you’re being a little melodramatic and really, if you think about it, that thing you wanted so bad is really quite simple. You could probably make one yourself, so stop whining about your stupid first world problems and get off your ass and make one! You quietly wonder when you started being so mean to yourself, but come to the conclusion that you’re probably right…

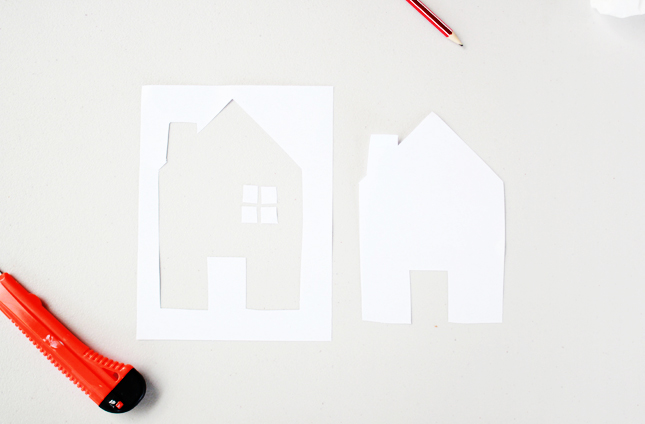
So maybe this happened to me recently. I spotted this adorable house art piece in a friends house. It was basically a little frame with a house cut out of a white board so the house shape was transparent. I was instantly smitten with the simplicity of the piece and demanded to know where she got it from. As always seems to happen when you ask someone where they got something, she had been gifted the piece from her husbands family (overseas family no less!) Feeling a little disappointed, I vowed to attempt my own, home made version.

DIY Cut Out Art | www.highwallsblog.com DIY Cut Out Art | www.highwallsblog.com

What You Need:

An old photo frame
Plain white paper or stock card
PVA Craft Glue
Super Glue
Pencil
Craft Knife
A clean, damp Cloth
Window Cleaner
Cotton Bud/Cotton Swabs

What You Do:

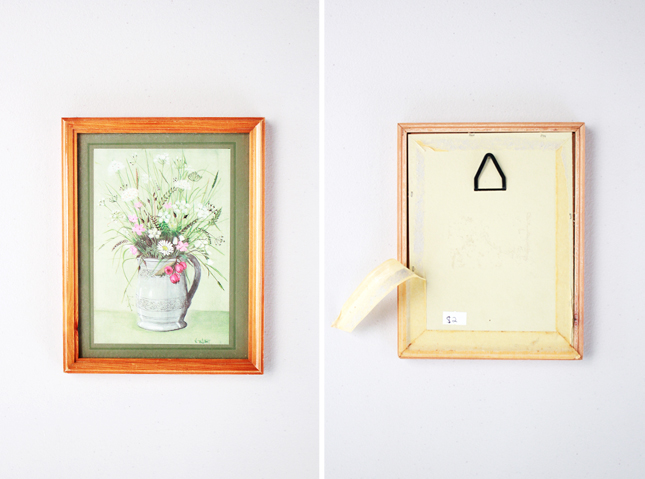
1. Choose an old photo frame to use, ensuring that it still has the glass. I picked up a frame from my local thrift store for a couple of dollars. I chose a frame that had the proper tacks and framing tape instead of the re-usable frames as it meant it was a little cheaper and  as we are discarding the backing of the frame, you don’t need the stand part anyway.

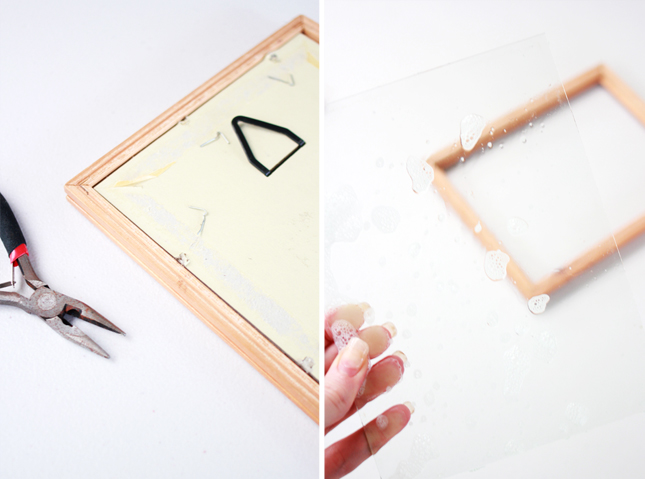
2. Carefully remove the backing from the frame. Take away any tape, staples, tacks etc so that all you have is the wooden frame part and the glass panel.

3. Separate the glass from the frame and give the panel a good wash in warm soapy water. Dry thoroughly making sure that there is no water or dust residue left on the glass.

4.  Take a piece of white paper or card stock and cut to match the size of your glass panel. With a pencil, lightly sketch out the shape you would like to cut out. I decided to stick with the house shape, but you can really do what ever you want here. Using craft knife carefully cut out your design and erase any pencil marks left.

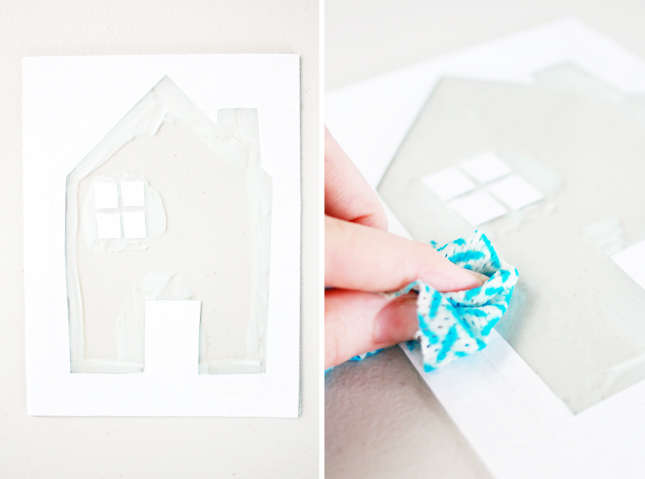
5. Take you glass panel and, using a paintbrush, coat all the areas that the paper will cover with an even coat of glue. Be generous, but ensure that the coat is even all the way across. Dont worry if your glue covers more that the paper does.

6. Carefully, starting from one corner of the glass, line up the paper cut out onto the glass panel. Smooth out the paper against the glue as you go, ensuring there are no air bubbles as you will be able to see these from the other side of the glass. Once you are happy with the positioning and you are sure there are no air bubbles visible, coat the paper with a generous coat of glue.

DIY Cut Out Art | www.highwallsblog.comDIY Cut Out Art | www.highwallsblog.com

7. Take a clean cloth and dampen with warm water. Carefully and gently use the cloth to clean away glue from any areas of glass that are not covered with paper. Don’t worry to much about the immediate edges and light smudges for now. Once you have cleaned the bulk of the glue, leave until the glue and paper are completely dry (Overnight if possible)

OPTIONAL STEP: If you find that your paper has dried a little transparent, paint a couple of layers of acrylic paint over the paper to ensure you have a nice opaque finish.

8. Once dry, take a cotton ball and cotton swab and spray with  Windex or any similar glass cleaner. Gently wipe the clear areas of glass until completely clear. Use the cotton swab to go around the edges.

9. Using super glue, run a line of glue around the inside of your frame and press the glass panel back into it with the paper side facing inwards (so it will face the wall when you display it). Make sure the glue is not visible from the front and allow to dry.

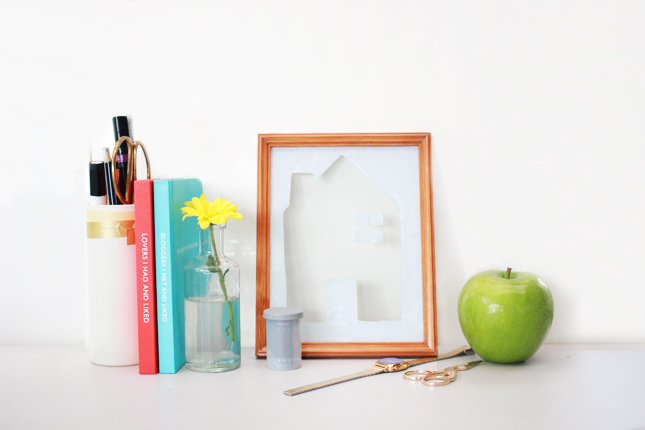
10. Flip over to see your finished piece. If required clean off the front of the glass with some more window cleaner and prop your art piece up on a table or shelf. Admire how brilliant you are.

DIY Cut Out Art | www.highwallsblog.com

I’m all about clean lines and simple design (as I’m sure you would have picked up from reading this blog), but I’m also inherently lazy. I like low maintenance additions to my home. While the original was simply a frame and some thick card, I opted to make something a little more sturdy and (hopefully) something that will last the distance and be easy to clean.

Another way you can complete this project would be if you had two frames the same size. Instead of gluing the paper to the glass what you can do is sandwich the paper between the panels from the two frames and glue together. However this will rely on you purchasing two frames the same size, which could be difficult if you go the second hand route like I did. You can also rig your piece to hang if you ensure that your hanging wire or hooks are also white and will be covered by the paper.

 The best part of this piece is the transparent ‘cut out’. I love the effect it gives, the white background, especially against a white wall is so subtle and effective. But then again, I’ve always been a sucker for a bit of minimalism art :)

thumb-ropecoasters

DIY: ‘Nautical’ Rope Coasters

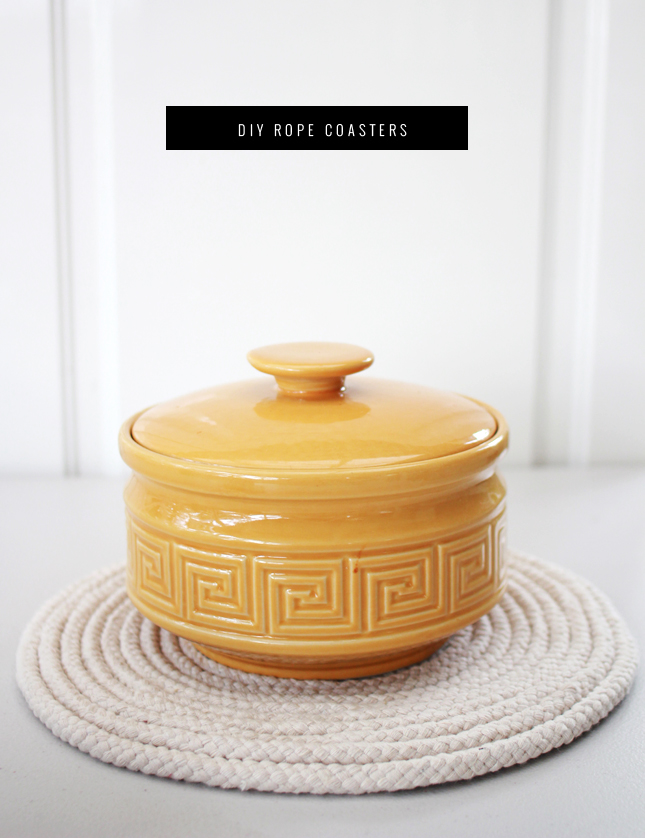
DIY Rope Coasters | www.highwallsblog.com

As you would have seen in my previous DIY posts; I am the queen of quick and easy projects. I don’t have the attention span (nor the patience) for anything that is going to take hours or days to make. I’m just not that committed I guess? So when I tell you that this project took me around 3 - 4 hours to complete, don’t freak out! While this project doesn’t fit the ‘quick’ part of my DIY-ing criteria, it certainly holds up its end of the bargain on the ‘easy’ side of things.

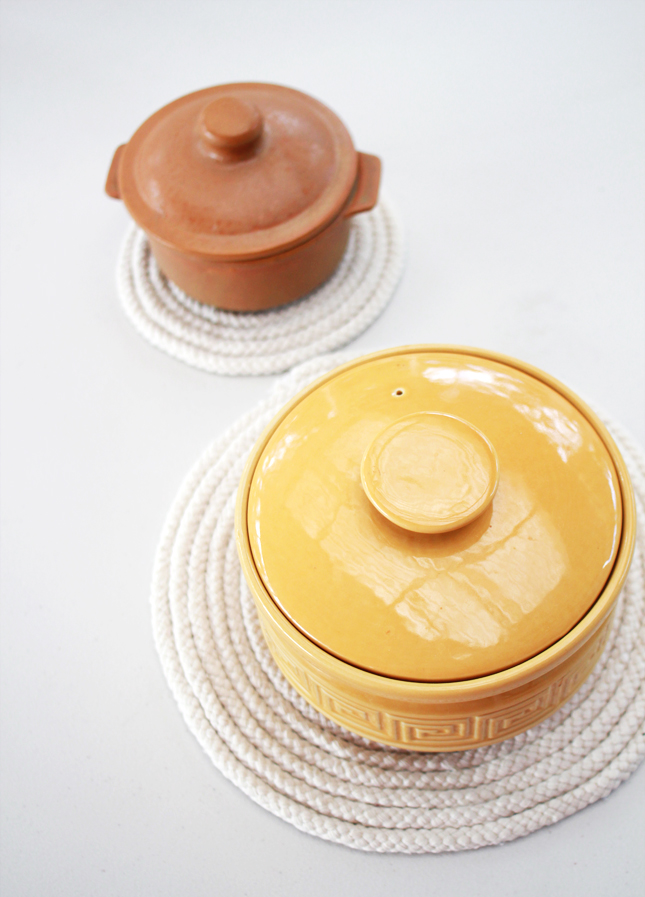
It may take a while, but I found it to be quite therapeutic. I stitched away a rainy Sunday afternoon watching a marathon of old Will & Grace episodes and I gotta say I’m pretty happy with what I have to show for it! I spotted a similar set of ‘nautical’ rope coasters in one of those boutique home ware stores (my original inspiration for this project) but at around $80 for a set of 2 I’m much happier with my home made version!

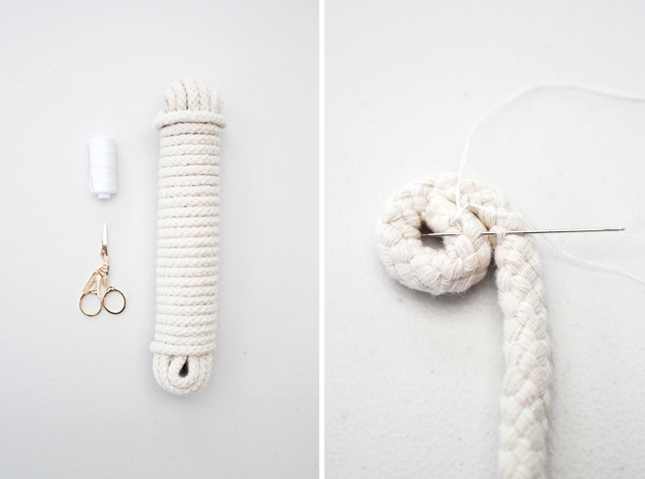
All you really need is a length of decent quality cotton rope, some white (or similarly coloured thread) and the ability to do some basic stitching. Remember to get cotton thread. We’re making those large coasters used for protecting your table tops from hot pots and serving dishes, so if you get synthetic or plastic based ropes you’re going to end up with a big melted mess as soon as you put any heat onto it. Yuck! I picked up 1o meters of good quality 15mm rope from my local hardware store for around $15, which made a large (45cm) and small (20cm) coaster.

DIY Rope Coasters | www.highwallsblog.comDIY Rope Coasters | www.highwallsblog.comDIY Rope Coasters | www.highwallsblog.com

What You Need:

8 - 10 meters of Rope
Light coloured Thread
Needle
Scissors

What You Do:

Ensure there are no kinks or twists in your rope and neatly pool it on your workspace. You want to be able to access it easily as you progress. Your work space should be a large flat area (ie; a table or desk) and should be somewhere you can sit comfortably while you work. How big you want your coaster will determine how much rope you need and how long it will take. I used around 8 meters of (15mm dia) rope to make a coaster around 45 centimeters across. The thickness of your rope will also impact your sizing so test out your design before you start sewing by coiling the rope until you have the desired size and measure the length.

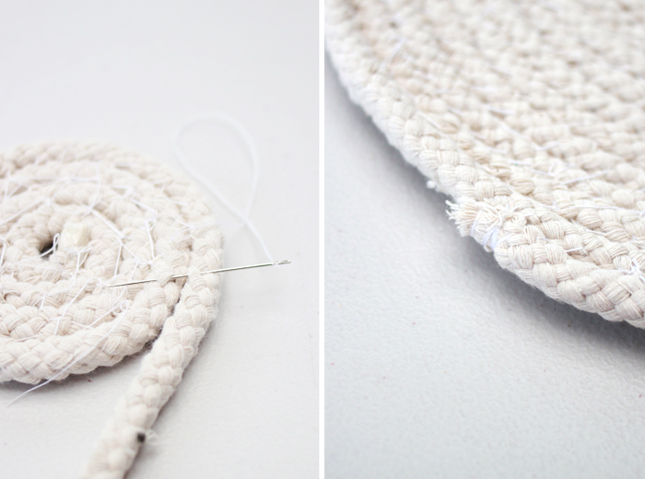
Begin by taking one end of the rope, lay it flat on your work space and twist it in on itself to make a circle. Stitch the end to the side of the rope and knot securely. Continue to coil the rope around the circle, a few centimeters at a time, stitching as you go. Stitch the together by threading the needle under a layer of the rope braid on each side and pull tight. Keep your rope flat on your work space so that your coaster will lay flat once completed.

To ensure that the stitching is secure and to avoid tangling long pieces of thread, stitch in sections, tying off each area as you come to the end of your thread. Don’t worry if your stitching isn’t super pretty as this will be the underside of the coaster. Continue to stitch the rope around itself until you have reached your desired size. Tie off the end by wrapping the thread tightly around the end of the rope 10 -15 times and stitching securely so that it is flush with the rest of the coil. Wrapping the thread around the end will help to stop the end from fraying and coming loose.

The larger your coaster gets the more it may start to curl inwards as you stitch, Don’t be concerned, just keep smoothing it down and make sure it stays flat as you stitch. When you flip it over to use it will curl towards the tabletop, which will actually help it to sit flush in the end.

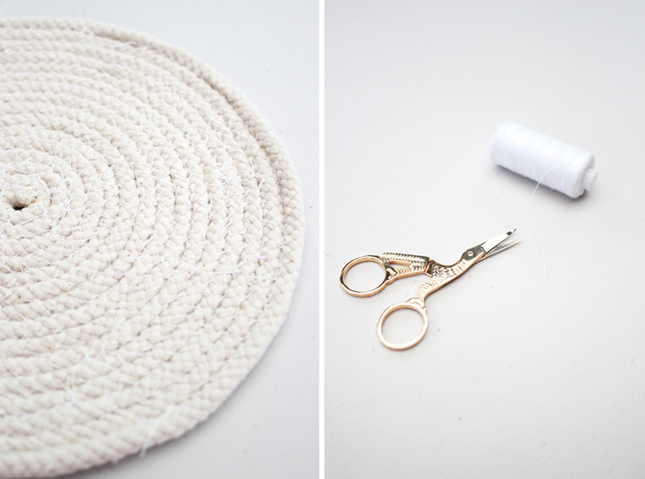
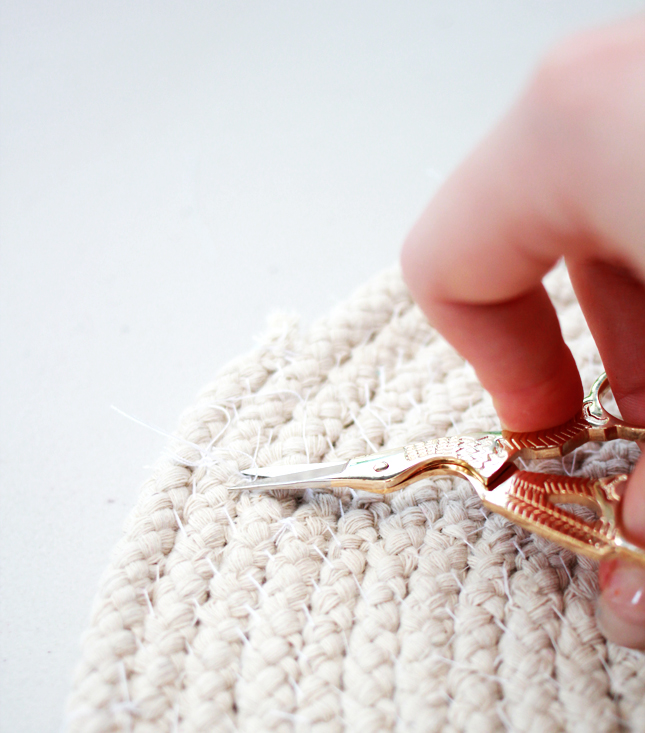
Smooth out the coaster and gently pull at the sides to see any loose areas. If the stitching pulls apart to show large gaps, make a few addition stitches to secure. Once you are happy with the strength of your coaster, take your scissors and trim away any access thread and neaten any frayed edges. Flip over and smooth out and you’re done!

DIY Rope Coasters | www.highwallsblog.comDIY Rope Coasters | www.highwallsblog.com

thumb-combarmentbook

Drifter & the Gypsy: Hidden Book Compartment DIY

We’ve all seen those old movies where the main character has a secret compartment in the bookcase. I always wanted to be able to tug on a book and have a secret passageway open up for me. How cool would it be to have a secret place to store your most precious things where no one would ever find them?

While I can’t show you how to make a book into a latch that opens a secret door, I have an sneaky DIY over at the Drifter and the Gypsy to show you how to make a secret storage compartment that no one will ever find. Check out the full DIY for all the details!