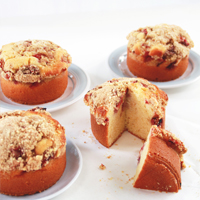
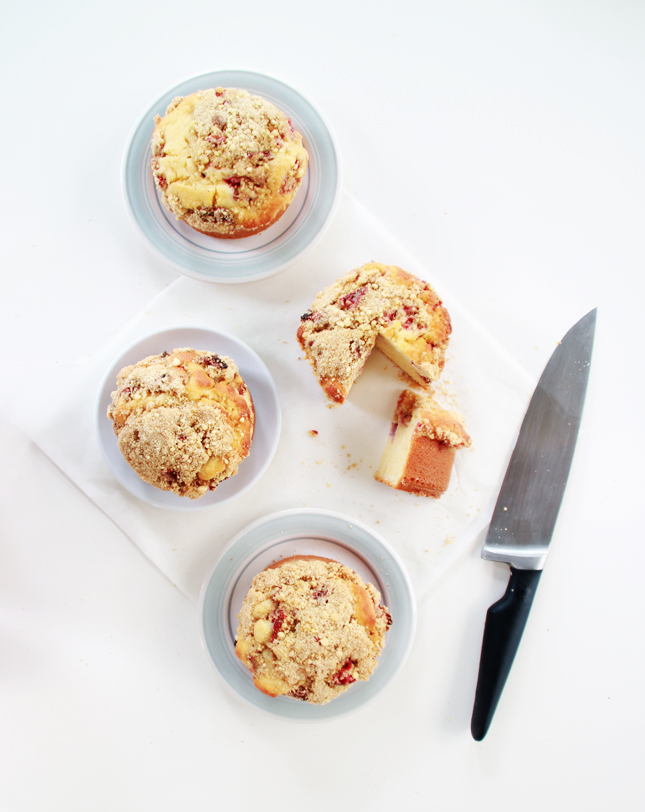
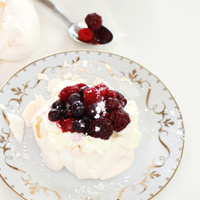
EAT | Chocolate Mudcake (with berries and cream)

Eats | Chocolate Mud cake w/ berries and cream | www.highwallsblog.com

Every time somebody has a birthday in our house I make them a cake of their choice. One of my house-mates will, without fail, always want black forest cake. My other house-mate always tries to talk his way out of a cake until I force one upon him. But my boyfriend always is a man of variety. He has a different request every year and this year’s request was a goodun'; chocolate mudcake. Aww Yiss!

I always have a problem with making mudcake in that I can never decide on what kind of icing to put on the damn thing! I wanted to get away from rich chocolate icings, but I didn’t want to leave it un-iced. In the end I fell back on my old favourite; layers of delicious whipped cream goodness! Yay! Add some berries and everyone is impressed with all your ‘hard work’ (Disclaimer: no actual hard work required.)

Eats | Chocolate Mud cake w/ berries and cream | www.highwallsblog.com

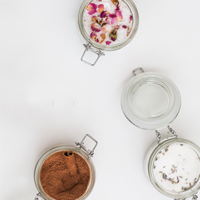
1 1/2 cups of caster sugar
250g of chocolate
250g of chopped butter
3/4 cup of freshly brewed coffee
1 1/2 cups of self-raising flour
3/4 cup of cocoa powder
1 cup of almond meal
1/2 cup of sour cream
4 eggs
2 teaspoons of vanilla essence
Thickened cream
1/2 cup of caster sugar
Berries to serve

1. Preheat the oven to 160°C and grease a 22cm round cake pan and set aside.

2. Place the sugar, chocolate, butter and coffee in a large saucepan and stir over medium-low heat for 4 minutes or until the chocolate melts and the mixture is smooth. Transfer to a large bowl and set aside to cool.

3. Sift the flour and cocoa powder into a bowl and add the almond meal and stir to combine. In a separate bowl, lightly whisk the eggs and combine with the sour cream and vanilla.

4. Gradually stir the sour cream and flour mixtures into the chocolate mixture, alternating in batches, until just combined.

5. Pour the mixture into the prepared pan and covering loosely with foil to prevent over browning, and bake for 1 hour 30 minutes or until crumbs cling to a skewer inserted into the centre. Set aside in the pan for 10 minutes to cool slightly before turning onto a wire rack to cool completely.

6. Whip together the cream and sugar in an electric mixer until stiff peaks start to form.

7. Cut the cake in half to create two layers and top one with cream. Place the other layer onto the cream and top with more cream and a handful of berries.

(Adapted from this recipe)

thumb-cronut

Eats | Faux Baked “Cronuts”

Faux Baked "Cronuts" (not actually cronuts!) | www.highwallsblog.com

What the hell is a cronut and where can I get one? (Disclaimer: I know what a cronut is, please don’t leave me comments explaining.)

Cronut’s don’t appear to have made it big in Australia as of yet, so I feel thoroughly out of the loop when it comes to this pastry sensation. I mean, Croissant-Doughnuts do sound crazy delicious but man they seem like a lot of work! Some online sleuthing found that while there are so many recipes online, most involve deep frying and let’s be real: who the hell wants to boil up a big ol’ pot of oil on a hot Sunday afternoon? Not this guy! That’s for sure.

So in my usual lazy way, I instead decided to Frankenstein up my own version of what I think ‘cronut’s might, maybe, kinda, perhaps taste like. Are these actually cronuts? Nope. Probably not even close. Are they excessive amounts of pastry, cinnamon and sugar? You betcha! And really, I think it’s how much something is deliciously bad for you, that really counts.

So - Let’s do this! Let’s make some faux cronuts (that aren’t really cronuts!) We can eat them together and pretend like we actually  made something fancy! 

 Faux Baked "Cronuts" (not actually cronuts!) | www.highwallsblog.comREAD MORE

thumb-crumbcake

Recipe | Mini Strawberry Crumb Cakes

Mini Strawberry Crumb Cake | www.highwallsblog.com

Raise your hand if you read designlovefest? Haha - just kidding! Of course you do! Who doesn’t? Now that we have cleared that up, lets talk about the Blueberry crumb cake Bri shared a few weeks ago. Uh… hello delicious thing! Where have you been all my life? I don’t know about you, but for me it was love at first site! I’ve never tried crumb cake before but it looked so damn incredible I just HAD to try my own version!

Originally, I was going to make a full sized cake as per usual. But when I went digging in my crazy cluttered kitchen cupboards, I came across the set of mini cake tins I bought on sale and never used.  Now, I might not know what regular crumb cake is like, but what I do know is that in miniature form, it’s pretty much perfect! Trust me on this…

Mini Strawberry Crumb Cake | www.highwallsblog.comMini Strawberry Crumb Cake | www.highwallsblog.com

INGREDIENTS:200g of room temperature butter
3/4 cup of caster sugar
2 teaspoons of vanilla essence
2 eggs
1 cup of self-raising flour
1 cup of plain flour
3/4 cup of milk
500g of strawberriesCrumble topping

1/2 cup of plain flour
50g of chopped chilled butter
1/4 cup of brown sugar


 (*Adapted from this recipe)

1. Preheat oven to 180°C. Grease 4 mini springform cake tins with butter and set aside on a baking tray.2. Using a mixer or electric beaters, beat the butter, sugar and vanilla together until pale and creamy.3. Add the eggs, 1 at a time, beating well after each egg.4. Combine the flours in a separate bowl and using a spoon, fold into the butter mixture, alternating even parts with the milk until well combined.

5. Spoon into the prepared tins and smooth the surface.

6. Wash and cut your strawberries in quarters (or smaller). Top each prepared tin with the strawberries, pressing gently into the mixture.

7. To make the crumble topping, place the flour and butter in a bowl and using your fingertips, rub the butter into the flour. Continue to do this until your mixture resembles coarse breadcrumbs. Add the brown sugar and stir to combine. Sprinkle the crumble topping over the strawberries.

8. Bake in oven for 35 minutes or until a skewer inserted into the centre comes out clean. Mini cakes can vary in cooking time so keep an eye on these guys while they cook.

9. Set aside in the pan for 10 minutes before transferring to a wire rack to cool. Serve cake warm or at room temperature.

crumb-cake-1Mini Strawberry Crumb Cake | www.highwallsblog.comMini Strawberry Crumb Cake | www.highwallsblog.com

thumb-chocpeanutcookies

RECIPE | Dark Chocolate & Peanut Butter Cookies

RECIPE | Dark Chocolate & Peanut Butter Cookies | www.highwallsblog.com

Cookies are, in my opinion, best served fresh from the oven. Warm and gooey, who doesn’t love fresh cookies? Well, I’m here to tell you that these cookies break that rule. I mean, they were pretty delicious on the first day - but pretty intense! But the next day? Oh. My. Gosh. Amazing! The flavour is more vibrant than your regular cookies, not as sugary or sweet, more deep and rich.

And if you’re like me and you don’t like dark chocolate, never fear! Those second day cookies lose some the intense bitterness of the dark chocolate and they are simply sublime. Take my word for it guys; day 2 is the secret ‘ingredient’ for this recipe!

What You Need:
100 of unsalted butter
200g of dark chocolate
100g of crunchy peanut butter
150g of caster sugar
1 egg, lightly beaten
1 1/4 cups of plain flour
1/2 teaspoon of bicarbonate of soda
1 tablespoon of cocoa powder
2 tablespoons of chopped roasted peanuts (unsalted)

What You Do:

1. Preheat the oven to 180 degrees celsius. Grease and line two baking trays with baking paper. Chop the dark chocolate into small rough pieces.
2.  Place the butter and half the chocolate in a heatproof bowl set over a saucepan of gently simmering water (don’t let bowl touch the water) and stir until melted. Remove from the heat and set aside to cool slightly. (You can also do this step using the microwave for 30 seconds)
3. Mix in the peanut butter and then add in the sugar and egg. Combine the flour, bicarbonate of soda and cocoa together and then stir into the chocolate mixture. Fold in half of the remaining chocolate pieces.
4. In a separate bowl, combine the chopped peanuts and remaining chocolate.
5. Take 2 teaspoons of dough and form into a ball and place on a tray lined with baking paper about 3cm apart. Gently flatten slightly with the back of a spoon. Sprinkle  the nut mixture onto each cookie and pressed into the dough. Bake for 12-15 minutes until cooked but still soft in the centre. Allow to stand on the tray for 5 minutes before transfering to a wire rack to cool completely.

RECIPE | Dark Chocolate & Peanut Butter Cookies | www.highwallsblog.com

Adapted from this recipe.

thumb-pinatacookies

RECIPE | Pinata Surprise Cookies

Recipe |Heart Shaped Pinata Surprise Cookies | www.highwallsblog.com

How much do you like cookies? Just a bit or could you eat a whole packet in one sitting? I only ask because this recipe is heavy on the cookie front. We’re talking 3 layers AND a surprise filling!

Making this recipe was a comedy of errors. I knew exactly what I wanted to make and how to make them, however it still took me three attempts to get right! If you follow me on instagram you might have seen this photo not too long ago. During my first attempt I got my ingredients mixed up and well… let’s just say, although they looked cute, they were not fit for human consumption! My second attempt faired just as well, with the dough way too moist and the cookies didn’t bake properly.

But as they say third time’s a charm! The cookies were a little thicker than I originally intended but I was so scarred from my previous attempts I wasn’t about to complain.

These beauties are nice big, decadent blocks of cookie goodness to give to someone you love.Recipe |Heart Shaped Pinata Surprise Cookies | www.highwallsblog.comRecipe |Heart Shaped Pinata Surprise Cookies | www.highwallsblog.com

 What You Need:
3 cups of flour
1 teaspoon of baking powder
260g of unsalted butter, room temperature
1 cup of sugar
1 egg
1 teaspoon of vanilla extract
Pink or red food colouring

1 cup of icing sugar
1 1/2 tablespoons of milk
1 teaspoon vanilla
mini M&M’s, sprinkles

What You Do:
1. Using an electric mixer, cream together the butter and sugar until light and fluffy.

2. Add the egg, vanilla and food colouring and beat another minute or so.

3. Add the flour and baking powder slowly and blend until all of the flour is incorporated and the dough begins to pull away from the sides of the bowl.

4. Split the dough into two disks and wrap in plastic wrap and move to the refrigerator for about 20-30 minutes.

6. When the dough has chilled and is firm, turn out onto a lightly floured surface and knead until smooth. Roll the dough out between 2 pieces of baking paper. Try to roll the cookies to a thickness of about 5mm. You want them to be thinner than you would usually make cookies.

7. Using a heart shaped cookie cutter, cut out as many cookies as you can with the dough. Take every third cookie and using a sharp knife, cut away a smaller heart from the inside of the cookies. Transfer the cookies to a tray lined with baking paper.

8. Place the cookies back in the freezer for 10 - 15 minutes. Chilling the cookies again will help ensure they keep their shape while baking.

9. Bake cookies for 8-10 minutes, until they are just barely beginning to take on a golden tone. Remove from the oven and transfer to a cooling rack.

10. To make the icing, mix together the icing sugar, milk and vanilla until smooth.

11. Once the cookies have cooled completely, match up into sets of three; two full sized cookies to one cut out cookie.

12. Run a line of icing along one side of the cut out cookie and secure to the flat side of one of the full cookies. Repeat with each set of cookies.

13. You should now have a little cookie ‘box’ in which you can fill with mini M&M’s, sprinkles or other small candies. Once filled, run another run of icing onto the open side of the cut out cookie and secure the remaining full cookie on top as a lid.

14. Finally, run a generous run of icing around the edge of the cookies filling in the gaps between the cookies. Smooth down with a spatula or knife. Clean away any excess from the front sides of the cookies.

Recipe |Heart Shaped Pinata Surprise Cookies | www.highwallsblog.com

thumb-mangococonut2

RECIPE | Salted Mango & Coconut Ice Cream

RECIPE | Salted Mango & Coconut Ice Cream by Erika Rax

Mangos seem to be extra abundant this summer and I have been leaving my local fruit store with the marked down mangos just about every visit. I love chopping them up and freezing to use later as they have so much more flavour when they’re really ripe. This ice cream has some really delicious tropical flavours, requires only a handful of ingredients and has just the right amount of kick due to the salt. Summer in every lick!

Ingredients:
2 cups Mango Puree (about 2 large extra ripe mangos whizzed up)
1 cup Coconut Milk
1/4 cup Maple Syrup
A generous sprinkle of Sea Salt Flakes
Toasted Coconut and some Waffle Cones to serve

Method:
Combine all ingredients in a bowl and give a good mix through. Cover in cling wrap and refrigerate for an hour. Transfer to the bowl of an ice cream maker and follow makers instructions until at an ice creamy consistency.

This ice cream is best served straight away, without further freezing. The lack of sugar means that it freezes really hard so if you do have some left over and want to freeze for later, make sure you leave it out for a good 20 minutes or so to thaw out.

RECIPE | Salted Mango & Coconut Ice Cream by Erika Rax

RECIPE | Salted Mango & Coconut Ice Cream by Erika Rax

transpar2

BLOG  |  INSTAGRAM  |  TWITTER 

thumb-minipavlova

RECIPE| Mini Pavlova

Mini Pavlova Recipe | www.highwallsblog.comLast Sunday was Australia Day; the official national day of Australia. Kind of like the USA’s fourth of July, it is a day of patriotism and basically a solid excuse to do something “Aussie”. Most people play cricket, go to the beach, or have a BBQ. The national youth radio station Triple J has a yearly countdown called the Hottest 100. I along with most of the country spent my day listening to countdown as I always do. Originally that was the entirety of my ‘celebrations’ but around mid afternoon I was suddenly inspired to try my hand at Pavlova.

For those of you unfamiliar with the dish, Pavlova consists of a base of baked meringue (crispy on the outside and soft on the inside) topped with outrageous amounts of cream and fruit and berries. Despite being originally created in New Zealand, Pavolva has become one of those quintessentially Australian desserts. It is also renowned for being difficult to master due to the delicate nature of the meringue, but I figured ‘how hard can it be?’

I forwent the standard huge size of Pavlova in favour of a mini version for individual servings. There seemed to be a lot of variety in recipes on-line, so I ended up cobbling together a simple method from a few different sources. The end result was better than I could have imagined! The meringue is so light and crispy on the outside and soft and sweet inside. It compliments the berries and cream perfectly! I couldn’t be prouder! If I can nail it on my first attempt, anyone can!

Mini Pavlova Recipe | www.highwallsblog.com
READ MORE

thumb-lavendercupcakes

Recipe | Lavender Coconut Mini Cupcakes

Lavender Coconut Mini Cupcakes by Erika Rax (for www.highwallsblog.com)

After I impulse bought a massive bag of dried culinary lavender online a little while ago, I have been non-stop experimenting to find the perfect recipe to use it in. Let’s just say that there have been some hits and many misses. These guys are definitely a hit. The flavours are pretty subtle and match each other perfectly.

I would suggest enjoying these tiny cakes while wearing your most girliest frock and sipping tea from your daintiest cup.

Lavender Coconut Mini Cupcakes by Erika Rax (for www.highwallsblog.com)Lavender Coconut Mini Cupcakes by Erika Rax (for www.highwallsblog.com)

Coconut cakes
2 eggs
1/3 cup coconut cream
splash of vanilla extract
3/4 cup caster sugar
3/4 self raising flour
1/4 cup shredded coconut

Preheat oven to 180 degrees C. Grease and line 2 mini patty pans.

Using an electric mixer, beat eggs and coconut cream for a minute then add vanilla and caster sugar. Beat for 3 minutes. Add coconut then sift in flour and fold through mixture.

Spoon into patty pans and bake for about 10-15 mins until golden and cakes spring back when lightly touched in the centre. Cool completely on a wire rack before icing.

Lavender Coconut Mini Cupcakes by Erika Rax (for www.highwallsblog.com)

Lavender Buttercream
1/2 cup Dried Culinary Lavender
1/2 cup Caster Sugar
1/2 cup Water
1 and 1/2 cups Icing Sugar
1/2 cup Butter
A drop of violet food colouring

In a saucepan over low to medium heat, add lavender, sugar and water stirring until sugar has dissolved completely. Simmer for another 8-10 minutes then strain and let cool completely. This is a simple syrup which you can use to flavour iced teas, cocktails or ice cream.

To make the buttercream, beat icing sugar and butter with an electric mixer until very light and fluffy. With the mixer still on low, slowly add 1 tbs of the lavender syrup followed by the food colouring.

transpar2

BLOG  |  INSTAGRAM  |  TWITTER 

thumb-xmascookies

RECIPE | Christmas Cookies

Recipe | Christmas Cookies from www.highwallsblog.com
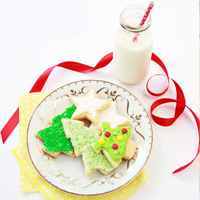
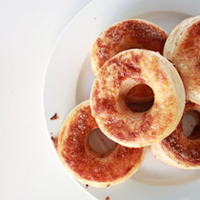
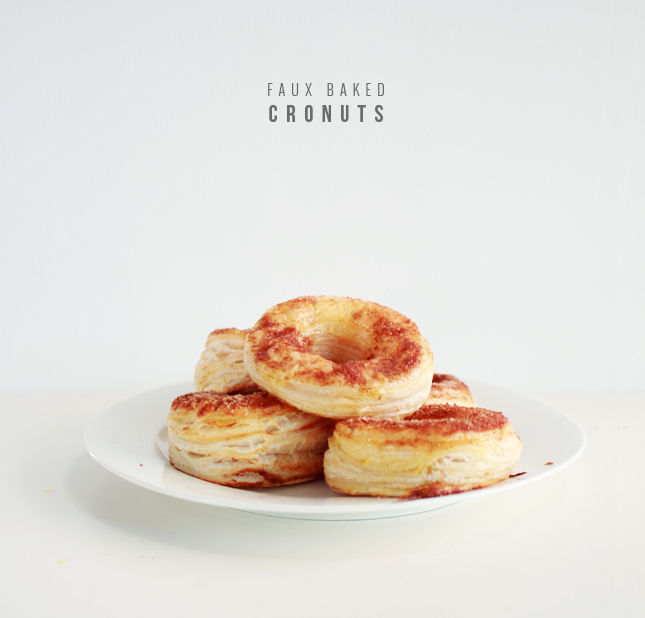
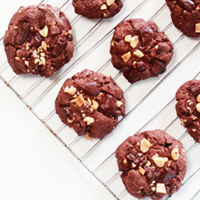
Well kids, it’s only 4 sleeps until Christmas, are you ready? If you’re like me and have finally finished your Christmas shopping you should probably start thinking about what snacks you want to leave out for Santa. The classic choice is of course cookies and milk, and let’s face it; the classics are often the best!

I’m super excited to share this cookie recipe as it is one of my favourites which originated from an unusual source. I found the recipe on the back of a cookie cutter packet. Now normally, I find that these kinds of ‘freebie’ recipes tend to be a little lacklustre, but I was so keen to try out my new cutters that I gave it a try anyway. Thank god I did! They are so simple to make and additively tasty! The perfect treat to leave out for everyone’s favourite festive friend.  Recipe | Christmas Cookies from www.highwallsblog.com Recipe | Christmas Cookies from www.highwallsblog.com What You Need:

250g of butter
3 cups of Plain Flour
1 cup of Icing Sugar
1 egg
1 tablespoon of milk
1 teaspoon of Vanilla extract

2 egg whites
2 teaspoon of lemon juice
3 cups of icing sugar
Green food colouring
Your choice of toppings (Optional)

What You Do:
1. Place butter chopped, flour and icing sugar in the bowl of a mixer and process until the mixture resembles fine breadcrumbs.

2. Add the egg, milk and vanilla and process again until the mixture comes together as a dough.

3. Turn the mixture out onto a lightly floured surface and knead until the dough is smooth. Split in half and form into two discs. Wrap each disc in plastic wrap and refrigerate for at least 30 minutes.

4. Preheat the oven to 160 degrees Celsius. Remove the dough from the fridge and place  each disc between two sheets of baking paper. Roll flat between the sheets, until around 5mm thick.

5. Using cookie cutters (or with a knife by hand) cut Christmas shapes from the dough and transfer onto a lined baking tray leaving a 2cm gap in between each cookie.

6. Bake for 11 minutes or until golden. Remove from the oven and allow to cool on a wire rack.

Once completely cool, you can make the icing. I used this  Royal Icing Recipe:

7. Using the mixer again, whisk egg whites with the lemon juice until combined.

8. Keeping the mixer on low speed, gradually add in sifted icing sugar part by part until smooth. Add food colour of your choice and mix to combine.

9. Spoon the icing into a ziploc bag and snip the corner to create a homemade icing bag and pipe onto your cookies. Top with your choice of toppings - I used mini M&M’s and silver balls as decoration as well as desiccated coconut dyed green and lime jelly crystals. Allow icing to set until it is hard. 

Recipe | Christmas Cookies from www.highwallsblog.comRecipe | Christmas Cookies from www.highwallsblog.com

thumb-flavoredsalt

Last Minute Edible Gifts

Last Minute Edible Gifts | by Erika Rax

Eek! It’s crunch time friends! If you still haven’t gotten all your gifts sorted your options are either braving the crowds and getting something in-store or getting in your kitchen and throwing a couple of ingredients together. I can promise you that your foodie friends will be very happy if you choose the latter option. I can also promise that it will take no longer than 10 minutes to make all 3 of these. Everyone wins!

You Will Need:
Rose Salt
1 cup Sea Salt flakes
2 tbs Dried Rose Petals

Lavender Sugar
1 cup Caster Sugar
2 tbs Dried Lavender

Mexican Cocoa
1 cup Dutch Processed Cocoa
1 tsp Cayenne Pepper
1 tbs Ground Cinnamon

Directions:
Just combine all ingredients in a jar, seal and give a quick shake to mix it up.

All of these mixes can be substituted for regular salt/sugar/cocoa in recipes to take it up a notch.They are also very easy to make your own if you don’t have these particular ingredients in the pantry. Think vanilla, rosemary, dried citrus zest etc.

Last Minute Edible Gifts | by Erika Rax Last Minute Edible Gifts | by Erika Rax Last Minute Edible Gifts | by Erika Rax
transpar2

BLOG  |  INSTAGRAM  |  TWITTER