thumb-citrus-cakes

EAT | Ombre Citrus Cakes

 Ombre Citrus Cakes - in lemon, lime and orange! | www.highwallsblog,com
Hey! Guess what! Today marks the 4th anniversary of this blog! Way back when I started this blog in 2010 we had a different name, a different format and the only person who read it was me! Look how far we’ve come! 4 years isn’t exactly one of the big milestones, but why not celebrate with cake, right? There’s always room for cake!

Let’s talk about cakes and the pressures of making a cake look ‘perfect’. With the amazing talent showcased on Pinterest and food blogs, it’s easy to feel like your cake needs to have that perfect frosting, be perfectly even and always look ready to be splashed across the pages of a magazine. While I am a perfectionist of the highest degree, I gotta say: there’s something kind of special about a messy cake.

Ombre Citrus Cakes - in lemon, lime and orange! | www.highwallsblog,com Ombre Citrus Cakes - in lemon, lime and orange! | www.highwallsblog,com

READ MORE

thumb-thumbprint-cookies

EAT | Strawberry Jam Thumbprint Cookies

Thumbprint Cookies with Strawberry Jam | www.highwallsblog.com

Do you want some jam? No seriously, let me give you some. I don’t know why or how, but we seem to have accumulated vast amounts of strawberry jam. Store bought, homemade, you name it: we got it. Where did it come from? Is there a jam fairy? Maybe it’s like when you lose a tooth and the tooth fairy leaves a dollar under your pillow. Maybe every time I clean my fridge, the jam fairy sneaks in under the cover of darkness and leaves me another jar of strawberry jam to thank me for my cleanliness.

So what does one do with this much jam…? That’s not a segue, I’m actually asking. Help me out guys! Give me suggestions of your favourite jam related recipes, because I am already totally over jam sandwiches. Sandwiches are lame. Cookies are what the people really  want!

And to be honest, these cookies are the bomb. The recipe is so easy even a child can make them. It goes a little something like this: Put ingredients in mixer until you make dough -  Roll into little balls – smoosh your finger or thumb down onto each ball to create a little cookie bowl –  fill with jam – get said jam everywhere because you always overfill the cookies. Rinse and repeat as many times as necessary until you no longer have any jam or you develop diabetes. Whichever comes first. (please don’t get diabetes) I think I’m delirious from a jam overdose. I’ve eaten so many of these cookies that I’ve lost count. Send help!

Thumbprint Cookies with Strawberry Jam | www.highwallsblog.com

Thumbprint Cookies with Strawberry Jam | www.highwallsblog.com

INGREDIENTS:
1 cup of butter
2/3 cup of sugar
2 egg yolks
1 teaspoon of vanilla extract
2 cups of plain flour
1/2 teaspoon of salt
Jam
1. Preheat oven to 180 degrees celcius and prepare a baking tray with baking paper.2. With an electric mixer beat together the butter and sugar on medium-high speed until the mixture is light and fluffy. Add the egg yolks and vanilla extract and beat again to combine.3. In a separate bowl, mix together the flour and salt and then  add to the butter mixture in small amounts, mixing in between each addition until dough forms together in a ball.

4. From the dough, roll small amounts into balls roughly 1 inch in size. Place the balls on the prepared baking tray and flatten balls slightly with your thumb (or the back of a small spoon) to leave an indent in the center.

5. Place in the oven and bake for r 8 to 10 minutes or until the bottom is just golden. Remove from the oven and carefully press down again on the indentations to re-define them.

6. Fill each cookie with jam and then return to the oven to bake until the jam melts slightly and edges of cookies are lightly golden (around 3 or 4 minutes). Allow to cool on a wire rack before serving.

NOTE: Another option is to use honey instead of jam- it wont look as aesthetically pleasing as the honey will melt more than the jam, but as it melts the honey soaks into the cookies for a deliciously sweet alternative.

Thumbprint Cookies with Strawberry Jam | www.highwallsblog.com Strawberry Jam Thumbprint Cookies | www.highwallsblog.comThumbprint Cookies with Strawberry Jam | www.highwallsblog.com

thumb-icecream-cupcakes

EAT | Ice Cream Cupcakes

Cupcakes iced with ICE CREAM  - Brilliant! | www.highwallsblog.com

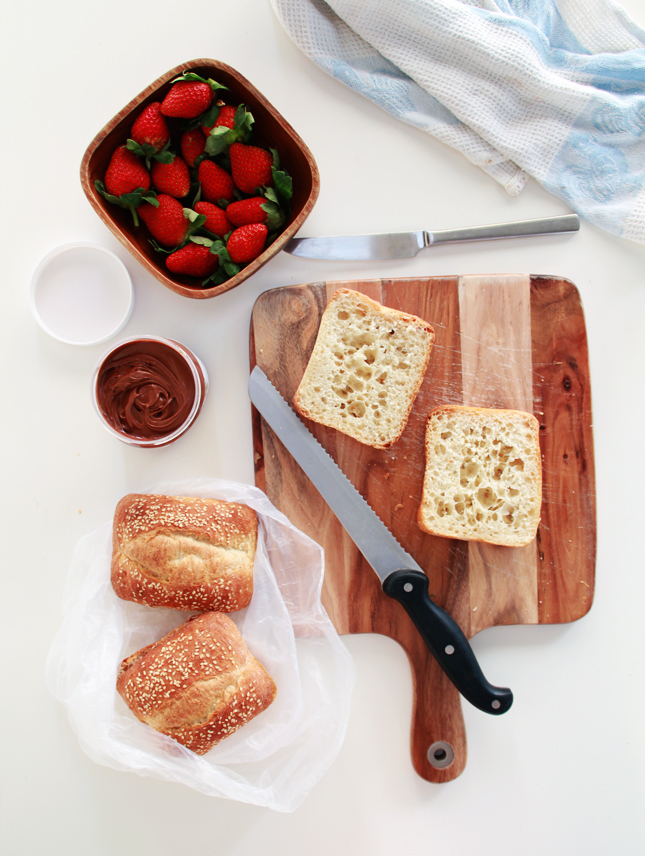
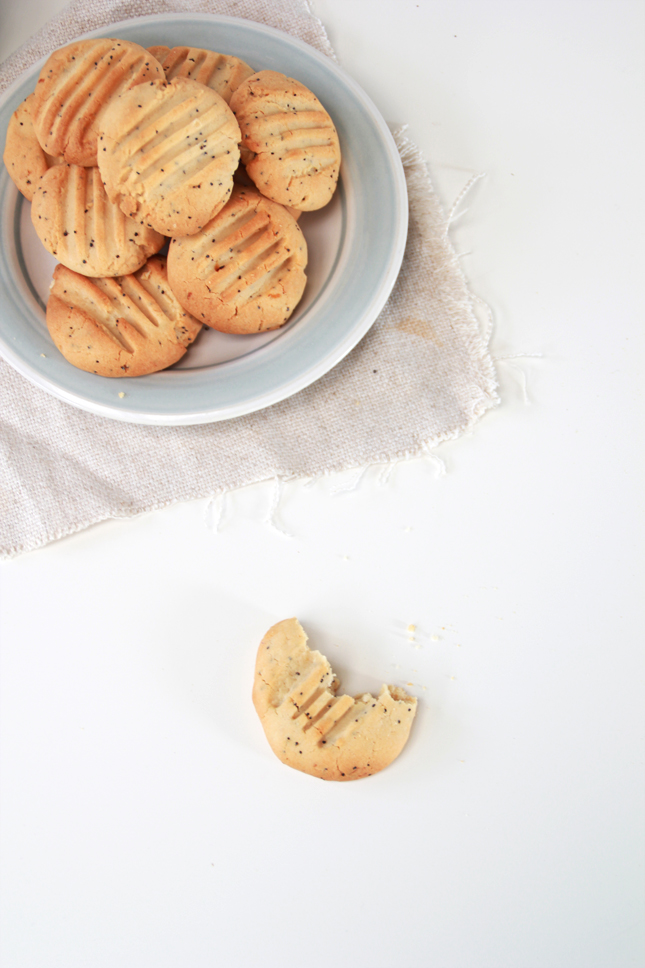
A friend of mine once declared that only women love cupcakes. No exceptions. I was simultaneously outraged at such a sexist remark and disappointed on behalf of these hypothetical men who apparently aren’t allowed to be into tiny cakes with sprinkles. I mean, who doesn’t love a good cupcake? Surely women aren’t the only ones who enjoy the soft bounce of the sponge like cakes, the sweetness of the icing and the playful colours and decorations. Say what you will about cakes in general, cupcakes have always been a crowd pleaser in my book! The idea that only one demographic can love this classic dessert is outrageous! On behalf of these men who have been so cruelly  deprived, I say ‘Let them eat (cup)cake!’

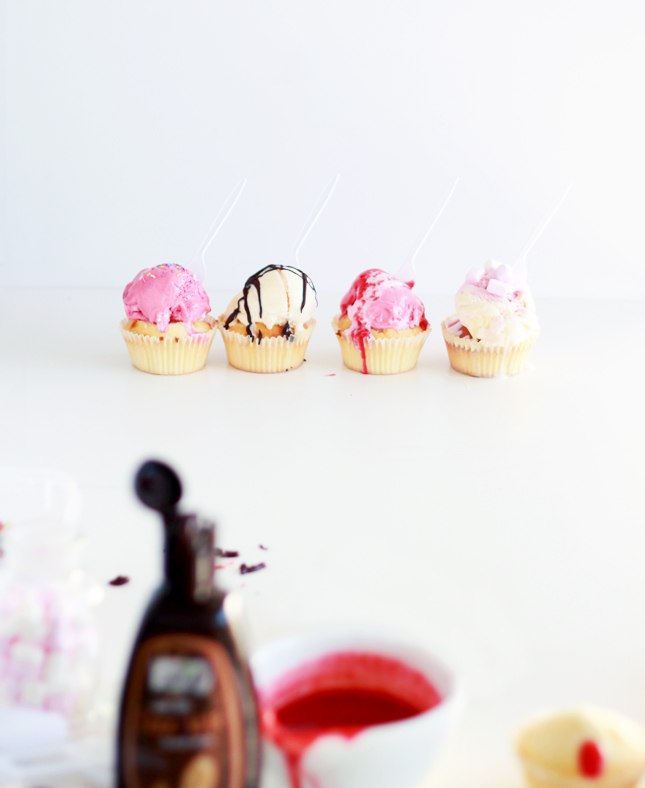
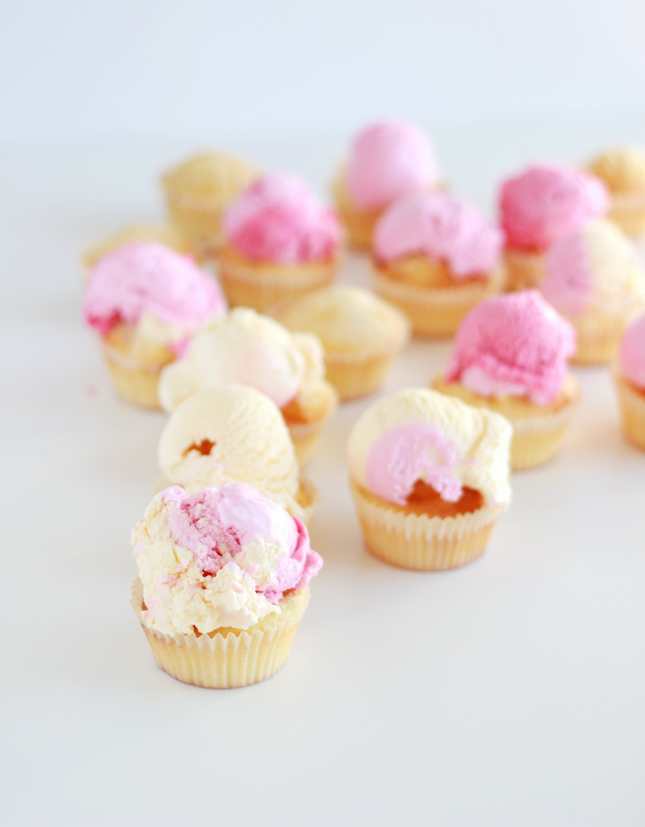
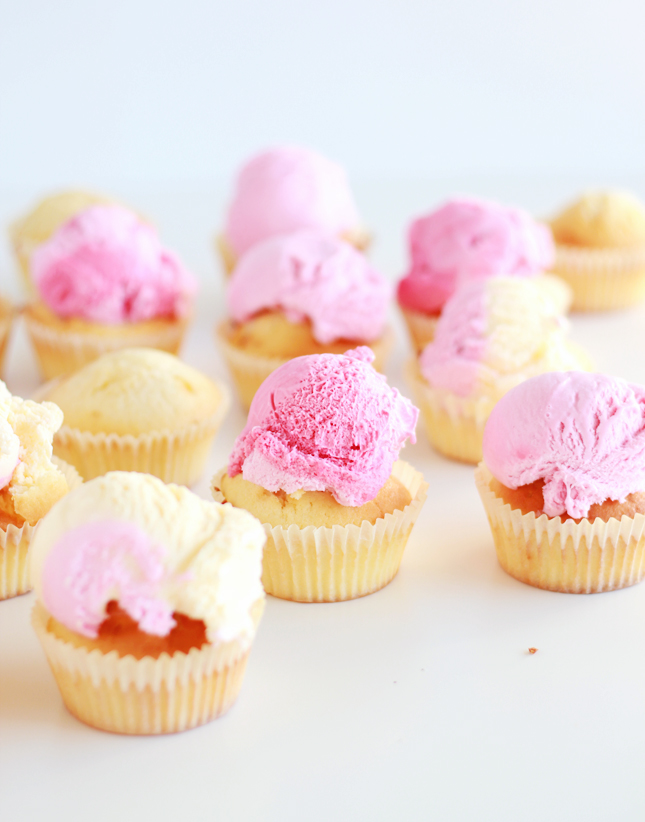
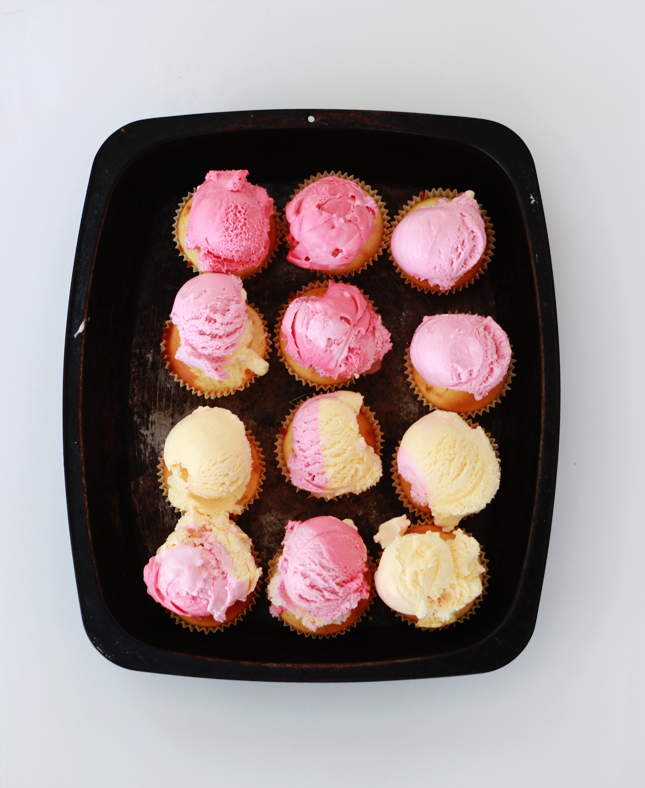
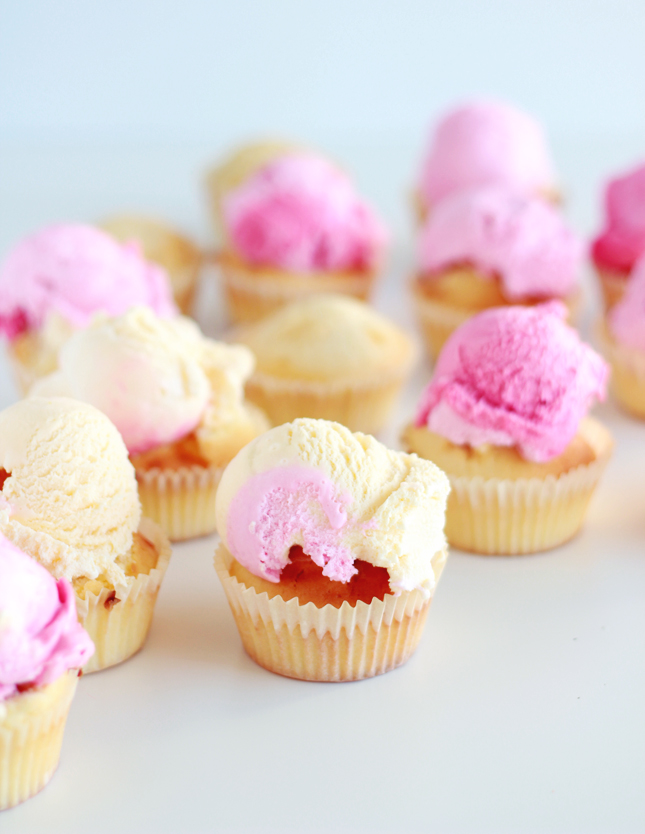
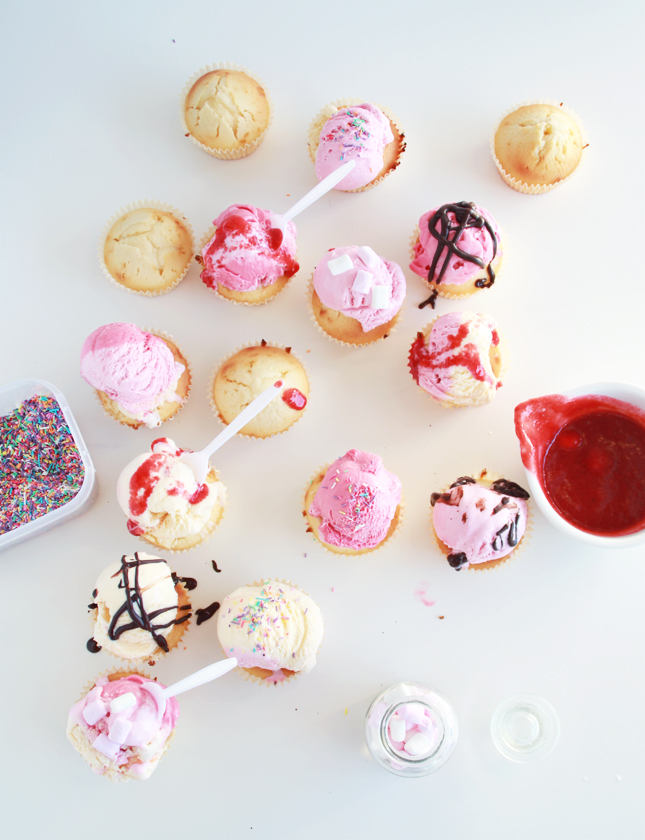
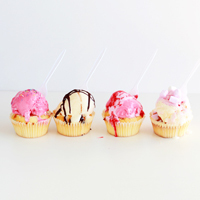
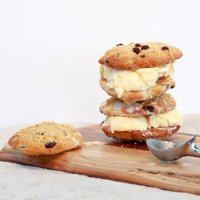
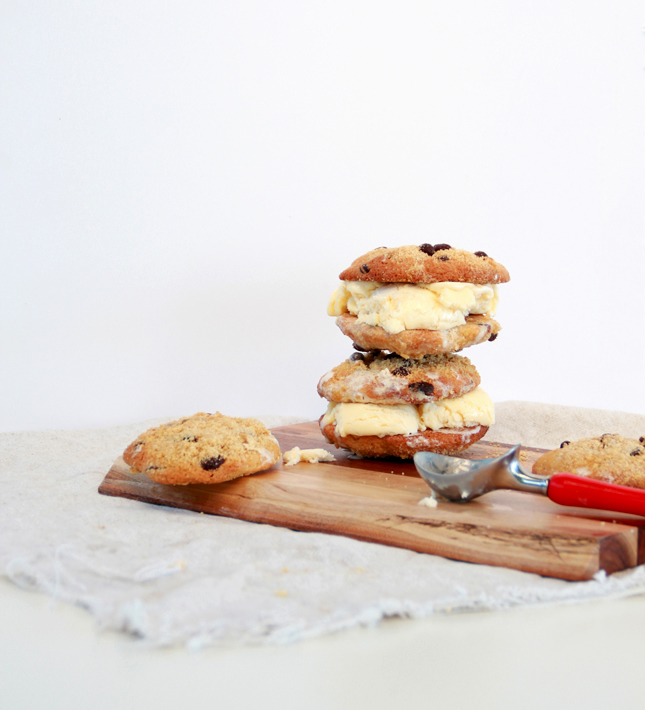
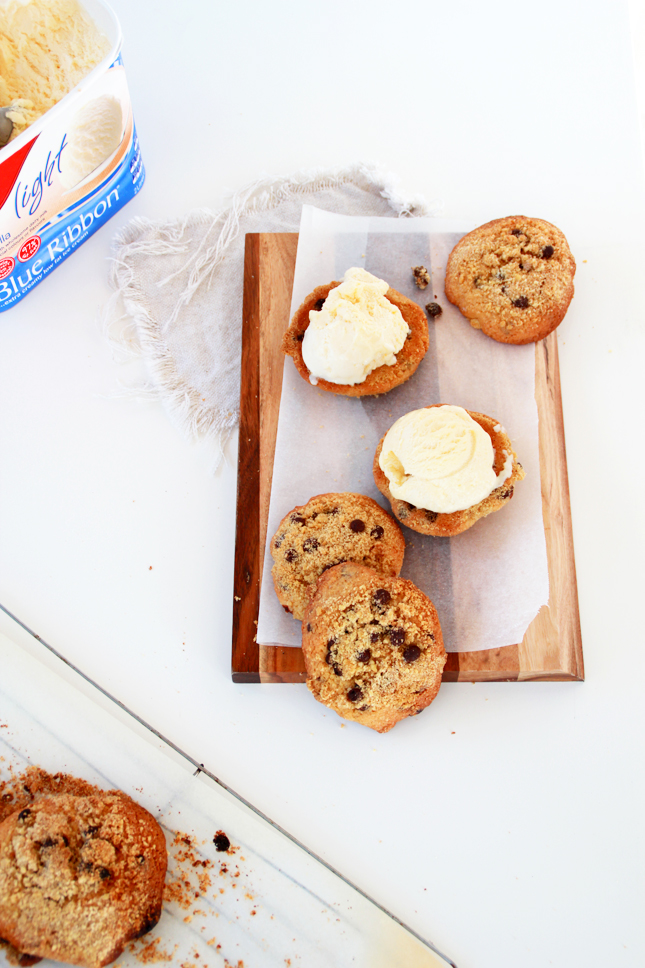
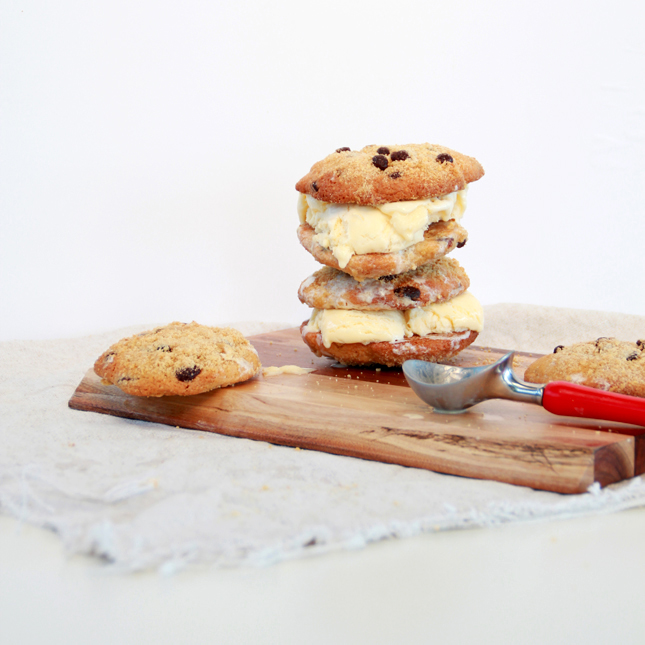
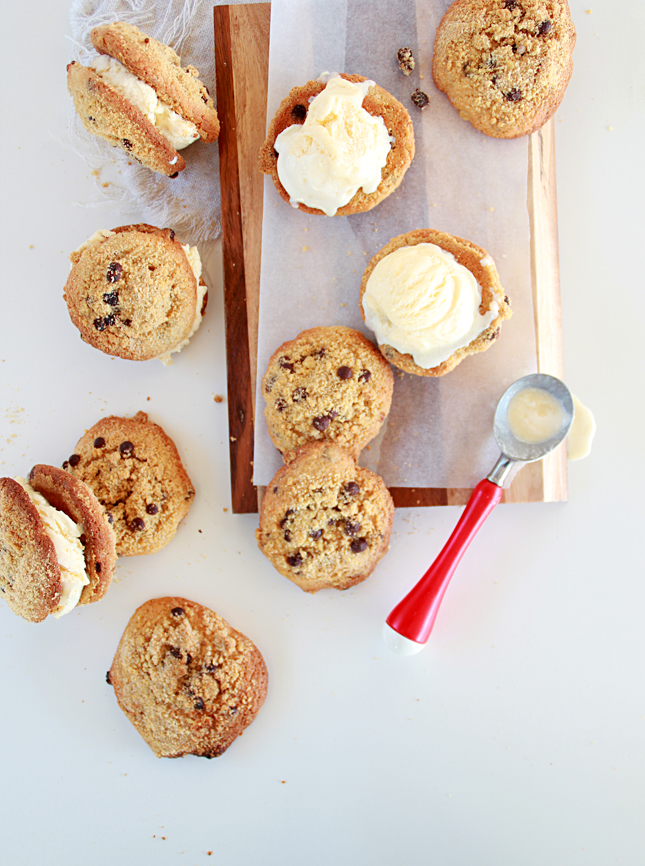
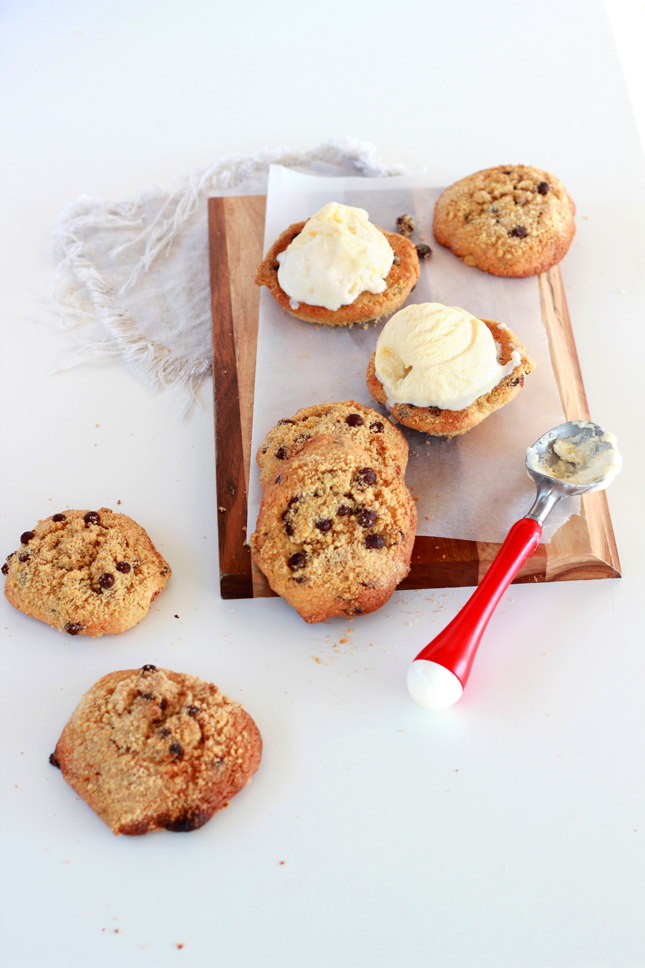
Well, Ice Cream Cupcakes  if you want to be precise. I admit, that title is kind of misleading. These are not cupcakes made of ice cream, rather cupcakes iced with ice cream. That’s right, you heard me right. No piping bags. no powdered sugar. Just a perfect, pretty scoop of ice cream.

Cupcakes iced with ICE CREAM  - Brilliant! | www.highwallsblog.com

Before we go any further we need to discuss methods of consumption:

Your first option is perfect for when you cupcakes are still fresh and warm from the oven. Serve in a bowl with a spoon, allowing the ice cream to get all melty over the warm cake base. The cold, gooey ice cream combined with the warm cake sponge is, unsurprisingly, a delight.

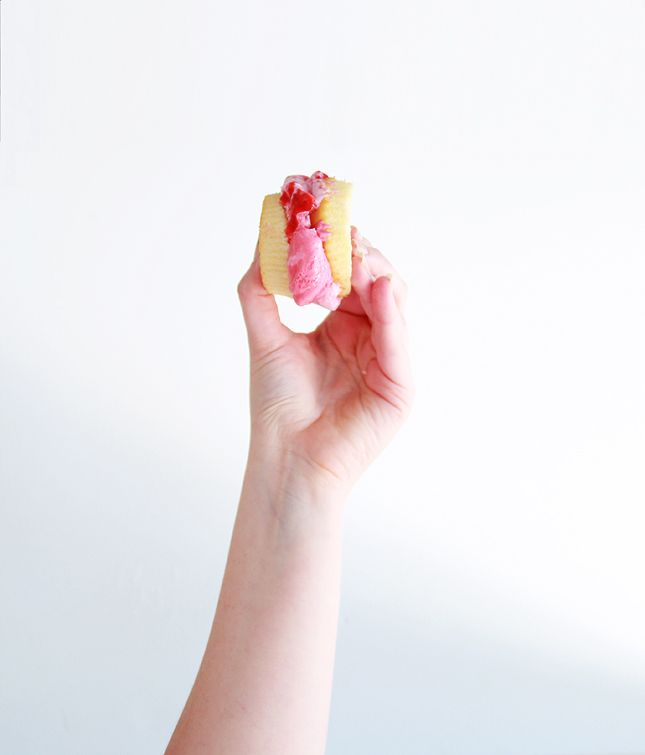
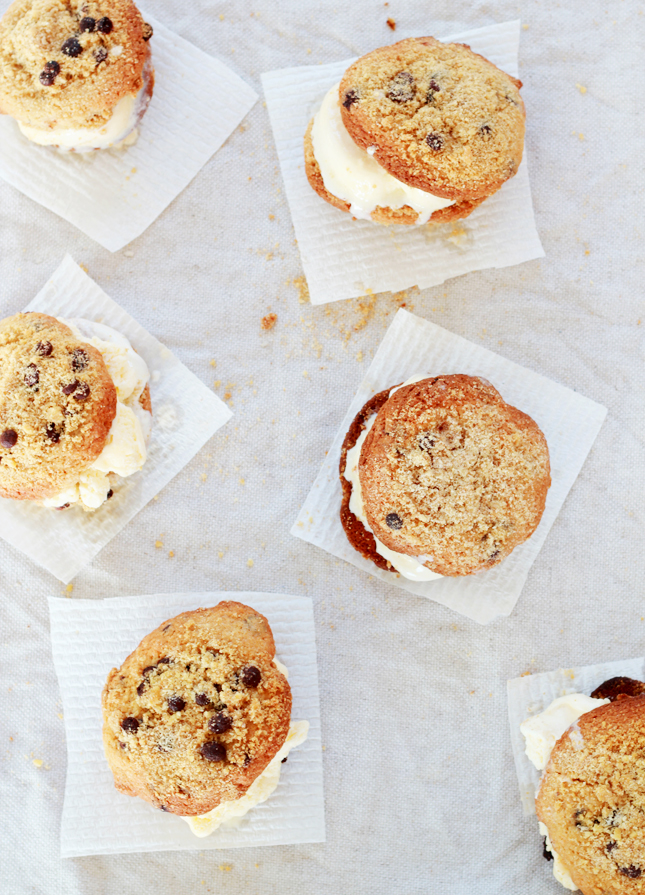
The second is, in my opinion, the correct way to eat cupcakes in general. Twist the base of your cupcake away from the top, separating into two halves. Take the bottom half and press down onto the icing (or ice cream in this case) and enjoy as a mini cake sandwich. Trust me, if you’re not eating your cupcakes this way you soon will be. No more awkwardly trying to get your mouth around both the cake base and the too-tall mound of icing. Once you try it, you’ll never go back!

Cupcakes iced with ICE CREAM  - Brilliant! | www.highwallsblog.com Cupcakes iced with ICE CREAM  - Brilliant! | www.highwallsblog.com

INGREDIENTS:
Cupcakes (recipe below)
Icecream
Toppings & Sprinkles
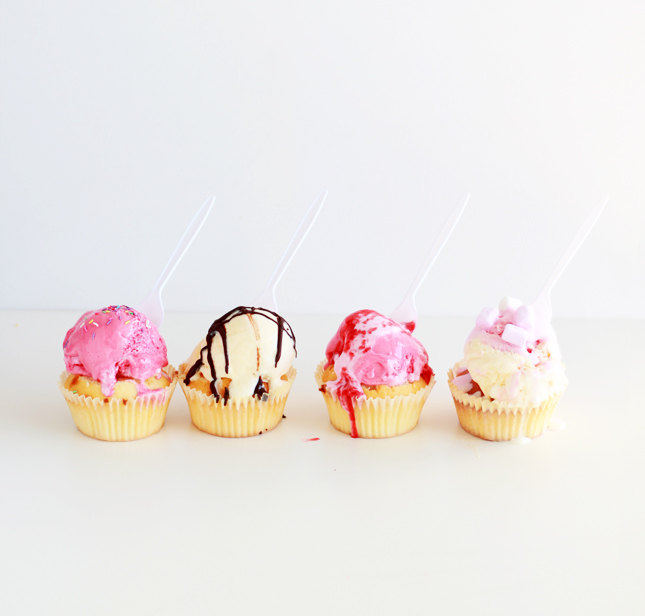
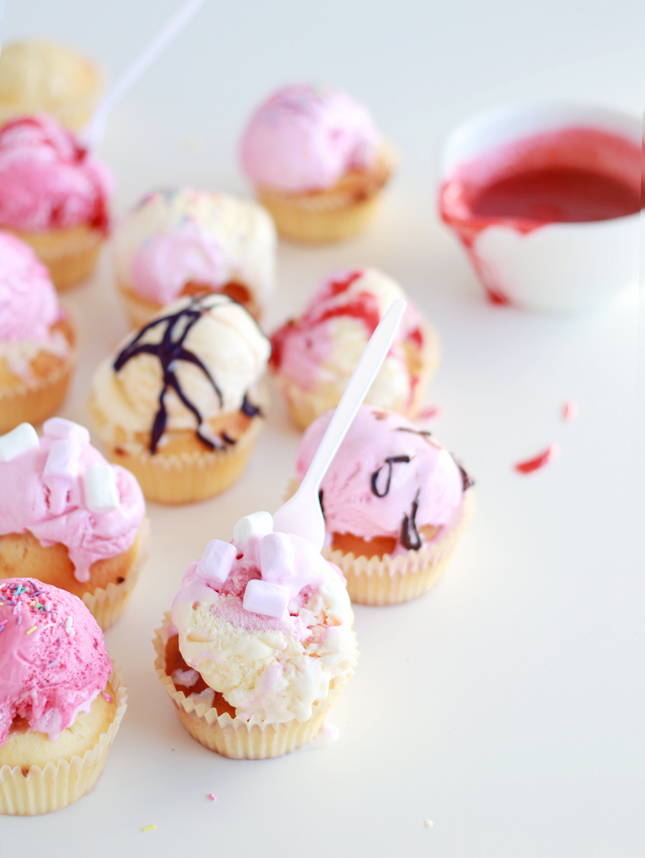
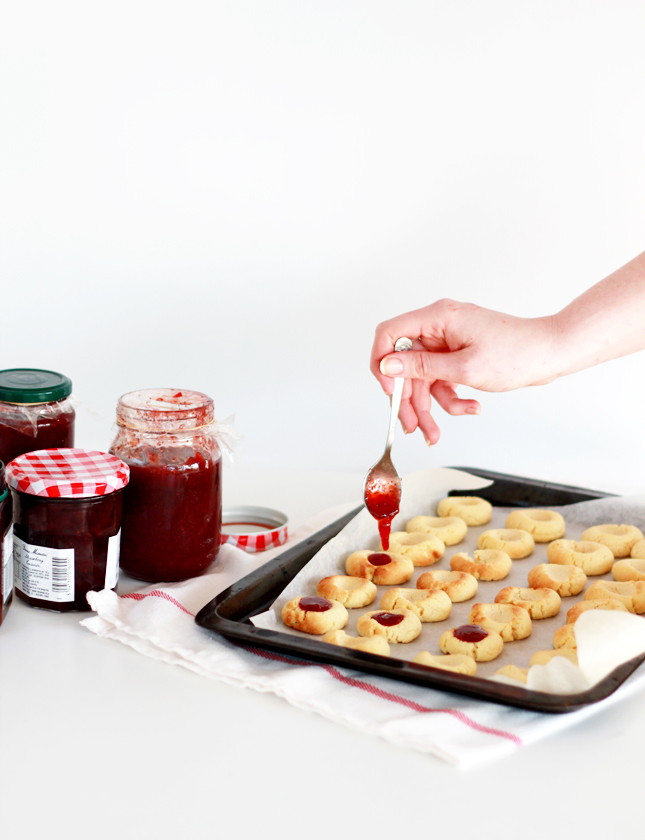
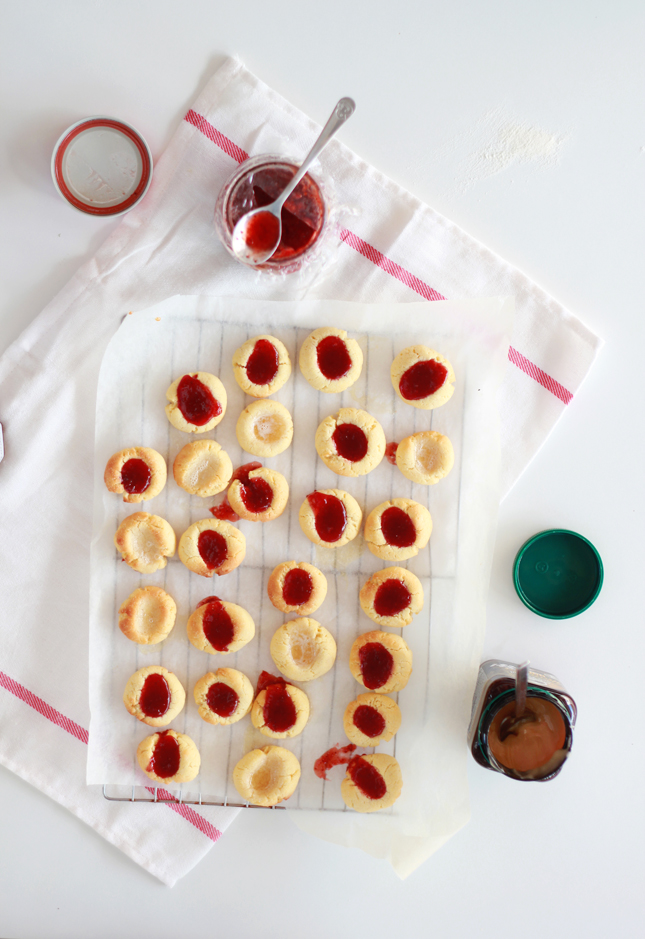
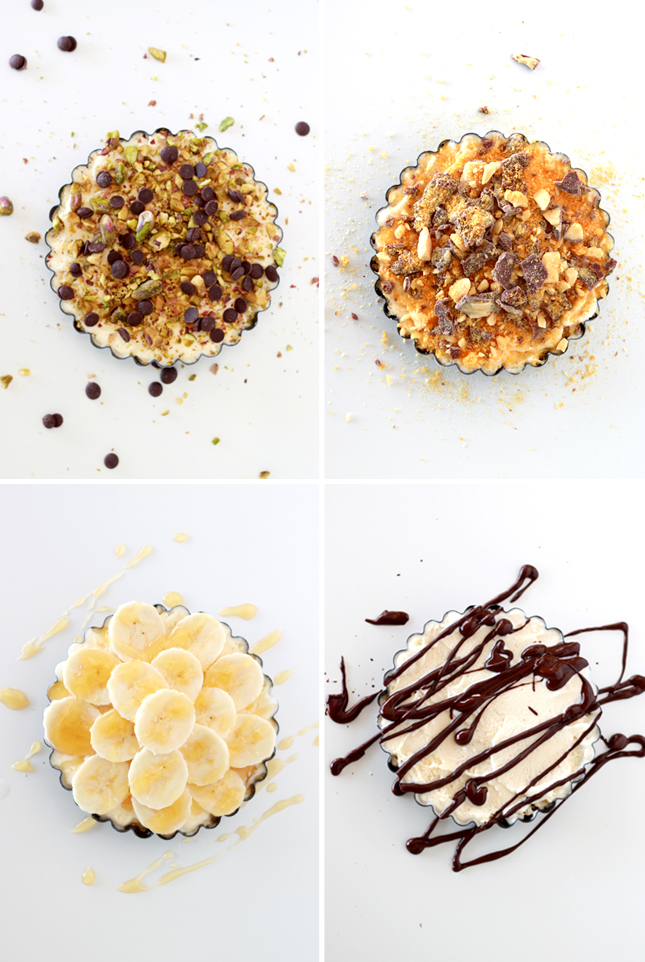
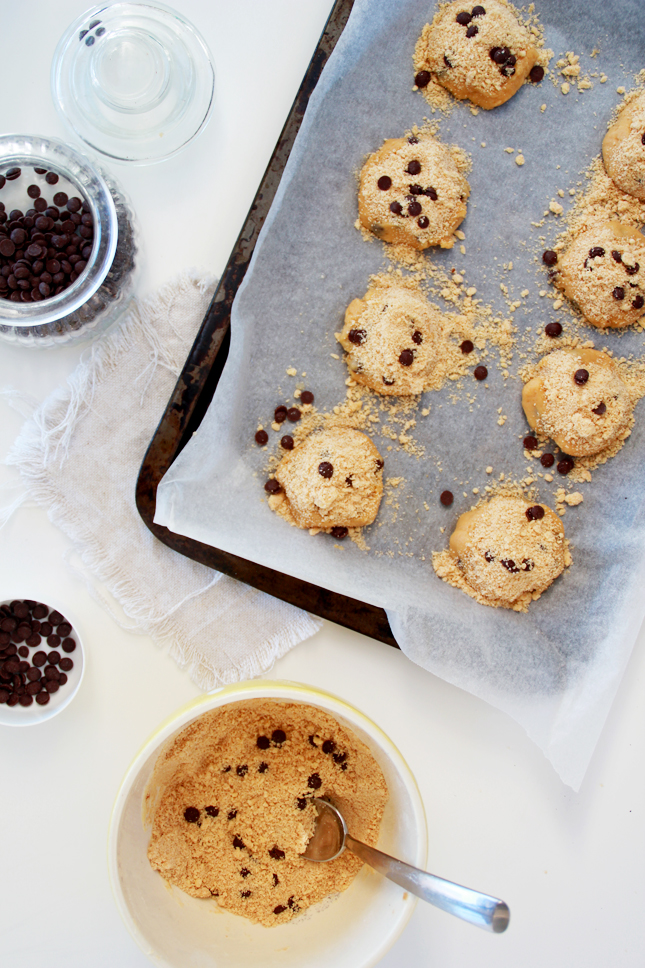
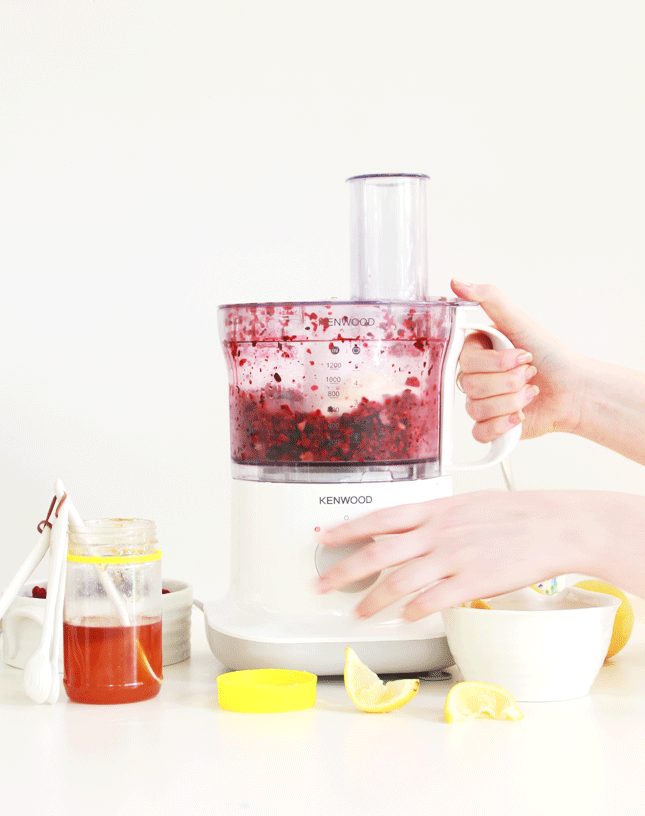
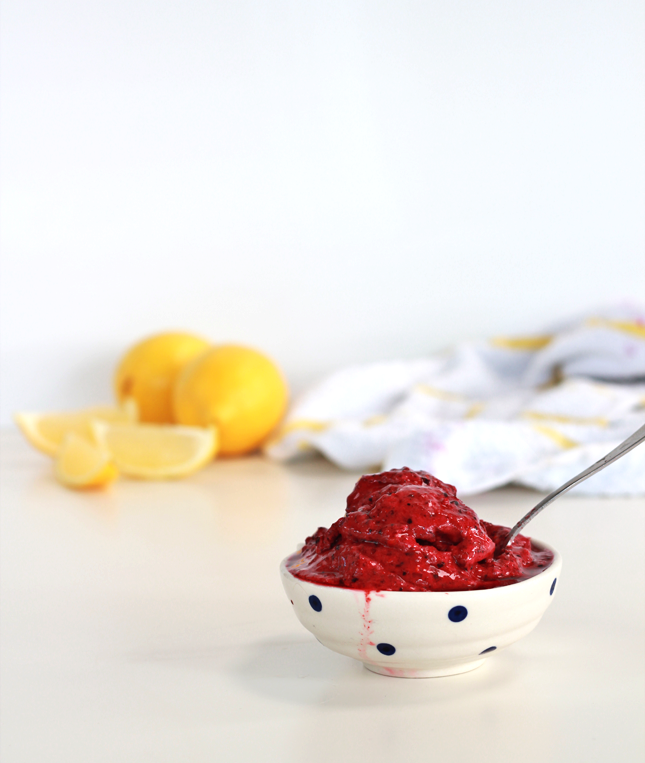
1. Using a serrated knife, cut the top off of any cupcakes that have risen unevenly, this will help the ice cream to stay on top of the cake. (You don’t need to cut off too much, just enough to have a  flat surface for the ice cream to sit on.2. Top each cupcake with  a scoop of ice cream (in your choice of flavour). The key to getting a nice round ball of ice cream is to dip your ice cream scoop into a glass of hot water in between cakes. The warmth of the spoon will stop the ice cream from sticking to the metal.3. Finish with your choice of toppings; I used leftover strawberry syrup from those delicious strawberry floats, chocolate topping, mini marshmallows, and good old fashioned sprinkles. If your cupcakes are still warm, serve immediately in a bowl. If not, return to the freezer for 10 minutes to firm up before serving.

———————————————————————————————-

Classic Vanilla Cupcakes

INGREDIENTS:
2¾ cups of cake flour
1⅔ cups of sugar
¾ teaspoon of salt
1 tablespoon of baking powder
12 tablespoons of softened  butter
4 egg whites, plus 1 whole egg
1 cup of milk
3 teaspoons of vanilla
1. Preheat your oven to 180 degrees Celsius.2. Mix the flour, sugar, salt and baking powder together in the bowl until well combined.3. Add the softened butter, a small amount at a time, allowing the butter to combine before adding the next part. With your mixer on low speed, add one egg white at a time, followed by the whole egg. Ensure each egg white is completely incorporated before adding the next.

4. In a separate bowl, add milk and vanilla extract and whisk together. With the mixer on low again, add the milk mixture a small amount at a time, allowing the dry and wet ingredients to combine properly in between additions. Scrape down the sides of the bowl as you go and after adding all the mixture, continue to beat for an additional minute or two.

5. Line a cupcake tray with cupcake wrappers and spoon the batter into each, filling around 2/4 of the way.

6. Place in the oven and bake for 16 – 18 minutes or until a toothpick comes out clean. Set aside to cool before serving.

Cupcakes iced with ICE CREAM  - Brilliant! | www.highwallsblog.comCupcakes iced with ICE CREAM  - Brilliant! | www.highwallsblog.com Cupcakes iced with ICE CREAM  - Brilliant! | www.highwallsblog.com Cupcakes iced with ICE CREAM  - Brilliant! | www.highwallsblog.com Cupcakes iced with ICE CREAM  - Brilliant! | www.highwallsblog.com

thumb-icecream-pie2

Ice Cream Pie [ Take 2 ]

Try out Ice Cream Pie  - Click through for Full Recipe

So how did you like yesterday’s Mixed Berry Ice Cream Pie recipe?  As promised, I thought I’d share another spin on this delicious dessert for those of you looking for a more ‘low-key’ version.

This time we’re using wafer biscuits (for that more ice cream cone style crunch) in the crust, fill it with vanilla ice cream (or you favourite flavour) and load up with your favourite toppings.  These guys are great to have pre-prepared in your freezer for a last minute dessert you can tailor from person to person. Also great for letting the little ones get involved, as they can go crazy with sprinkles and toppings!  Some of our favourite vanilla combinations include; Pistachio and dark chocolate chips, chocolate sauce, crushed honeycomb Crunchie bar and sliced banana with honey. Yuuuuuuum!

What ice cream / topping combo’s would you try? Chocolate with Peanut butter? Salted Caramel? Oreo? The choices are endless!

Try out Ice Cream Pie  - Click through for Full Recipe Try out Ice Cream Pie  - Click through for Full Recipe

 INGREDIENTS:
1 packet of Vanilla Wafers
1 cup of butter
1/3 cup of sugar
1 pint of vanilla ice cream
Toppings of your choice
 1.  Place the wafers in a food processor and blitz until reduced to crumbs. Transfer to a bowl to a large mixing bowl. Along with the sugar (you can omit the sugar if you prefer).2. Melt the butter and allow to cool slightly before using. Add gradually to the crumb mixture, mixing as you go until the mixture starts to clump together. (you may not need all the butter)3. Divide the mixture into 4 - 5 mini pie or tart tins,  pressing down to form a thick crust. The mixture should come together as you press down. Place in the freezer to set for 30 minutes.

4. Remove the crust from the freezer and fill with the ice cream. Ensure that the crust is completely filled and smooth down the top. Wrap in plastic wrap and return to the freezer for 30 minutes to an hour.

5. To serve, remove the pie from the freezer and finish with your favourite toppings. Return to the freezer or serve immediately.

Try out Ice Cream Pie  - Click through for Full Recipe

thumb-icecream-pie1

EAT | Mixed Berry Ice Cream Pie

Mixed Berry Ice Cream Pie | www.highwallsblog.com

Our next stop on the runaway train that is Ice Cream Month, is the city of Pie Town. Now I know a lot of you out there will be we acquainted with Pie Town in the form of its’s flaky pastry, fruit filled exports like the all American apple pie. But today I’m going to introduce you to its little known cousin; Ice cream pie.

Similar to cheesecake, this little guy has a sugary cookie crust encasing its cream insides.  Add in some mixed berries that, when combined with vanilla ice cream, give the pie that sweetness and tart you didn’t realise you’d been craving. This is ice cream for grown ups people. Your friends are going to suspect that you are perhaps secretly a chef in you spare time, after you whip this one out at parties. (Do people whip out desserts at parties? Maybe I have the wrong idea about what happens at parties… or maybe the parties I’m attending are totally awesome!)

Of course if berries aren’t really your wheelhouse, you can substitute them for other ingredients, but we’ll get back to that tomorrow with a slight variation on this recipe. For now, sit back and revel in the knowledge that you only need a few simple ingredients to make something oh-so amazing.

Mixed Berry Ice Cream Pie | www.highwallsblog.com

Mixed Berry Ice Cream Pie | www.highwallsblog.com

INGREDIENTS:
1 packet of Nice Biscuits1 cup of butter

1/3 cup of sugar

1 pint of vanilla ice cream

1 packet of frozen mixed berries

1.  Place the biscuits in a food processor and blitz until reduced to crumbs. Transfer to a bowl to a large mixing bowl. Along with the sugar (you can omit the sugar if you prefer).

2. Melt the butter and allow to cool slightly before using. Add gradually to the crumb mixture, mixing as you go until the mixture starts to clump together. (you may not need all the butter)

3. Press the mixture evenly into a pie or tart tin, pushing up at the sides and smoothing the bottom. The mixture should come together as you press down. Place in the freezer to set for 30 - 40 minutes.

4. Meanwhile allow the vanilla ice cream to soften in a large bowl. Place the 3/4 of the frozen berries in a food processor and pulse a few times to break down into smaller pieces.

5. Mix the berries (and any juices) into the softened ice cream. If you are feeling it, add in some finely chopped chocolate as well.

6. Remove the crust from the freezer and fill with the ice cream and berries. Ensure that the crust is completely filled and smooth down the top. Wrap in plastic wrap and return to the freezer for at least an hour.

7. To serve, remove the pie from the freezer and allow to sit on the bench to soften slightly before cutting into slices. Top with the remaining frozen berries and dusted with icing sugar if you so desire.

Mixed Berry Ice Cream Pie | www.highwallsblog.com

Mixed Berry Ice Cream Pie | www.highwallsblog.com

Mixed Berry Ice Cream Pie | www.highwallsblog.com

thumb-icecream-sandwiches

EAT | Choc Chip Crumb Cookie Icecream Sandwiches

Chocolate Chip Crumb Cookie Ice Cream Sandwiches! WOW! | www.highwallsblog.com

As we discussed yesterday, July is ice cream month in the US. “No Fair!” cry out all the other countries, but to them I say - why should America get all the fun?  Ice cream month sounds amazing, so let’s crash this party! We’re going to celebrate with a whole series of ice cream related recipes over the next few weeks. Let’s kick things off with an old faithful; ice cream sandwiches.

These cookies are an amalgamation of chocolate chip cookies and crumb cakes . As the name suggests, these cookies are super crumbly and while delicious on their own, when combined with ice cream they are next level.  A soft, crumbly cookie is the key to a good ice cream sandwich and these cookies sure do deliver! The crumble and chocolate chips mix in with the ice cream into a glorious messy marriage. Napkins are a must on this one guys! Be prepared for sticky fingers and dripped on shirts! Ice cream sandwiched by cookies. Is there anything better?

Chocolate Chip Crumb Cookie Ice Cream Sandwiches! WOW! | www.highwallsblog.com

Chocolate Chip Crumb Cookie Ice Cream Sandwiches! WOW! | www.highwallsblog.com

INGREDIENTS:

1 large egg
1/2 cup of caster sugar
1/3 cup of brown sugar
125g softened butter
1 teaspoon of vanilla essence
2/3 cup of self-raising flour
1 cup of plain flour
Roughly 1 cup of mini chocolate chips
Vanilla Ice cream

Crumble topping:

1/2 cup of plain flour
50g of chopped chilled butter
1/4 cup of brown sugar

1. Preheat oven to around 180 degrees Celsius (or 160 degrees if you have a fan-forced oven)

2. Place butter, caster sugar, brown sugar and vanilla together in a bowl and beat with an electric mixer until the mixture is pale and of a creamy consistency.

3. Add the egg and beat again until combined.

4. In a separate bowl, mix together the plain flour and self-raising flour. In small parts, stir the flour mixture into the butter/sugar mix until the mixture starts to form into dough. Mix in half the chocolate chips at the same time.

5. Spoon small amounts of the dough and roll in the palm of your hand into a ball.

6. Place dough balls onto a baking tray lined with baking paper 5cm apart. With the back of a spoon press an indent into the center of each cookie.

7. To make the crumble topping, place the flour and butter in a bowl and using your fingertips, rub the butter into the flour. Continue to do this until your mixture resembles coarse breadcrumbs. Add the brown sugar and stir to combine.  Mix in the remaining chocolate chips and sprinkle the crumble topping over the cookies.

8. Bake for about 5 minutes, as the cookies spread out, top with more crumble topping. Cook for another 7 - 10 minutes or until cookies are lightly golden but still very soft.

9. Transfer the cookies to a wire rack and allow to cool. Once completely cool, place 1 – 2 scoops of ice cream between two to cookies and press together firmly.

Chocolate Chip Crumb Cookie Ice Cream Sandwiches! WOW! | www.highwallsblog.com

Chocolate Chip Crumb Cookie Ice Cream Sandwiches! WOW! | www.highwallsblog.com

 Chocolate Chip Crumb Cookie Ice Cream Sandwiches! WOW! | www.highwallsblog.com

Chocolate Chip Crumb Cookie Ice Cream Sandwiches! WOW! | www.highwallsblog.com


thumb-nutella-strawberry

EAT | Nutella & Strawberry

Nutella & Strawberry | www.highwallsblog.com

Hey guys, I’m jumping on a plane today – heading interstate for a wedding (and a long weekend!) but before I go, I thought I’d share one of my guilty pleasures.

Ahh Nutella, the most delicious of the falsely touted ‘healthy’ spreads. When I was a child I hated Nutella (what a freak!) It wasn’t until I was about 19 that I suddenly developed a liking for it. Since then I have been making up for lost time! I try not to keep too much in the house because once I know it’s there I will demolish it straight from the jar! I’ve taken to hiding it in the back of the pantry so I only use it when I actually need it. No self-control. Mix that strawberries, and you have a recipe for delicious delicious disaster!

Nutella & Strawberry | www.highwallsblog.com
There is no real ‘recipe’ per-se. Take some crusty bread, I like to get mini Turkish rolls and warm them in the oven before slicing in half. Then add an extra generous slathering of Nutella (go crazy! You know you want too!) and top with a layer of sliced strawberries. Consume as quickly as possible, which you will immediately regret, but it was totally worth it!

Nutella & Strawberry | www.highwallsblog.com

Fun story: This video was originally a GIF was made with over 200 individual images. I spent over an hour putting it together before Photoshop promptly crashed and I (of course) had not saved… After crying myself to sleep, I attempted the GIF a second time the next day and of course it was waaaaay to big! So instead here it is in all its GIF-y, Jumpy glory but in video form! See how much I love you guys? (Does anyone else actually enjoy these gifs as much as I do?)

thumb-frozen-yogurt

Eat | Homemade Frozen Yoghurt

 5 Minute Frozen Yogurt  with only 4 ingredients! (via www.highwallsblog.com)

Frozen Yoghurt, or ‘Fro-Yo’ as the kids are calling it these days seems to have been the ‘new craze’ for the last couple of years. People have been singing the praises of frozen yoghurt so long that its starting to gain an almost fanatical following. I’m convinced that there is some kind of secret frozen yoghurt cult, whose members are slowly attempting world domination with this sweet treat.

While touted under the banner of a ‘fat free’ dessert, we all know the truth of the matter: frozen yoghurt is only masquerading as a healthier alternative to ice cream. Sure it is fractionally better for you, but generally, any store bought frozen yoghurt is going to have just as much sugar in it as its decadent dairy cousin. (And don’t even get me started on adding candy toppings! ) Until now. I have for you today, the easiest and healthiest homemade frozen yoghurt recipe ever. When your recipe is 90% fruit, you know it’s gonna be healthy.

Of course, given my obsession with berry flavours, I was always going to make my fro-yo with said ingredient, but you can really make this recipe with most fruits! Banana, peach, plum, whatever floats your boat. Chop them up and freeze them ahead of time or be lazy like me, and buy the store bought frozen stuff. Never let it be said that any of my recipes or craft projects actually require any real effort ;)

 5 Minute Frozen Yogurt  with only 4 ingredients! (via www.highwallsblog.com)

Homemade Frozen Yoghurt

Ingredients

  • 4 cups of Frozen Mixed Berries
  • 1/2 cup of natural plain yoghurt
  • 3 tablespoons of honey
  • 1 tablespoon of lemon juice

Instructions

  1. Place the berries, still frozen into your food processor and process for 1 minute to get the berries broken down a bit.
  2. Add in 1/2 cup of natural yoghurt along with 3 tablespoons of honey and 1 tablespoon of freshly squeezed lemon juice.
  3. Process on high until the mixture is smooth and creamy. It is best to stop the mixer ever minute or so and stir the mixture to help the processor along.
  4. Taste your frozen yoghurt; the berries can be quite tart, so if you prefer your frozen yoghurt to be sweeter, you can add in extra honey to taste.
  5. When you are happy with the flavour, grab a spoon and dig in!

Notes

While it is better freshly made, the frozen yoghurt will keep in the freezer for a couple of weeks. If you find that it is getting too solid/icy during storage, just let it soften slightly and then add back to your food processor to get it back to a smooth consistency

http://www.highwallsblog.com/2014/05/eat-homemade-frozen-yoghurt/

5 Minute Frozen Yogurt  with only 4 ingredients! (via www.highwallsblog.com)

thumb-lemon-poppyseed

Eat | Gluten Free Lemon, Honey & Poppyseed Cookies

GLUTEN FREE Lemon, Honey & Poppy Seed Cookies | Recipe from www.highwallsblog.com

Every Year in May, the Cancer Council hosts the fundraising event Australia’s Biggest Morning Tea to raise money for cancer research. This year, Erika Rax and Baked by Gemma  decided to host their own ‘virtual’ tea party to celebrate and give their support this very worthy cause. All week long Erika is sharing recipes and posts from her friends and readers who are taking part in this online morning tea. The posts she has shared so far have been mouth watering!!

Nia Neve  of Life & Co also, lent her support by hosting an awesome morning tea themed parcel swap which I participated in (look at what I received! EEE!) In keeping with this theme (and of course to add my own efforts to the cause), I thought I would share these wonderful Lemon, Honey & Poppyseed Cookies that I made to send to my swap partner.

These tasty treats are so light and tasty and, for all you celiacs out there, they are even Gluten Free! Luckily I made enough to send and to share with my housemates, because you should have seen their faces when I started packaging them up to send! No one wanted to miss out on these bad boys!

Are you guys participating in this fun (virtual) event? There is still plenty of time to contribute or make a donation and help the ladies reach their fundraising goal! 

GLUTEN FREE Lemon, Honey & Poppy Seed Cookies | Recipe from www.highwallsblog.com

Lemon, Honey & Poppyseed Cookies

Recipe adapted from this recipe

Ingredients

  • 150g of softened butter
  • 50g of brown sugar
  • 150g of honey
  • 2 Tbsp of poppyseeds
  • 2 Tbsp of grated lemon zest
  • 4 Tbsp of lemon juice
  • 175 g corn flour
  • 275 g rice flour

Instructions

  1. Preheat your oven to 180 Celsius and set aside a baking tray lined with baking paper.
  2. Using an electric mixer, cream together the butter and sugar until light and fluffy. Add in the honey and mix again until combined.
  3. Using a spoon, stir in the poppy seeds, lemons zest and lemon juice.
  4. In a separate bowl, sift the flour and cornflour together and gradually add to the butter mixture until it starts to come together as a dough. It will be very soft and slightly sticky.
  5. If the dough is too difficult to handle, place it in the refrigerator for 10 -15 minutes to harden slightly. Then scoop from the dough, enough dough to make 1 inch (approx) diameter balls.
  6. Place each ball onto the prepared tray and flatten down with the underside of a fork (pulling the fork across the surface to create ridges).
  7. Place in the oven and bake for 20 - 25 minutes or until the cookies are golden and brown. Transfer to a wire rack to cool.
http://www.highwallsblog.com/2014/05/gluten-free-lemon-honey-poppyseed-cookies/

GLUTEN FREE Lemon, Honey & Poppy Seed Cookies | Recipe from www.highwallsblog.comGLUTEN FREE Lemon, Honey & Poppy Seed Cookies | Recipe from www.highwallsblog.com

thumb-honey-butter

Eat | Honey Butter

Eat this! Honey Butter (With cinnamon and vanilla!) YUM! | www.highwallsblog.com

A lot of the recipes on this blog are featured because they are favourites in our house. For example, Strawberry butter is pretty much a permanent fixture in our fridge. So much so that it’s always a little sad when we run out. Especially if we have reached the time of the year when strawberries are no longer in season.  There’s nothing worse than waking up with a taste for sweet, buttery goodness and realising your stupid selfish housemates have eaten the last of it… god-dammit you guys!

In such hours of need, I always have a back-up flavour up my sleeve. Perfect for pancake and other breakfast related emergencies, Honey Butter it is even simpler than its predecessor and can be made with pantry basics! With a softer flavour than regular honey, and with the added kick of cinnamon, your breakfast (or afternoon tea) will be dressed to impress with this clever condiment. And seriously, try it on pancakes or warm fresh bread; Trust me, one taste and this will be a new favourite in your house too!

—————————————————————————————————————————————

INGREDIENTS:
250g of butter
1/4 cups of honey
1/2 teaspoon of ground cinnamon
Vanilla extract

1. Chop your butter into cubes and allow to soften slightly before adding to a large bowl.
2. Beat the butter with an electric mixer at low speed to start the mix, then turn up to medium and add the honey, cinnamon and a few drops of vanilla extract (optional).

3. Cream together until the mixture is smooth and creamy.

4.  Cover and leave to stand in a cool place for at least 1 hour to allow the flavours to develop. Store in an air tight container in the refrigerator.

Eat this! Honey Butter (With cinnamon and vanilla!) YUM! | www.highwallsblog.comEat this! Honey Butter (With cinnamon and vanilla!) YUM! | www.highwallsblog.com