thumb-hash-browns

Eat | Lazy Girl’s Breakfast Hash Browns

hashbrown-1

Let’s be real, if I could eat potato in every meal I totally would. I mean, I know that physically, its completely doable, but the grown up in me knows that it’s a bad idea. (My waistline thanks me for that sliver of adult behaviour!)

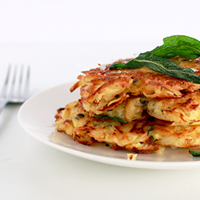
Regardless, there are times when I wake up and decide to start my day with a stack of starchy goodness. These are the lazy girl (or guy) hash browns. The kind for when you want something delicious, but can’t be bothered to cook something complicated. And complicated it is NOT: Take 3 ingredients. Mix. Cook. Eat! This is the breakfast I would make on Sunday’s when it’s almost midday and I am still in my pyjamas… if that were something that ever happens (read: all the time.)

Also, if you are anything like me, you always end up buying way everything in bulk, so this recipe is perfect for using up left over uncooked vegetables. I almost always have these ingredients in my kitchen. If I don’t have sage, you can always swap out for your favourite herb (or whatever you have on hand) I’ve tried it with basil, oregano and even coriander! It changes up the flavour so much, so experiment and find which combination you like the best!

hashbrown-3hashbrown-4

Lazy Girl's Breakfast Hash Browns
 
Author:
Ingredients
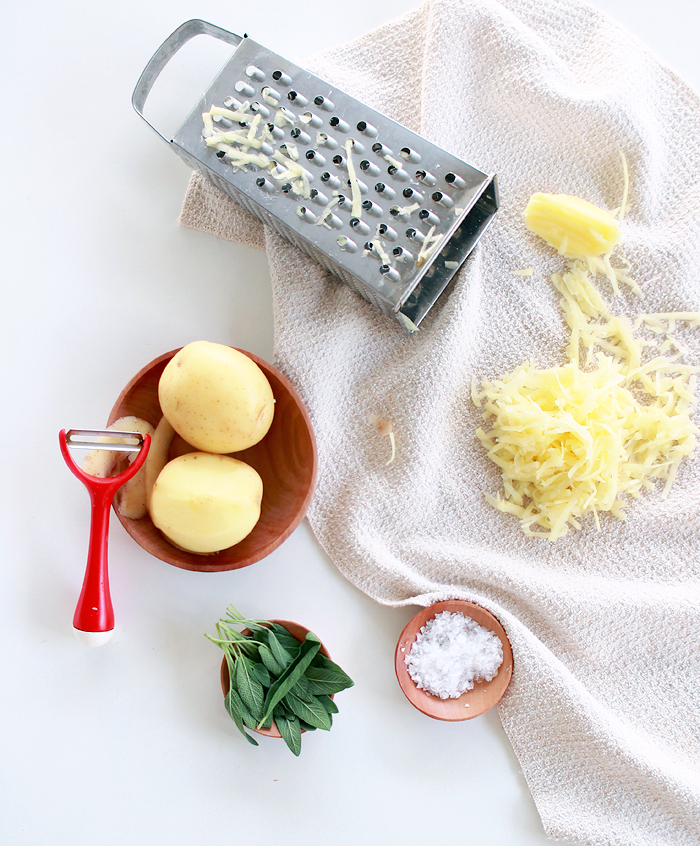
  • 4 - 5 medium to large Potatoes
  • 1 egg
  • Fresh sage, chopped
  • Olive oil
Instructions
  1. Wash and peel your potatoes. Coarsely grate and place into the centre of a clean tea towel. Wrap the tea towel around the potato and wring out the liquid
  2. Place one egg into a mixing bowl along with a large pinch of chopped sage and salt and pepper and whisk together.
  3. Add the potato and mix well to combine.
  4. In a frying pan, heat 1 or 2 tablespoons of olive oil. Place a large spoonfull of the potato mixture and flatten to your desired thickness (around 1 or 2 cm is best) Repeat with the rest of the mixture, you should be able to make around 4 or 5 large has browns)
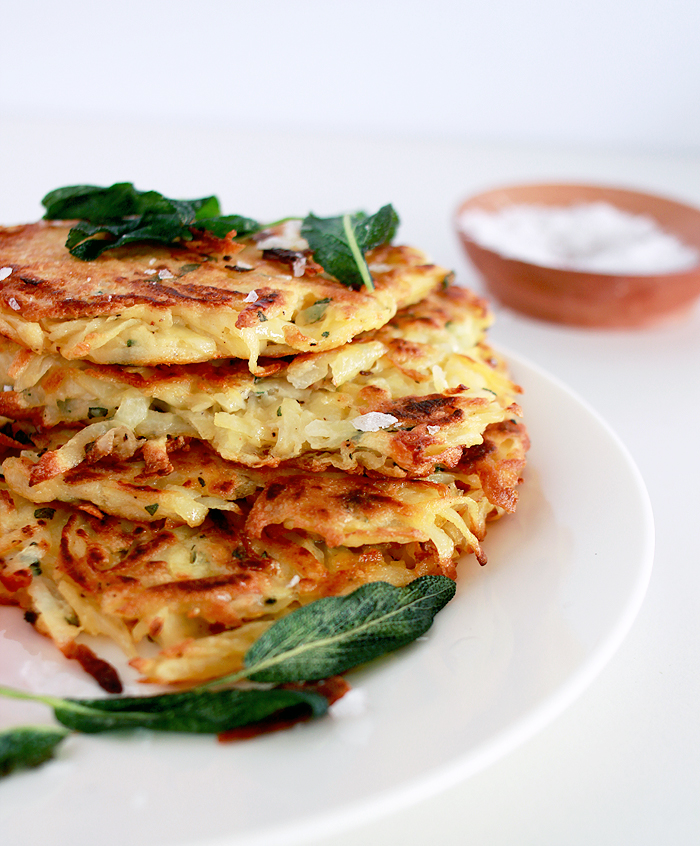
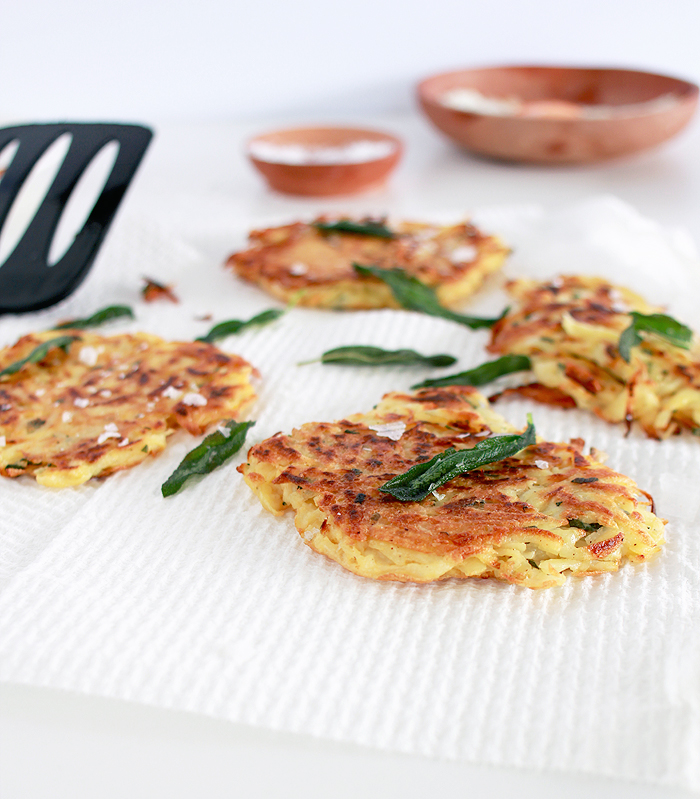
  5. Fry until golden and crispy and using a spatula, flip over and cook the opposite side.
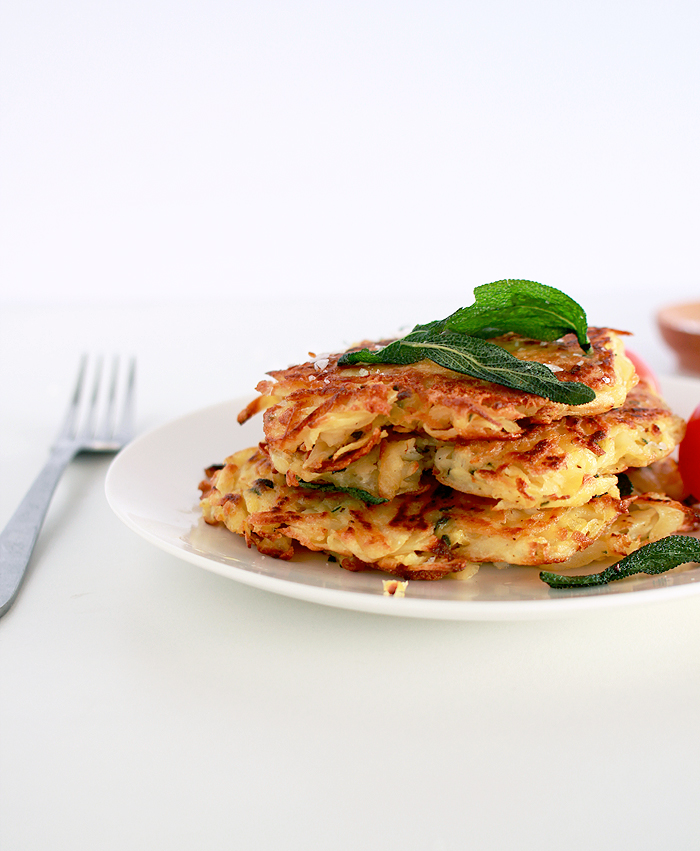
  6. Drop a few whole sage leaves into the oil and allow to crisp up.
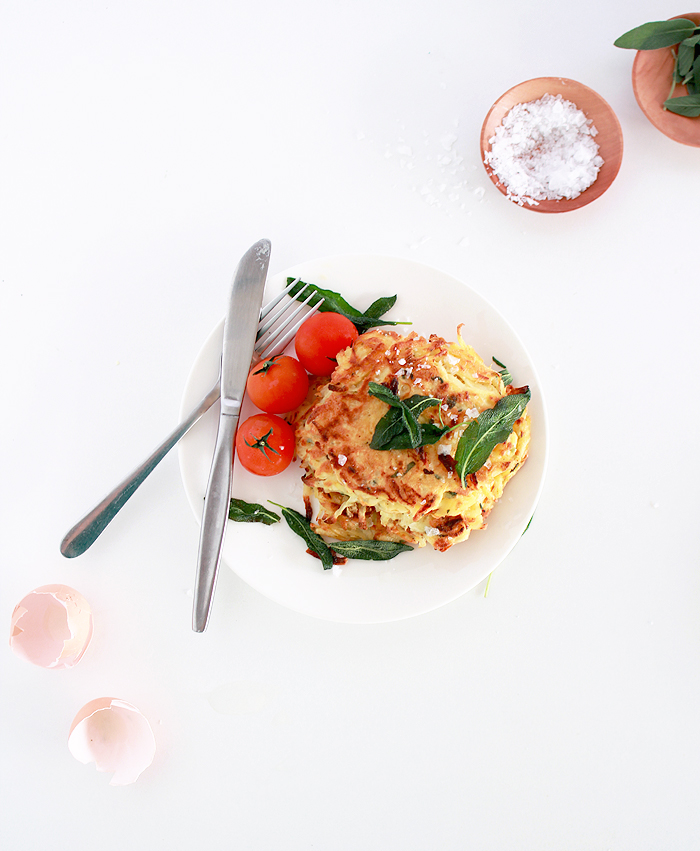
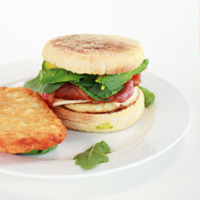
  7. Serve 1 or 2 with a fried egg for breakfast or enjoy a whole stack by themselves. Garnish with the fried sage leaves and a sprinkling of sea salt.

hashbrown-6hashbrown-5

thumb-herb-pullapart

EAT | Easy Herb and Cheese Pull Apart

5 Minute Recipe: Herb & Cheese Pull Apart | high walls

It’s been a sugar overload around here lately, so let’s take a beat and instead have something a little more savoury. Let me introduce you to your new best friend: the Cheese & Herb pull apart. It’s quick and easy and can be made with whatever you have floating around in your fridge. Isn’t that the best kind of recipe?

Like many things in life, this recipe is best enjoyed with friends. Not casual acquaintances, actual friends. The kind that  you will feel comfortable calling out when they try to steal that bit of cheesy, herby goodness you were eyeing off seconds before they reached for it. Everyone will have their paws all over this meal. There will be mess. There will be greasy fingers. But don’t worry, because it will be awesome.

As far as cheese and herb combinations; feel free to use whatever you have or whatever you like the most. The best part about this dish is that you really can’t go wrong! Try different cheeses! Top with diced up meats! sneak in some spices! The power is yours – go crazy!

5 Minute Recipe: Herb & Cheese Pull Apart | high walls 5 Minute Recipe: Herb & Cheese Pull Apart | high walls

INGREDIENTS:

1 loaf of crusty bread

Cheese (your choice)

Herbs (ie: basil, parsley)

Butter

Olive oil

1. Using a bread knife, slice into the top of the bread: cutting a cross hatch about 3/4 of the depth of the bread. Leave around an inch in between each cut.

2. With a long knife or spatula, generously butter the inside parts of the bread in between the cuts.

3. Roughly chop your choice of herbs and stuff into the cuts in the bread and across the top. (I used parsley and lemon thyme because that’s what I had)

4. Grate your choice of cheese and stuff half deep into the cuts in the bread. Scatter the rest across the top, I used jarlsberg cheese and added extra tasty and parmesan cheese on top.

5. Drizzle the whole thing with olive oil and place in the oven, preheated to 180 degrees celcius. Cook for 5 - 10 minutes or until the cheese is melted. Serve immediately.

5 Minute Recipe: Herb & Cheese Pull Apart | high walls 5 Minute Recipe: Herb & Cheese Pull Apart | high walls

thumb-taco-burger

EAT | Taco Burgers

Mid-week meals: easy Taco Burgers (Click for the full recipe) | www.highwallsblog.com

When concocting new recipes, I have one of two creative methods:

1. Careful planning and research, followed by trial and error until the recipe is perfected.
2. Get a spur of the moment idea; mash ingredients together. Hope for the best.

This recipe is clearly the product of the latter process. Is it elegant? Not really. Does it taste mighty fine? Yes Sir-ee! I mean, just think about it. Everybody loves burgers. Everybody loves tacos. Burgers combined with tacos = maximum love! My logic is flawless!

These burgers are perfect for mid-week when you can’t be bothered to make anything fancy, but you also don’t want to have the same old boring meat and salad combo. You can, of course, go all out with this baby if you want to take it up a notch.  Add roasted capsicum or make your own salsa and seasonings. But for me, the best part of this burger is that it is quick, easy and a slightly different take on two old favourites.

Mid-week meals: easy Taco Burgers (Click for the full recipe) | www.highwallsblog.com

INGREDIENTS:
4 x Large Burger Buns
500g of beef mince
1 egg
1 cup of bread crumbs
A hand-full of plain corn chips
1 bunch of coriander*
1 packet of taco seasoning
1 packet of burrito seasoning
1/4 cup of milk
3 birds eye chili’s (optional)
Your choice of salad & toppings, we used:

Taco salsa, oak leaf or cos lettuce, tomato, red onion, grated cheese, avocado, lime, 4 large burger rolls

STEPS: (makes 4 burgers)

  1. Place the corn chips in a food processor and process until crumbs. Add in the washed coriander (and chili if you are using it) and process again until  finely chopped and mixed in. Stir in the bread crumbs.
  2. In a large bowl combine 500g of beef mince with 1 egg, ¼ cup of milk, the breadcrumb mixture and at least ¾ of each packet of seasoning (you can use the whole thing if you want) Trust me on this, the two different flavourings work brilliantly together, I never make tacos without both now!
  3. Mix with your hands until completely combined. If you find the mixture is too dry add it a splash of milk and mix again. Split into 4 large patties and place, covered in the refrigerator for at least 30 minutes.
  4. Remove from the fridge and on a flat surface, flatten each patty with your hands until around 1 -2cm in thickness. Cook patties in  large frying pan over medium-high heat, flipping occasionally until cooked through.
  5. While these are cooking, slice the bread rolls in half and place under the grill until crisp and golden. Flip over and grill the other side. Keep in a warm oven until ready to serve.
  6. In a small bowl mash 1 avocado with a squeeze of lime juice, a handful of chopped coriander (optional) and season with salt and pepper. Slice the tomato and onion and set aside.
  7. To serve: smear ¼ of the avocado mix on the bottom bun of each burger. Top with meat, taco salsa, cheese, coriander, tomato, onion and lettuce.

* Please Note: I am a fiend for coriander so I like a LOT. If you’re not a fan you can reduce the amount or omit it completely.

Mid-week meals: easy Taco Burgers (Click for the full recipe) | www.highwallsblog.com

Mid-week meals: easy Taco Burgers (Click for the full recipe) | www.highwallsblog.com

Mid-week meals: easy Taco Burgers (Click for the full recipe) | www.highwallsblog.com

thumb-mini-quiche

EAT | Feta, Ham and Spinach Mini Quiche

Feta, Spinach, Ham & Tomato Mini Quiches | www.highwallsblog.com

Everybody has fall back dishes they keep tucked up their sleeve for times when you just can’t really be bothered to cook a full meal. For me, quiche would be in my top 3 under the category of ‘ugh. What can I cook that’s super easy?” Mix together some eggs, milk and whatever you have in the fridge, pour in on a pastry base and bake. BAM! You’re done! No muss, no fuss, AND depending on what you put in it, you’re still bound to impress any guests you may have!

Today I have a slightly less lazy version to share with you. With a full sized quiche, I rarely make the effort to blind bake the crust (meaning you bake the crust first and then add the filling and bake a second time). A full quiche is fine with a flaky puff pastry crust because it has its own weight to sustain its shape. But today we’re going to make mini versions, which are so deliciously light that you are going to want a crisp, crumbly shortcrust base to hold it all in.

Danish feta is really the star of this dish. I say ‘add to taste’, but what really makes the difference, is when you add in lots of feta. When I make these for myself, I basically fill any gaps with feta and then add in a little more for good measure. The soft texture and silky flavour overpowers that overly ‘eggy’ flavour that puts some people off of quiche. Combined with ham, spinach and tomato, these little quiches are perfect for breakfast, lunch or dinner (or all three if you’re really feeling it!)

Feta, Spinach, Ham & Tomato Mini Quiches | www.highwallsblog.com

Feta, Ham and Spinach Mini Quiche

Ingredients

  • 3 eggs
  • 1/2 cup of thickened cream
  • 1/4 cup of milk
  • 1 bunch spinach
  • Danish feta
  • 50 grams of shredded ham
  • Cherry tomatoes
  • Short crust pastry

Instructions

  1. Grease 4 tartlet pans with butter and then line with short crust pastry, trimming to 1-2cm above the rim and fold down around the edge.
  2. Preheat oven to 180 degrees Celsius and place the prepared pastry crusts into the fridge while you prepare the filling.
  3. In a bowl, whisk together the eggs, heavy cream and milk. Season with salt and pepper.
  4. Place the spinach in a bowl, cover with cling wrap and microwave for 20 - 30 seconds to slightly wilt. Slice the ham into 1cm squares and the cherry tomatoes in half.
  5. Line the prepared pastry shells with a sheet of baking paper and fill with baking weights or rice and place into the oven for 10 - 12 minutes or until the pastry is lightly golden. Remove and allow to cool.
  6. Once cool, divide the spinach between the shells and top with crumbled feta cheese (to taste), ham and pour over the egg mixture. Lastly press the cherry tomatoes into the mixture, cut side down. Each shell should be about 3/4 full.
  7. Bake for 20-30 minutes or until the pastry is golden brown and the filling is crisp and has risen slightly. Insert a toothpick in the middle of the quiche and if it comes out clean it is ready.
  8. Remove from oven and each from its tartlet pan to cool for 10 minutes on wire rack before serving.
http://www.highwallsblog.com/2014/06/eat-feta-ham-and-spinach-mini-quiche/

Feta, Spinach, Ham & Tomato Mini Quiches | www.highwallsblog.com Feta, Spinach, Ham & Tomato Mini Quiches | www.highwallsblog.comFeta, Spinach, Ham & Tomato Mini Quiches | www.highwallsblog.com

thumb-crostinii

EAT | Crostini

Make Crostini appetizers at home | www.highwallsblog.com

It’s a scientific* fact: food tastes better in miniature form. Why else would we have so many ‘bite size’ versions of our favourite foods? How else do you explain why appetizers taste so amazing? Teeny Tiny foods are, in my professional opinion, the BEST.

Crostini, which literally means “little toast”, is an Italian appetizer made up of small pieces of toasted bread with a variety of toppings, some what similar to bruschetta. In short: tiny toast = awesome! Choose your favourite toppings and seasonings and go crazy! Perfect for dinner parties, a light lunch or when you just feel like eating itty bitty toasties.

*Disclaimer: it’s not actually anywhere near a scientific fact. Make Crostini appetizers at home | www.highwallsblog.com Make Crostini appetizers at home | www.highwallsblog.com

Mixed Crostini

Ingredients

  • 1 Baguette
  • 4 Cloves of Garlic
  • Olive oilToppings of your choice:
  • Ricotta cheese
  • Cucumber
  • Cherry Tomatoes
  • Chilli & Garlic Olives
  • Hungarian Salami
  • Red Onion
  • Avocado
  • Lemon
  • Parsley or Basil

Instructions

  1. Diagonally slice the baguette into ½ inch thick slices and place on a baking tray.
  2. Drizzle bread pieces with a light covering of olive oil and place under a hot grill for 3-5 minutes or until lightly toasted. Remove from the oven and turn all the pieces over and toast the opposite side.
  3. While toasting, prepare your toppings: slice cucumber, red onion, avocado, salami; halve tomatoes and olives and chop your herbs.
  4. 4. Remove the toasted bread from the oven and using a clove of garlic cut in half – rub the cut side onto the hot bread. Repeat with all the cloves of garlic adding flavour to the bread.
  5. Top each piece with your choice of topping combinations.
  6. Season with salt & pepper, herbs or add a dash of dressing (lemon juice, balsamic vinegar, we placed ricotta cheese on all of ours and topped with the following: Tomato & cracked pepper, Red Onion and Parsley (not pictured – and diced capsicum), Avocado and grated lemon rind, Salami and Olive, Cucumber and sesame seeds)
http://www.highwallsblog.com/2014/06/eat-crostini/

Make Crostini appetizers at home | www.highwallsblog.com

thumb-breakfastmuffin

RECIPE | Bacon & Egg Breakfast Muffin

Bacon & Egg Breakfast Muffin | www.highwallsblog.com

Breakfast is one of those sacred things in the world of blogging. Show me a blogger who isn’t completely obsessed with breakfast (or brunch) dishes and I’ll show you a liar! The combination of carbs, eggs and bacon seems to be reserved for meals prior to 12pm and therefore everyone seems to feel the need to make it as gourmet as possible!

Sure, I’m as obsessed with fancy omelettes and quiches as the next girl, but can I be real with you for a second? You know what breakfast dish really gets me excited? McDonald’s breakfasts! I love love McDonald’s breakfast. Don’t look at me like that! I know you love it too! Some people are into the pancakes, some into the sausage and egg, but me… I’m all about the Bacon & Egg McMuffin.

But the problem with greasy take-out breakfast is, well, exactly that! It’s greasy take-out! Of course it tastes good, but feeling heavy and bloated is probably not the best way to start your day. So, to fulfil my love of the Bacon and Egg McMuffin without clogging my arteries on a regular basis, I have mastered the art of the home made “McMuffin”

Bacon & Egg Breakfast Muffin | www.highwallsblog.com Bacon & Egg Breakfast Muffin | www.highwallsblog.comBacon & Egg Breakfast Muffin | www.highwallsblog.com

INGREDIENTS:
(1 per muffin)
Eggs
Short Cut Bacon
Tomato
English Muffins
Spinach & Rocket
Cheese Slices
Avocado
Hash Browns (optional**)

1. Split each English muffin in half and set cut side up on a plate. Set aside for later.

2. Cook bacon and eggs in a frying pan over medium-high heat. For this step I suggest investing in some egg rings. They are inexpensive and make putting your muffin together 1000 time easier! To use the rings, place them into your frying pan and crack an egg into each ring. Allow to cook for a few minutes until the bottom and edges of the egg are cooked. At this point you can usually remove the egg ring with some tongs and flip the egg over to cook the top side. If the rings wont come away easily, just flip the egg over - ring and all - and you can remove it after you have finished cooking by running a butter knife around the edge.

3. Meanwhile, slice your vegetables: avocado, tomato and wash and dry the spinach and rocket. Top one side of the English muffin with avocado tomato and spinach/rocket. Season with salt and pepper.

4. Take your egg fresh from the pan and put it on the other side of the English muffin. Here is the secret to getting that authentic “take-out” taste for your muffin - place a slice of cheese singles on top of your egg and top that with a peice (or two!) of crispy bacon. Of course you can use good quality cheeses instead, but trust me - its the processed cheese singles that you buy individually wrapped in plastic that will give you that guilty pleasure taste.

5. Take the two halves and sandwich them together! Voila! A healthier and even tastier take on the Bacon and Egg McMuffin!

** If you’re like me, and you think that the hash brown is what takes your muffin to the next level, you can buy them frozen from the supermarket and bake them in the oven while you’re cooking the rest of the meal. Personally, I like to sneak one into my muffin itself, because, that’s just how I roll…

Bacon & Egg Breakfast Muffin | www.highwallsblog.com

thumb-chilisauce

Chili Sauce

Recipe for Chili Sauce | www.highwallsblog.com

How do you feel about a bit of spice? How about a lot of spice? When I was younger I could only eat the mildest of curries and spicy foods. My delicate little tongue couldn’t handle too much chili. Even as I grew older and started to appreciate chili flavours more and more, I was still on the mild flavours. But I had to harden up fast when I moved in with my boyfriend and house mates as they love love LOVE chili! Basically any dish that can have chili in it, does, without fail. It’s at the point now where we have frozen chilies on our freezer and a jar of chili sauce in the fridge for daily use. I’m proud to say I’m pretty good with a bit of spice these days!

The sauce we had was a batch made by the boyfriends dad, but we as we came to the end of our last jar I decided to have a crack at making my own for the house. How hard could it be?

We used a mixture of different chilies; regular long red and green chilies, birds eye and habanero chilies. I bought a big bag of mixed chilies  (probably double what is in the first image below) and that made 2 jars of sauce. The measurements aren’t exact, we like our sauce extra hot so we left all the seeds in, but you can discard them or else use less chilies overall for a milder flavour.

Recipe for Chili Sauce | www.highwallsblog.com

What You Need:

Lots of Chilies!
1 small onion
4 - 6 cloves of garlic
A 3cm piece of ginger
1 bunch of coriander
1/4 cup of Red wine vinegar
1/4 cup of Olive Oil

What You Do:

1. De-seed the chilies according to your tastes. If you like it hot keep them in, or else discard.

2. Roughly chop the chilies, garlic, ginger, onion and coriander. Blend in a food processor in batches until all the ingredients are extra finely chopped and mixed together.

3. Transfer to a large pot over medium heat and add about 1/4 of a cup of red wine vinegar and the same of olive oil.  Cook, stirring regularly, allowing the liquid to reduce as you cook. You want to let everything to soften but not burn.

4. Reduce the heat to a low setting and continue to cook and stir until the mixture starts to form a thick paste. If it looks too dry or thin, add another splash of red wine vinegar and allow to reduce again. Season with salt and pepper.

5. Once the sauce has achieved a good consistency, take off the heat and allow to cool to room temperature.  Then spoon into jars and store in the fridge overnight to allow flavours to mature.

Use your sauce when cooking curries, stir fries and even a little spoonful in casseroles and meat dishes will give your meal a little extra flavour. The vinegar will keep in the fridge for a few weeks, so depending on how much you make, freeze any left overs if you don’t think you will use it very quickly. Our first attempt turned out pretty well, we’ve already used up most of it. I’m looking forward to improving the recipe with future batches. What about you guys? Have you got a recipe for chili sauce? What are your secret ingredients?

Recipe for Chili Sauce | www.highwallsblog.com

thumb-breakfastpizza

Pizza for Breakfast?!

Breakfast Pizza Recipe | www.highwallsblog.com

Ahh breakfast, the most important meal of the day, or so they say. I’m gonna be straight with you, I very rarely actually eat breakfast. I just don’t really dig toast or cereal or any of the traditional breakfast foods. If I could have bacon and eggs every morning however, I’d be big as a house the happiest person alive. But really, who has time for that? Most days I forgo breakfast completely and settle for a mid-morning snack once I get to work.

Then I discovered Breakfast Pizza and my whole world changed.

Look, I realize that breakfast pizza is possibly more suited as a brunch type meal. It’s not exactly super healthy. I’m not suggesting that you have pizza for breakfast every day, that would be crazy (yeah, crazy delicious!) but c’mon. How great is it that we live in a world where you can combine two things as delicious as breakfast and pizza? And the best part is it’s a mobile breakfast. Just grab a slice as you’re heading out the door and you’re good to go!

Breakfast Pizza Recipe | www.highwallsblog.com

What You Need:

For the dough…
3/4 cups of lukewarm water
1 teaspoon of instant yeast
2 cups of plain flour
1 1/2 teaspoons of salt
For the sauce…
400g diced tomatoes
2-3 cloves of garlic
Dried Oregano &  Basil to taste
For the toppings…
4 eggs
200g of bacon, diced
Plus whatever you want!

What You Do:

1. Set the oven to as hot as it will go and allow to preheat for at least a half an hour.

2. Mix together the yeast and water in a large mixing bowl until dissolved. Add the flour and salt to the bowl and combine until a shaggy dough starts to form.

3. Turn the dough and any excess flour out onto a flat, clean working surface and knead together until all the flour is incorporated and the dough is smooth and springy. If  the dough starts to stick to your hands or to your work surface, add tablespoons of flour until the dough becomes smooth. The end result should be moist and slightly tacky but solid.

4. Cover the dough and allow to rise until it has doubled in size (around an hour and a half). Once it has risen you can refrigerate it until you need it. It should keep for 2 – 3 days. If your short on time you don’t need to allow it to rise, just set it aside while you prepare the toppings and it will cook as  a thin crust pizza. Breakfast Pizza Recipe | www.highwallsblog.com

5.  To make the sauce, combine the diced tomatoes, garlic and dried herbs in a bowl. Blend together if you prefer a smoother sauce. The sauce will keep in the refrigerator for a week. Prepare your toppings at this point.

6. Divide the dough in two evenly sized pieces. Working with one piece of the dough at a time, form into a flat disc, either by hand or using a rolling pin. Work from the middle outwards, using the heel of your hand to gently press and stretch the dough. Breakfast Pizza Recipe | www.highwallsblog.com

7. Spoon a few tablespoons of sauce into the center of the pizza and using the back of a spoon spread the sauce to the edges. Evenly spread on your toppings, ensuring the bacon is on the top so it cooks properly. Crack  the eggs into individual cups or small bowls and set aside.

8. Transfer the pizza’s to baking trays and slide into the oven. Carefully pour each egg onto the pizza one at a time and close the oven to bake. Turn the oven down to about 250 degrees Celsius and cook for 10 - 15 minutes or until the eggs are just set.

9. Remove the pizza from oven and allow to cool for about five minutes before serving. Season with salt and pepper and fresh herbs.

Breakfast Pizza Recipe | www.highwallsblog.com

thumb-gatzpacho

Gazpacho Soup Day

Gazpacho Soup Recipe | www.highwallsblog.com

If you ever watched the old BBC comedy Red Dwarf, the mere mention of Gazpacho Soup may conjurer memories of one of the characters embarrassing experience in asking a waiter to heat his up much to the amusement of his dining companions. You see, Gazpacho soup is  traditionally served cold as a refreshing summer soup, usually a starter before the main meal.

Apart from mentions in British comedy shows, I had never come across it until recently when I decided to give it a go myself. My partner had his wisdom teeth removed and aside from not being able to eat solid foods, he also wasn’t allowed to eat anything heated, so this seemed the perfect meal for his return from hospital.

Have you tried it? The soup itself is easy as long as you have a decent blender or food processor. As it is served cold there is no real cooking required. Just prepare the veggies and blend! The flavours are tangy and slightly spicy and super refreshing! I was a little hesitant (I mean it has soggy bread in it!?) but  it really was a pleasant surprise. My boyfriend enjoyed it too which was lucky considering that’s all he could eat for a 24 hour period…

Gazpacho Soup Recipe | www.highwallsblog.comGazpacho Soup Recipe | www.highwallsblog.com

 What You Need:

A slice of day-old bread
2 tablespoons of red wine vinegar
1kg of ripe tomatoes
1 cucumber, peeled
1 green capsicum
1 large red onion, roughly chopped
1 garlic clove
1/3 cup of olive oil
Croutons and chopped parsley to garnish

What You Do:

1. Place the bread and the red wine vinegar in a shallow bowl. Add 1/4 cup of water and set aside while you prepare the vegetables.

2. Remove seeds from the tomatoes, cucumber and capsicum and roughly chop.  Toss the vegetables along with the onion and garlic with the olive oil in  a large bowl. Season with salt and pepper.

3. Blend using a stick blender or a food processor until smooth. Blend in bread. Pass through a sieve into a bowl and discard the leftover pulp.

4. Serve chilled or add ice cubes just before serving. Garnish with croutons and parsley.

thumb-potatoeggs

Pesto Potato & Eggs (with tomato and fried basil)

Pesto Potato and Egg with fried basil and tomato (via www.highwallsblog.com)

Although I would class this as a ‘breakfast’ dish, I’ve never actually had it for breakfast. Lets be honest, this many carbs first thing in the morning is just going to make me want to go back to bed and sleep off my food coma. It is however, perfect for a late brunch or even for an easy dinner. Based on this recipe, we’ve had this dish a few times and every time I make it we think of new ingredients to include next time (the boys want diced bacon to add to the mix, but I think that’s taking it a little too far!) Its substantial enough to be the main course, but would also be a great side dish.

Basically it’s the Swiss army knife of potato dishes.

No matter when or how you decide to make this meal, I promise you wont be disappointed. The fact that it’s super easy to make doesn’t hurt either…

Pesto Potato and Egg with fried basil and tomato (via www.highwallsblog.com)Pesto Potato and Egg with fried basil and tomato (via www.highwallsblog.com)Pesto Potato and Egg with fried basil and tomato (via www.highwallsblog.com)

What You Need:

Medium sized potatoes (1 per person)
Eggs, (1 per person)
1 and 1/2 tablespoons of Pesto (per person)
Olive oil
4 cloves of Garlic
A handful of basil leaves
A punnet of cherry or grape tomatoes

What You Do:

1. Preheat the oven to 180 degrees and set aside a medium sized dish or baking tray.

2. Scrub and/or peel your potatoes and slice into thin strips and place in a bowl. Crush and peel 4 cloves  of garlic and add to the potato.

3. Lightly toss the potato with the olive oil and season with salt and pepper. Crack the eggs into a cup and set aside.

4. In a frying pan or skillet, cook the potatoes and garlic on a high heat for around 10 - 15 minutes until they crisp on the edges.

5. Place the cooked potatoes in your dish or baking tray and spoon in the pesto. You can use store bought or even make your own. Toss until the potato is evenly covered.

6. Half the tomatoes and disperse evenly across the potatoes.  Put it in the oven for 5-10 minutes to brown the top.

7. Remove from the oven and pour the eggs on top,  trying to get the egg evenly throughout the dish. Season with salt and pepper and return to the oven to bake until the eggs are just set.

8. While the eggs are cooking prepare the fried basil; Heat 3 tablespoons of oil in a frying pan over medium-high heat and allow the pan to get hot (about one minute). Very carefully add the basil leaves to the oil one at a time. Ensure the basil is completely dry before starting. Stand back  as the oil will sizzle and maybe splatter, and allow the basil to fry for about 30 seconds. When the sizzling starts to  slow you can remove the basil gently and lay them on a paper towel-covered plate to soak any excess oil.

9. Remove the potato mixture from the oven and scatter the fried basil on top. Serve while still hot.

Pesto Potato and Egg with fried basil and tomato (via www.highwallsblog.com)