Recipe: Roasted Strawberry & Chili Jam

Roasted Strawberry & Chili Jam | www.highwallsblog.com

Every year as winter comes to a close, my local supermarket is suddenly brimming with punnets and punnets of strawberries at bargain prices. My over zealous enthusiasm for these sweet treats takes over. I can’t help but snatch up a basket full of berries and inevitably end up purchasing punnets of over ripe berries. You would think I would learn from past mistakes, but I always seem to buy way too many considering they aren’t the best to start off with.

Of course, if you’re a long time reader, you will know that I have an arsenal of recipes incorporating strawberries. But for those times that I get really over excited, my fall back is the old classic; strawberry jam. I mean who doesn’t love strawberry jam? Mash up strawberries, smear on bread, done! How good is that?

The sophisticated mix of sweet and spicy flavours are the prefect combination. Roasting the strawberries intensifies the sweetness and the kick of chili adds depth (plus it gives a surprising aftertaste for the unprepared).  It is a marriage of flavours I never thought would work before trying, but surprisingly it totally works!

Roasted Strawberry & Chili Jam | www.highwallsblog.comRoasted Strawberry & Chili Jam | www.highwallsblog.com

What You Need:

1 punnet of strawberries
Extra Virgin Olive Oil
Honey
2 Chilli Peppers
2 star anise pods
Salt and pepper to taste
Balsamic vinegar (optional)

Roasted Strawberry & Chili Jam | www.highwallsblog.com

What You Do:
1. Preheat your oven to 150 degrees celsius and line a baking sheet with a line of aluminum foil and a piece of baking paper.

2. Rinse and half strawberries and add to a large bowl with anise pods and whole chili peppers.

3. Toss the prepared strawberries and chili’s with a drizzle of honey, a drizzle of olive oil  and season with salt and pepper.

4. Spread the strawberry mixture on the prepared baking sheet and bake for 20 minutes.

5. Discard the anise pods. Remove the chili’s from the baking tray and cut off the ends. Carefully cut open each chili and using a knife, scrape the flesh and seeds from the inside and discard the skins.

6. Add the chili and strawberries with the juices  and blend until smooth. If you prefer add 1 tsp of balsamic vinegar for extra depth and to help preserve the jam for long.

Roasted Strawberry & Chili Jam | www.highwallsblog.comRoasted Strawberry & Chili Jam | www.highwallsblog.com

Serve while still warm on bread, toast, scones; you know - any kind of delicious carbs! Just remember to warn people before you serve it up. Not everyone would enjoy this spicy spread on their morning toast…

Roasted Strawberry & Chili Jam | www.highwallsblog.com

thumb-chilisauce

Chili Sauce

Recipe for Chili Sauce | www.highwallsblog.com

How do you feel about a bit of spice? How about a lot of spice? When I was younger I could only eat the mildest of curries and spicy foods. My delicate little tongue couldn’t handle too much chili. Even as I grew older and started to appreciate chili flavours more and more, I was still on the mild flavours. But I had to harden up fast when I moved in with my boyfriend and house mates as they love love LOVE chili! Basically any dish that can have chili in it, does, without fail. It’s at the point now where we have frozen chilies on our freezer and a jar of chili sauce in the fridge for daily use. I’m proud to say I’m pretty good with a bit of spice these days!

The sauce we had was a batch made by the boyfriends dad, but we as we came to the end of our last jar I decided to have a crack at making my own for the house. How hard could it be?

We used a mixture of different chilies; regular long red and green chilies, birds eye and habanero chilies. I bought a big bag of mixed chilies  (probably double what is in the first image below) and that made 2 jars of sauce. The measurements aren’t exact, we like our sauce extra hot so we left all the seeds in, but you can discard them or else use less chilies overall for a milder flavour.

Recipe for Chili Sauce | www.highwallsblog.com

What You Need:

Lots of Chilies!
1 small onion
4 - 6 cloves of garlic
A 3cm piece of ginger
1 bunch of coriander
1/4 cup of Red wine vinegar
1/4 cup of Olive Oil

What You Do:

1. De-seed the chilies according to your tastes. If you like it hot keep them in, or else discard.

2. Roughly chop the chilies, garlic, ginger, onion and coriander. Blend in a food processor in batches until all the ingredients are extra finely chopped and mixed together.

3. Transfer to a large pot over medium heat and add about 1/4 of a cup of red wine vinegar and the same of olive oil.  Cook, stirring regularly, allowing the liquid to reduce as you cook. You want to let everything to soften but not burn.

4. Reduce the heat to a low setting and continue to cook and stir until the mixture starts to form a thick paste. If it looks too dry or thin, add another splash of red wine vinegar and allow to reduce again. Season with salt and pepper.

5. Once the sauce has achieved a good consistency, take off the heat and allow to cool to room temperature.  Then spoon into jars and store in the fridge overnight to allow flavours to mature.

Use your sauce when cooking curries, stir fries and even a little spoonful in casseroles and meat dishes will give your meal a little extra flavour. The vinegar will keep in the fridge for a few weeks, so depending on how much you make, freeze any left overs if you don’t think you will use it very quickly. Our first attempt turned out pretty well, we’ve already used up most of it. I’m looking forward to improving the recipe with future batches. What about you guys? Have you got a recipe for chili sauce? What are your secret ingredients?

Recipe for Chili Sauce | www.highwallsblog.com

thumb-breakfastpizza

Pizza for Breakfast?!

Breakfast Pizza Recipe | www.highwallsblog.com

Ahh breakfast, the most important meal of the day, or so they say. I’m gonna be straight with you, I very rarely actually eat breakfast. I just don’t really dig toast or cereal or any of the traditional breakfast foods. If I could have bacon and eggs every morning however, I’d be big as a house the happiest person alive. But really, who has time for that? Most days I forgo breakfast completely and settle for a mid-morning snack once I get to work.

Then I discovered Breakfast Pizza and my whole world changed.

Look, I realize that breakfast pizza is possibly more suited as a brunch type meal. It’s not exactly super healthy. I’m not suggesting that you have pizza for breakfast every day, that would be crazy (yeah, crazy delicious!) but c’mon. How great is it that we live in a world where you can combine two things as delicious as breakfast and pizza? And the best part is it’s a mobile breakfast. Just grab a slice as you’re heading out the door and you’re good to go!

Breakfast Pizza Recipe | www.highwallsblog.com

What You Need:

For the dough…
3/4 cups of lukewarm water
1 teaspoon of instant yeast
2 cups of plain flour
1 1/2 teaspoons of salt
For the sauce…
400g diced tomatoes
2-3 cloves of garlic
Dried Oregano &  Basil to taste
For the toppings…
4 eggs
200g of bacon, diced
Plus whatever you want!

What You Do:

1. Set the oven to as hot as it will go and allow to preheat for at least a half an hour.

2. Mix together the yeast and water in a large mixing bowl until dissolved. Add the flour and salt to the bowl and combine until a shaggy dough starts to form.

3. Turn the dough and any excess flour out onto a flat, clean working surface and knead together until all the flour is incorporated and the dough is smooth and springy. If  the dough starts to stick to your hands or to your work surface, add tablespoons of flour until the dough becomes smooth. The end result should be moist and slightly tacky but solid.

4. Cover the dough and allow to rise until it has doubled in size (around an hour and a half). Once it has risen you can refrigerate it until you need it. It should keep for 2 – 3 days. If your short on time you don’t need to allow it to rise, just set it aside while you prepare the toppings and it will cook as  a thin crust pizza. Breakfast Pizza Recipe | www.highwallsblog.com

5.  To make the sauce, combine the diced tomatoes, garlic and dried herbs in a bowl. Blend together if you prefer a smoother sauce. The sauce will keep in the refrigerator for a week. Prepare your toppings at this point.

6. Divide the dough in two evenly sized pieces. Working with one piece of the dough at a time, form into a flat disc, either by hand or using a rolling pin. Work from the middle outwards, using the heel of your hand to gently press and stretch the dough. Breakfast Pizza Recipe | www.highwallsblog.com

7. Spoon a few tablespoons of sauce into the center of the pizza and using the back of a spoon spread the sauce to the edges. Evenly spread on your toppings, ensuring the bacon is on the top so it cooks properly. Crack  the eggs into individual cups or small bowls and set aside.

8. Transfer the pizza’s to baking trays and slide into the oven. Carefully pour each egg onto the pizza one at a time and close the oven to bake. Turn the oven down to about 250 degrees Celsius and cook for 10 - 15 minutes or until the eggs are just set.

9. Remove the pizza from oven and allow to cool for about five minutes before serving. Season with salt and pepper and fresh herbs.

Breakfast Pizza Recipe | www.highwallsblog.com

thumb-cookieicecreamcake

Icecream Bread [pt 1]

Make your own Ice Cream Bread | www.highwallsblog.com

Hey Internet!! Internet are you listening to me? Pay attention - I have something of the utmost importance to tell you; Did you know, you can make bread from icecream?! No for reals, I’m serious! And it’s positively the easiest, fastest recipe you’ve ever seen!

I was procrastinating browsing on the never ending supply of randomness that is Tumblr and this ‘recipe’ came up on my feed. You need two ingredients; ice cream and self raising flour. That’s it. Who the hell came up with this idea? I think I need to find them and pledge my allegiance to them. If this is the caliber of their ideas, I’m totally on board with joining any kind of ice cream related cult they might be starting.

The ice cream flavour cooks mostly away to leave this wonderful subtle, almost ‘after taste’, of ice cream. You can use any flavour you want, and add on toppings to give the top a nice crunchy texture (kind of like adding sesame seeds to regular bread) and considering it takes literally 5 minutes to prepare, how can you not want to try this out?!  Obviously, the ice cream is the main ingredient, so make sure you get the good stuff. No low fat vanilla, we want full cream in crazy flavours. The Ben & Jerry’s style expensive brands. Trust me, it’s worth it.

Ice Cream Bread | www.highwallsblog.com

What You Need:

2 cups of Ice Cream, in any flavor you like
1 1/2 cups of Self Raising Flour

What You Do:

1. Preheat your oven to 180 degrees Celsius (350 f) and line a regular 8 x 4 loaf pan with baking paper.
2. Take your ice cream out of the freezer and measure out 2 cups. Leave on the bench to soften.
3. Once soften add the ice cream together with 1 and a half cups of self raising flour in a large bowl and mix until just combined.
4. Scoop into your prepared pan and smooth down the top. If you would like to add on any toppings now’s the time to do so. I chose cookies & cream ice cream so I topped mine with crumbled oreos for extra crunch!
5. Bake in the oven for around 45 minutes or until an inserted toothpick comes out clean.
6. Turn out onto a wire rack and allow to cool before serving.

Bonus points for serving with ice cream on the side, because, you know, that’s how we roll. Stay tuned for Part 2; my second attempt with a slightly more technical version of this recipe…

Make your own Ice Cream Bread | www.highwallsblog.com Make your own Ice Cream Bread | www.highwallsblog.com 

Yes, all my favourite recipes involve chocolate…

Choc Crumble; Cookie base topped with white & milk chocolate | www.highwallsblog.com

I had purchased this bag of Cadbury drops to use in some kind of Easter recipe, but instead had opted for the more traditional Hot Cross Buns option.  Easter came and went and having not used them, I promptly forgot the bag of candy coated chocolate residing in the back of my fridge. Remember how much I love chocolate bark (especially involving cookies)? Well, this is something a little similar.

Kind of a cross between chocolate bark and chocolate slice. Essentially you’re making a cookie crust, like you would for cheesecake, but substituting the ‘cheesecake’ part for layers of melted chocolate.  I was jonesing for some chocolate bark, but also for some kind of crumbly cookie and this is what I came up with. It is so good. The chocolate texture is creamy and rich without being sickly. You don’t even really need the toppings. The Cadbury Drops were a nice addition, but I think next time I will go the more ‘grown up/ route and instead drizzle some lines of dark chocolate across the top. Mmmm!READ MORE

thumb-strawberrybread

Recipe: Banana & Raspberry Bread

Homemade Banana & Raspberry Bread | www.highwallsblog.com
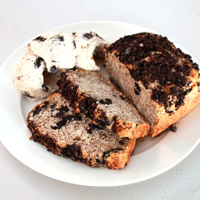
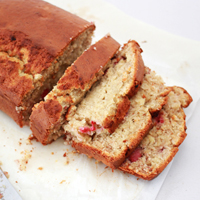
Banana bread seems to be one of those comfort foods that everyone can identify with. Everybody loves banana bread. You can have it for breakfast, lunch or dinner. It’s the perfect semi-healthy snack and of course, it is the go to recipe when you have a bunch of banana’s that you just didn’t get around to eating before they got all bruised. The thing is… I don’t really like banana bread. It just doesn’t excite me. It’s not terrible by any means, but I can never recall a time where I was in a bakery or cafe and thought to myself “man. I could really go for a slice of that banana bread!” Am I alone in this?

‘Well then,’ I hear you say, ‘why they hell did you make banana bread if you hate it so much?’ Whoa! First of all, why so aggressive? Just because banana bread isn’t  my favourite thing doesn’t mean we can’t still get along. Secondly, this bread wasn’t for me, it was a birthday gift for my boy. I was actually looking for raspberry loaf recipes but instead came across this recipe for banana AND raspberry bread instead. While banana bread isn’t my bag, as previously mentioned, everybody else loves it so I thought it just might be a winner.

It totally was.

Homemade Banana & Raspberry Bread | www.highwallsblog.comHomemade Banana & Raspberry Bread | www.highwallsblog.comHomemade Banana & Raspberry Bread | www.highwallsblog.com

What You Need:

150g  of softened butter
1 cup of brown sugar
2 eggs
2 ripe bananas
2 cups of self-raising flour
1 teaspoonof  baking powder
1/2 cup of milk
2/3 cup of fresh raspberries

What You Do:

1. Preheat oven to 180 degrees and grease base and sides of a  loaf pan before lining with baking paper.  Allow a few centimeters overhang at both long ends.

2. Using an electric mixer, cream butter and sugar together until pale.  Lightly beat 2 eggs and add to the mixture in batches, beat the mixture well after each addition.

3. Mash 2 banana’s until puply and smooth and stir into the mixture.  Sift flour and baking powder into the mix.

4. Add milk in batches, stirring with a wooden spoon until combined. Carefully fold in raspberries.

5. Spoon mixture into the prepared loaf pan and smooth  the top. Bake for 45 to 50 minutes (or until a skewer inserted into the middle comes out clean).

6. Allow to cool in the pan for 10 minutes before transferring to a wire rack to cool completely. Serve warm with butter.

Homemade Banana & Raspberry Bread | www.highwallsblog.comHomemade Banana & Raspberry Bread | www.highwallsblog.com

thumb-gatzpacho

Gazpacho Soup Day

Gazpacho Soup Recipe | www.highwallsblog.com

If you ever watched the old BBC comedy Red Dwarf, the mere mention of Gazpacho Soup may conjurer memories of one of the characters embarrassing experience in asking a waiter to heat his up much to the amusement of his dining companions. You see, Gazpacho soup is  traditionally served cold as a refreshing summer soup, usually a starter before the main meal.

Apart from mentions in British comedy shows, I had never come across it until recently when I decided to give it a go myself. My partner had his wisdom teeth removed and aside from not being able to eat solid foods, he also wasn’t allowed to eat anything heated, so this seemed the perfect meal for his return from hospital.

Have you tried it? The soup itself is easy as long as you have a decent blender or food processor. As it is served cold there is no real cooking required. Just prepare the veggies and blend! The flavours are tangy and slightly spicy and super refreshing! I was a little hesitant (I mean it has soggy bread in it!?) but  it really was a pleasant surprise. My boyfriend enjoyed it too which was lucky considering that’s all he could eat for a 24 hour period…

Gazpacho Soup Recipe | www.highwallsblog.comGazpacho Soup Recipe | www.highwallsblog.com

 What You Need:

A slice of day-old bread
2 tablespoons of red wine vinegar
1kg of ripe tomatoes
1 cucumber, peeled
1 green capsicum
1 large red onion, roughly chopped
1 garlic clove
1/3 cup of olive oil
Croutons and chopped parsley to garnish

What You Do:

1. Place the bread and the red wine vinegar in a shallow bowl. Add 1/4 cup of water and set aside while you prepare the vegetables.

2. Remove seeds from the tomatoes, cucumber and capsicum and roughly chop.  Toss the vegetables along with the onion and garlic with the olive oil in  a large bowl. Season with salt and pepper.

3. Blend using a stick blender or a food processor until smooth. Blend in bread. Pass through a sieve into a bowl and discard the leftover pulp.

4. Serve chilled or add ice cubes just before serving. Garnish with croutons and parsley.

thumb-potatoeggs

Pesto Potato & Eggs (with tomato and fried basil)

Pesto Potato and Egg with fried basil and tomato (via www.highwallsblog.com)

Although I would class this as a ‘breakfast’ dish, I’ve never actually had it for breakfast. Lets be honest, this many carbs first thing in the morning is just going to make me want to go back to bed and sleep off my food coma. It is however, perfect for a late brunch or even for an easy dinner. Based on this recipe, we’ve had this dish a few times and every time I make it we think of new ingredients to include next time (the boys want diced bacon to add to the mix, but I think that’s taking it a little too far!) Its substantial enough to be the main course, but would also be a great side dish.

Basically it’s the Swiss army knife of potato dishes.

No matter when or how you decide to make this meal, I promise you wont be disappointed. The fact that it’s super easy to make doesn’t hurt either…

Pesto Potato and Egg with fried basil and tomato (via www.highwallsblog.com)Pesto Potato and Egg with fried basil and tomato (via www.highwallsblog.com)Pesto Potato and Egg with fried basil and tomato (via www.highwallsblog.com)

What You Need:

Medium sized potatoes (1 per person)
Eggs, (1 per person)
1 and 1/2 tablespoons of Pesto (per person)
Olive oil
4 cloves of Garlic
A handful of basil leaves
A punnet of cherry or grape tomatoes

What You Do:

1. Preheat the oven to 180 degrees and set aside a medium sized dish or baking tray.

2. Scrub and/or peel your potatoes and slice into thin strips and place in a bowl. Crush and peel 4 cloves  of garlic and add to the potato.

3. Lightly toss the potato with the olive oil and season with salt and pepper. Crack the eggs into a cup and set aside.

4. In a frying pan or skillet, cook the potatoes and garlic on a high heat for around 10 - 15 minutes until they crisp on the edges.

5. Place the cooked potatoes in your dish or baking tray and spoon in the pesto. You can use store bought or even make your own. Toss until the potato is evenly covered.

6. Half the tomatoes and disperse evenly across the potatoes.  Put it in the oven for 5-10 minutes to brown the top.

7. Remove from the oven and pour the eggs on top,  trying to get the egg evenly throughout the dish. Season with salt and pepper and return to the oven to bake until the eggs are just set.

8. While the eggs are cooking prepare the fried basil; Heat 3 tablespoons of oil in a frying pan over medium-high heat and allow the pan to get hot (about one minute). Very carefully add the basil leaves to the oil one at a time. Ensure the basil is completely dry before starting. Stand back  as the oil will sizzle and maybe splatter, and allow the basil to fry for about 30 seconds. When the sizzling starts to  slow you can remove the basil gently and lay them on a paper towel-covered plate to soak any excess oil.

9. Remove the potato mixture from the oven and scatter the fried basil on top. Serve while still hot.

Pesto Potato and Egg with fried basil and tomato (via www.highwallsblog.com)

thumb-berryicecreamsandwich

Homemade Icecream (Sandwiches)

Berry & Chocolate Homemade Ice Cream Sandwiches from www.highwallsblog.com

Ice cream is a serious weakness of mine and finding out how easy it is to make at home is possibly one of the most dangerous things that has ever happened to me! You only need some condensed milk and cream to make the base, and something to flavour the batch! Thank goodness it takes hours to set properly, or else I’d probably make a new flavour (and eat it all) every day!

My mother first made these ice cream sandwiches for us last Christmas. I’ve dabbled with home made ice cream sandwiches before but these are something entirely different. The ice cream is a little less heavy than the store bought stuff. It’s not as creamy or milky, and with the addition of the berries  you get a lovely fresh flavour with the wonderful crunch of the Toblerone chunks. Mmmm… I think I ate about 5 of these the first weekend I made them…. so much for the diet!

Of course you can use any mix in’s you want, if berry and chocolate isn’t really your thing (although trust me, the combination is better than you might think) If you want to eat the ice cream straight, you can always pour the batch into  a deeper container and scoop it into a cone or bowl to serve instead of sandwiches. There really are so many possibilities!

Berry & Chocolate Homemade Ice Cream Sandwiches from www.highwallsblog.comBerry & Chocolate Homemade Ice Cream Sandwiches from www.highwallsblog.com

What You Need:

2 Cups heavy whipping cream
1 can Sweetened Condensed Milk
1 packet of Frozen Mixed Berries, semi thawed
2 Toblerone bars
Wafer biscuits

What You Do:

1. Line the base and the long sides of a rectangular baking pan with baking paper, allowing paper to overhang about 5cm on each end.

2. Whip 2 cups heavy whipping cream until stiff peaks start to form.

3. Take the berries (semi thawed) and mash gently with a fork until about 2/3’s of the packet are mashed but there are still a few whole berries. Chop the Toblerone’s into small chunks and add to the berries.

4. Mix the condensed milk with the berries and chocolate in a large bowl until well combined.

5. Fold whipped cream into sweetened condensed milk mixture, work slowly and carefully, so cream doesn’t collapse. Fold until evenly combined.

6. Pour into the lined tray and smooth flat. Your mixture should be around 3 - 4cm deep. Wrap the whole thing in plastic wrap and then in tin foil and freeze at least 6 hours or until set.

7. Remove from the freezer and using a wafer biscuit as a guide, cut slices from the slab of ice cream.

8. Sandwich between 2 Wafer biscuits to serve. Re-wrap what you do use and return to the freezer for later.

thumb-xmascake

White Christmas Cake

White Christmas’s are not really something we have in Australia. Christmas day falls in the middle of Summer, so usually our Christmas day involves a lot of seafood, swimming and relaxing in the heat. It’s nice, but it doesn’t mean I don’t sometimes wish I could have a ‘traditional’ snowy Christmas like in the movies. With this in mind, I thought I’d make something a little festive this close to Christmas.

Now, I’ve never been super great at decorative icing on cakes. Hell, I only just mastered getting an even, smooth icing! But I found this adorable little fondant Christmas tree at my local supermarket and I couldn’t resist putting together a little scene. The teeny tiny deer is made of glass. I picked him up from some Christmas markets when I was in Paris a couple of years ago. That trip was the closest I’ve ever come to having a white Christmas. It was the beginning of December, so everywhere was in full festive mode in preparation for Christmas. It only snowed briefly but as it is the one and only time I have ever even seen snow, it is a time I will never forget!

For my first attempt at a Christmas Themed cake, I’m pretty happy with how it turned out. The cake itself is a delicious vanilla cake, but the butter cream icing makes it that little bit decadent. It certainly didn’t last long in my house (admittedly, I think I ate the most of it though!) My favourite thing about it is that it made me feel like I have a little piece of white Christmas in my house, even if it is 30 degrees outside.

What You Need:
For the Vanilla Cake - 
5 large egg whites
¾ cup of whole milk
2½ teaspoons of pure vanilla extract
2½ cups of sifted plain flour
1¾ cups of sugar
1 tablespoon and an additional 1 teaspoon of baking powder
¾ teaspoon of salt
¾ cup of unsalted butter

For the Icing -
1½ cups plus 2 tablespoons of softened butter
3½ cups of sifted icing sugar
3 tablespoons of milk
1½ teaspoons of pure vanilla extract
A pinch of salt
Extra icing sugar for decoration

What You Do:
1. Preheat your oven to 180 degrees and grease two round cake tins.
2. Whisk together the egg whites, ¼ cup of milk, and the vanilla and set aside.
3. Place the dry ingredients in a large bowl and mix until combined. Add in the butter and the remaining ½ cup of milk. Mix with an electric beater on low speed until just moist. Increase the speed to medium and mix for a further 1½ minutes.
4. With the beater on medium speed, add the egg mixture in 3 separate parts, beating for 20 seconds after each addition.
5. Divide the batter evenly into the cake tins and bake in the oven for 20-30 minutes or until a toothpick inserted into the center comes out clean.
6. Allow to cool in the tins for 10 minutes before loosening the sides of the cakes with a knife and remove to cool on wire racks. Ensure the top of the cakes are facing up and leave to cool completely.
7. For the icing; In a large bowl whip the butter on medium speed until pale and creamy, about 8 minutes.
8. On low speed, add in the remaining ingredients and mix for 1 minute. Increase the speed to medium and continue to whip until the icing becomes light and fluffy (about 6 minutes.)
9. To assemble the cake, place the bottom cake layer bottom/flat side down on a plate. Spoon about 1 cup of icing into the center and spread evenly across the cake with a spatula.
10. Gently place the 2nd cake layer top/rounded side down onto the first layer. Place a small amount of frosting on top of the cake and create a crumb coat by spreading a thin layer of icing over the top and sides with a spatula or butter knife. Place in the refrigerator and chill for about 30 minutes.
11. Remove the cake from the refrigerator and spread the rest of the icing evenly over the top and sides. I dusted the cake with icing sugar and used torn up mini marsh-mellows to create the snowy effect. Place the cake back in the refrigerator and chill for another 30 minutes prior to serving.
Enjoy on Christmas day with your loved ones, or if you’re me, enjoy it a week early and wish it would snow where you are!