February 23, 2012
In
Uncategorized
One of those so-simple-why-didn’t-I-think-of-that DIY’s that I always see going around is decorated porcelain. Such a simple and effective way to improve or revamp old crockery around your home, I always wanted to try it myself, but I was never sure where i could get the tools necessary. On a recent trip to my local craft store, I spotted these Porcelaine 150 pens for a measly $9! There was a whole selection of colours, but as this was my first try I decided to stick with simple black to test it out. And guess what; It was SUPER easy! Hooray!
To do this at home, you will need:
For my first attempt, I chose an
old mug I had laying around, a sugar pot I picked up from the craft store for $2 and Loki’s food bowls that I thrifted for 50 cents each.
Decorating your items is as simple as pie… no, even easier! (What? Sometimes pies are hard to make…)
1. Give the pen a good shake before use, you may need to press down on the tip repeatedly to get the ink flowing.
2. Make sure your item to decorate is clean and dry - if it is wet the pen will not draw well on the china.
3. Now, I am notoriously impatient, so I didn’t use pesky things like stencils or guides. I’m all about the free-hand baby! But if you would like neater prettier designs than me, this would be the time to measure out and stick them on.
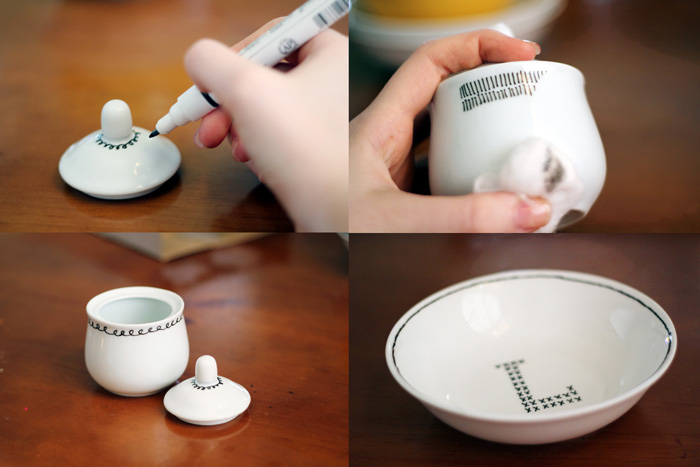
4. Because the pen is basically a marker you can just draw on your porcelain as you wish, I found that the pen would start to run out of ink after a few lines, so keep a small piece of paper or cardboard close by to re-load the tip and test the flow. (To do this press down on the tip a couple of times until the ink starts to come out again - Be careful you dont get too much!)
5. If you make a mistake, a touch of nail polish is perfect to wipe away your design. I believe a damp cloth would also work, but I chose nail polish because as an alcohol it dries very quickly, so you don’t have to worry about getting the China too wet to draw on.
6. Let the paint set - this will depend on the pen/paint you’re using: some can just air dry and some you will need to bake in the oven - check the directions on the product.
7. Voila! Proudly use your new and totally unique cup/bowl/plate/tattooed china doll!
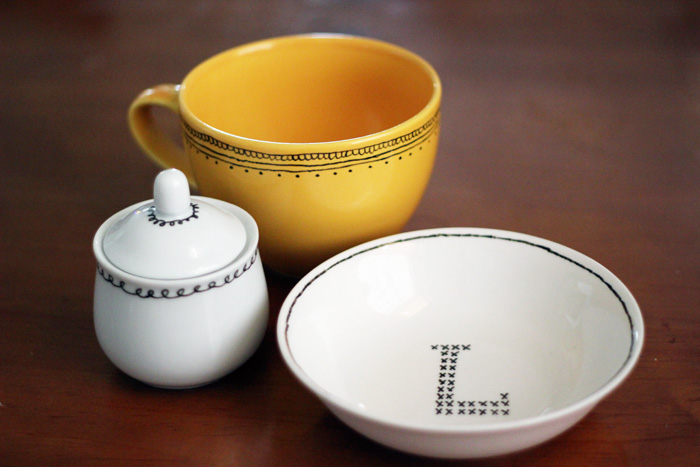 My test subjects turned out even better than I had expected! I already have plans to try this again, next time with more colours and patterns! My dinner sets wont know what hit them!


