Christmas day is always a little bittersweet for me. I think I love the lead up to Christmas more than the day itself. The day is wonderful but it is always over so quickly! I love the season, the parties, shopping for gifts, decorating and giving to others. It’s my favourite time of year. Here’s hoping you have a fabulous day, full of friends, family, food and of course a few presents!
Last chance to share some Christmasy links before the actual day. I always wish that the end of the year wasn’t so busy so that I could try out more of these projects myself…
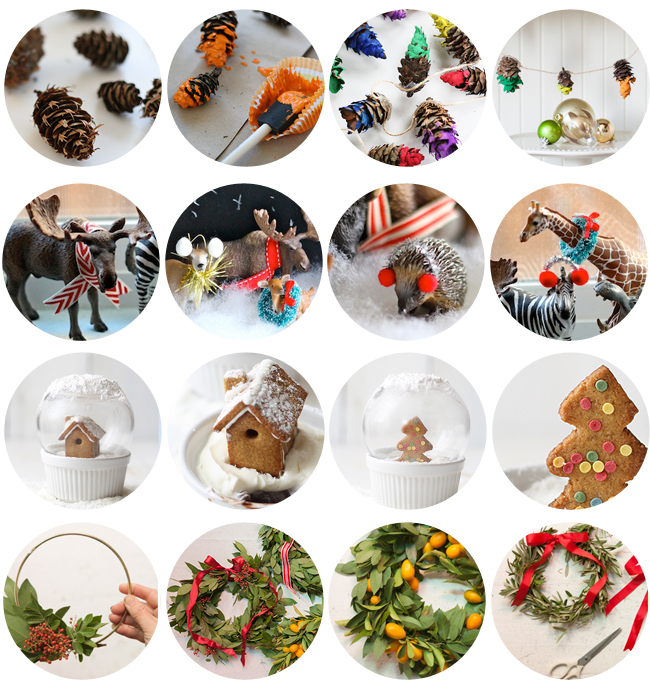
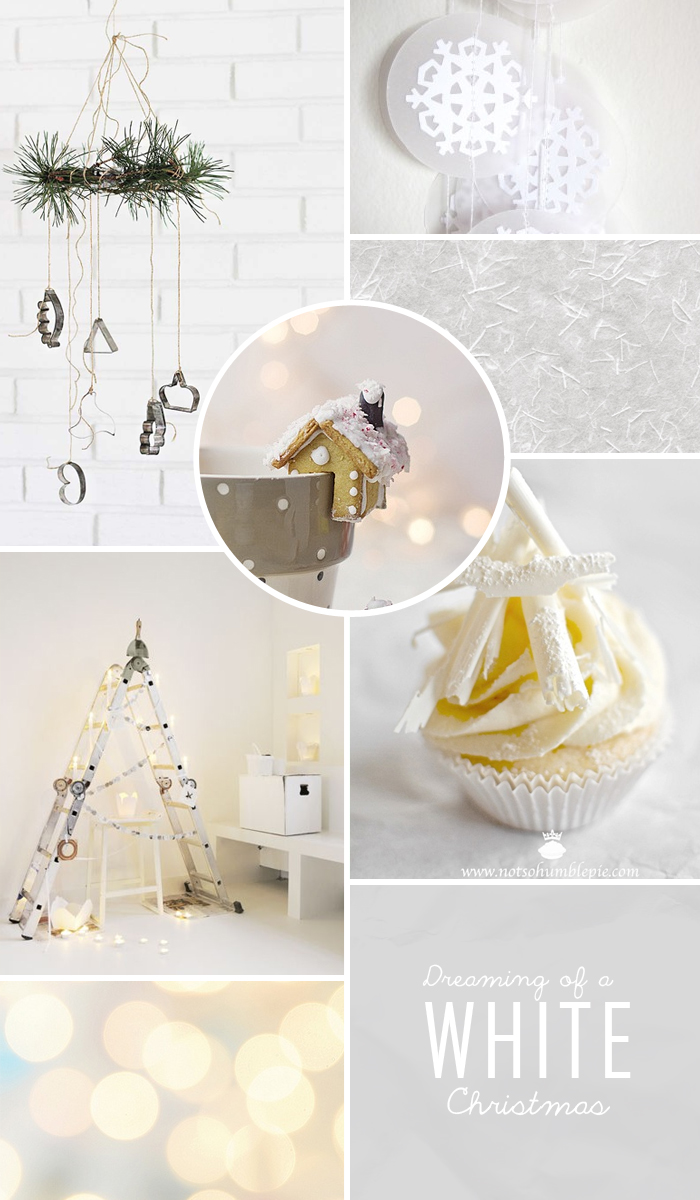
LINE ONE: Loving this nifty DIY for making Rainbow Dipped Pine Cone Garlands. They almost look like the old style of Christmas lights we used to have in our house as kids.
LINE TWO: Melanie over at You Are My Fave has been getting into the Christmas Spirit by putting teeny tiny scarves and earmuffs onto toy animals around her home. Adorable!
LINE THREE: I am totally want to try this next year, Edible Snow Globes are such a brilliant idea and look delicious to boot!
LINE FOUR: Oh Joy has more fantastic Christmas Projects, this time 3 beautiful wreaths you can make yourself. Next year I think I might make some mini wreathes for inside my house.
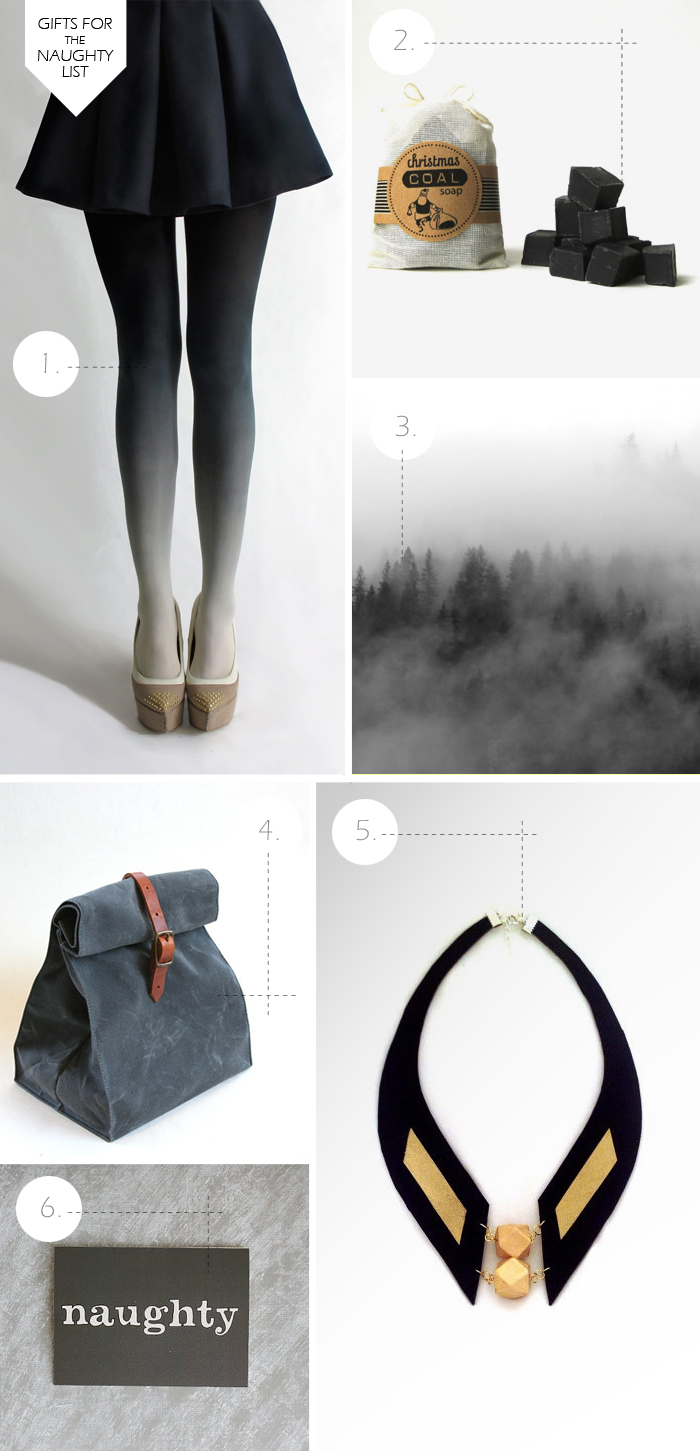
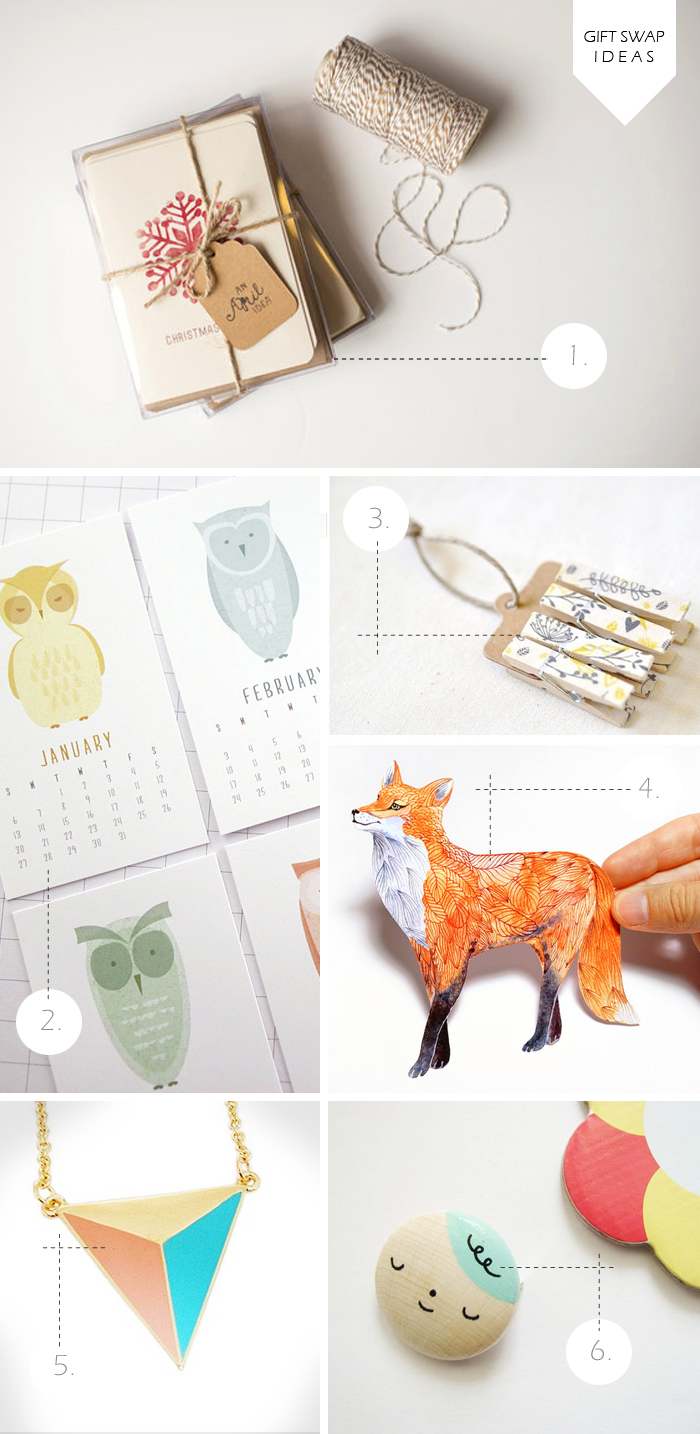
A Etsy gift guide for that person who hasn’t been so good this year. Maybe it’s your little sister who steals your clothes. Maybe it’s your neighbor who lets their dog poop in your yard. Perhaps even, it’s a blogger who hasn’t been posting her ‘Oh Etsy‘ posts on time the last few weeks. Either way, here is a collection of last minute gift ideas for that person in your life who should really be finding a lump of coal in their stocking come Christmas day.
ONE/ Ombre Tights in Coal / BZR / $40
TWO/ Christmas Coal Soap / Prunella Soap / $6.50
THREE/ Diffusion - Black & White Photography / Ashes / $18
FOUR/ Charcoal Gray Canvas Lunch Bag / Overlap / $48
FIVE/ Geometric Statement Necklace / Julishland / $24
SIX/ Naughty Christmas Card / Branch & Olive Paper / $4.75
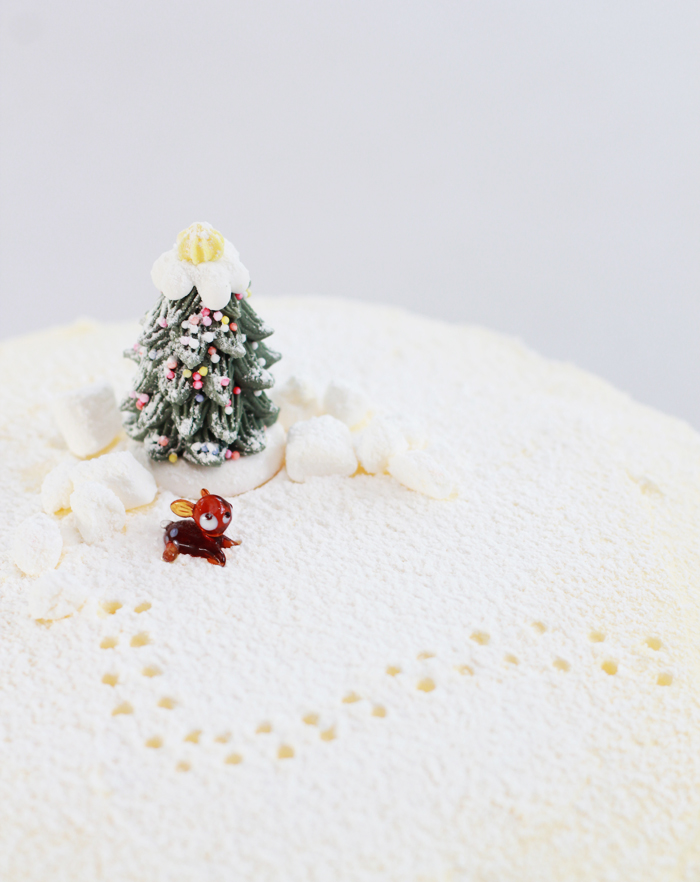
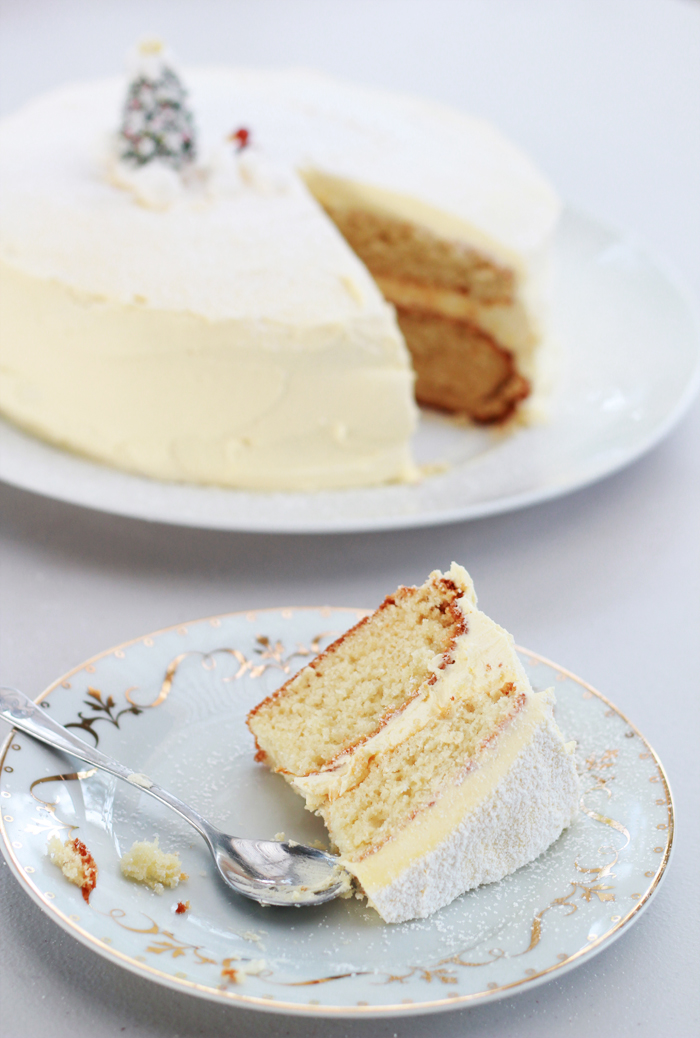
White Christmas’s are not really something we have in Australia. Christmas day falls in the middle of Summer, so usually our Christmas day involves a lot of seafood, swimming and relaxing in the heat. It’s nice, but it doesn’t mean I don’t sometimes wish I could have a ‘traditional’ snowy Christmas like in the movies. With this in mind, I thought I’d make something a little festive this close to Christmas.
Now, I’ve never been super great at decorative icing on cakes. Hell, I only just mastered getting an even, smooth icing! But I found this adorable little fondant Christmas tree at my local supermarket and I couldn’t resist putting together a little scene. The teeny tiny deer is made of glass. I picked him up from some Christmas markets when I was in Paris a couple of years ago. That trip was the closest I’ve ever come to having a white Christmas. It was the beginning of December, so everywhere was in full festive mode in preparation for Christmas. It only snowed briefly but as it is the one and only time I have ever even seen snow, it is a time I will never forget!
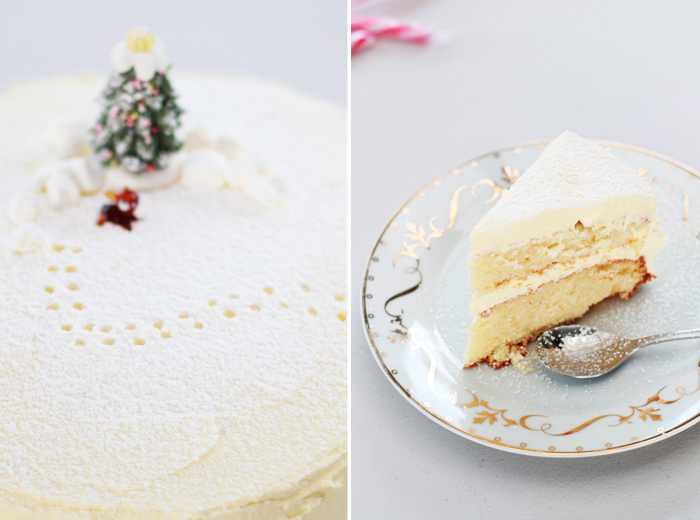
For my first attempt at a Christmas Themed cake, I’m pretty happy with how it turned out. The cake itself is a delicious vanilla cake, but the butter cream icing makes it that little bit decadent. It certainly didn’t last long in my house (admittedly, I think I ate the most of it though!) My favourite thing about it is that it made me feel like I have a little piece of white Christmas in my house, even if it is 30 degrees outside.
 What You Need:
For the Vanilla Cake -
5 large egg whites
¾ cup of whole milk
2½ teaspoons of pure vanilla extract
2½ cups of sifted plain flour
1¾ cups of sugar
1 tablespoon and an additional 1 teaspoon of baking powder
¾ teaspoon of salt
¾ cup of unsalted butter
For the Icing -
1½ cups plus 2 tablespoons of softened butter
3½ cups of sifted icing sugar
3 tablespoons of milk
1½ teaspoons of pure vanilla extract
A pinch of salt
Extra icing sugar for decoration
What You Do:
1. Preheat your oven to 180 degrees and grease two round cake tins.
2. Whisk together the egg whites, ¼ cup of milk, and the vanilla and set aside.
3. Place the dry ingredients in a large bowl and mix until combined. Add in the butter and the remaining ½ cup of milk. Mix with an electric beater on low speed until just moist. Increase the speed to medium and mix for a further 1½ minutes.
4. With the beater on medium speed, add the egg mixture in 3 separate parts, beating for 20 seconds after each addition.
5. Divide the batter evenly into the cake tins and bake in the oven for 20-30 minutes or until a toothpick inserted into the center comes out clean.
6. Allow to cool in the tins for 10 minutes before loosening the sides of the cakes with a knife and remove to cool on wire racks. Ensure the top of the cakes are facing up and leave to cool completely.
7. For the icing; In a large bowl whip the butter on medium speed until pale and creamy, about 8 minutes.
8. On low speed, add in the remaining ingredients and mix for 1 minute. Increase the speed to medium and continue to whip until the icing becomes light and fluffy (about 6 minutes.)
9. To assemble the cake, place the bottom cake layer bottom/flat side down on a plate. Spoon about 1 cup of icing into the center and spread evenly across the cake with a spatula.
10. Gently place the 2nd cake layer top/rounded side down onto the first layer. Place a small amount of frosting on top of the cake and create a crumb coat by spreading a thin layer of icing over the top and sides with a spatula or butter knife. Place in the refrigerator and chill for about 30 minutes.
11. Remove the cake from the refrigerator and spread the rest of the icing evenly over the top and sides. I dusted the cake with icing sugar and used torn up mini marsh-mellows to create the snowy effect. Place the cake back in the refrigerator and chill for another 30 minutes prior to serving.
Enjoy on Christmas day with your loved ones, or if you’re me, enjoy it a week early and wish it would snow where you are!
Hey you guys, it’s almost Christmas! My December of Christmas adventures hasn’t really gone according to plan. As always seems to be the way when I’m feeling extra inspired, I have been crazy busy with work over the last week or so. After Blogshop last weekend I have been so extra pumped to work on my posts and layout. Not having time has been so frustrating!
Never mind, this week is my last week at work while we shut down for a couple of weeks over Christmas. I’m finally getting back into the Christmas Spirit. I’m the biggest fan of Christmas so it feels good to be getting excited all over again. We put up our tree recently and decorated the living room. All of my decorations seem to have ended up in shades of white, silver and gold this year. Seems as though, even though there is no chance of snow here in Australia, I’m pining for a white Christmas.
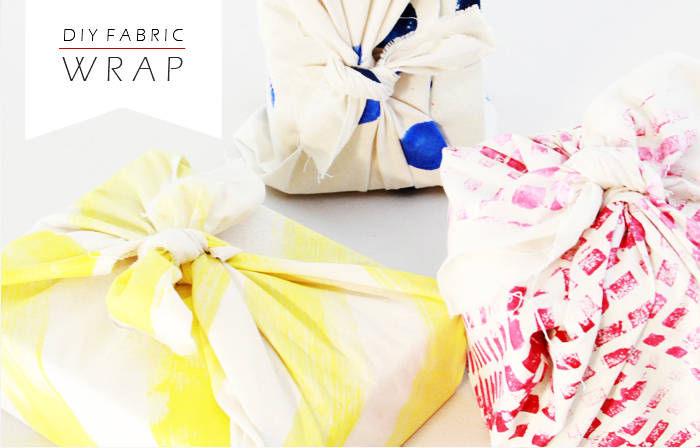
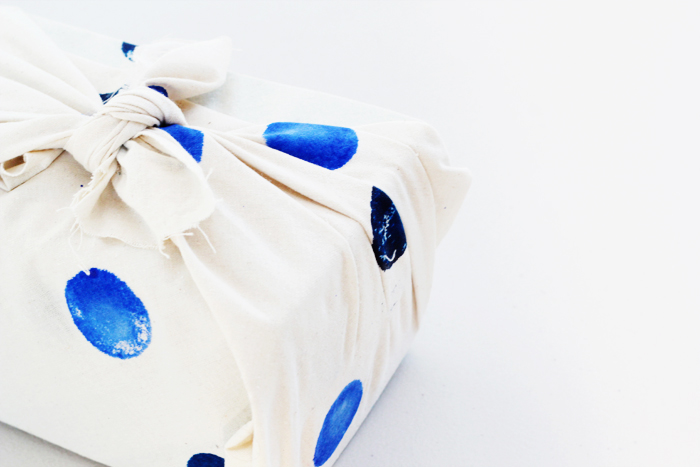
Ever since I went to Japan, I’ve been obsessing over fabric wraps, in particular, for gift wrapping. There are so many different ways to gift wrap presents, but fabric wraps still seems to be one style that doesn’t get used anywhere near as much, which is a shame considering what an art form it can be! Using fabric to wrap your gifts is also a little friendlier for the environment, as they can be used again and again, or even kept to be used as scarfs or linen.
These wraps can definitely be made to last. If you want to go out and purchase some fabric inks and nice material, you’ll make a long lasting gift within a gift. For me however, I chose to use what I had on hand, which still turned out beautifully, but probably wont last the distance long term.
What You Need:
Plain Calico or cotton fabric – as much as you might need to make a few large squares. I got around 2m
Fabric Dye/Paints – I used acrylic paints which worked just as well.
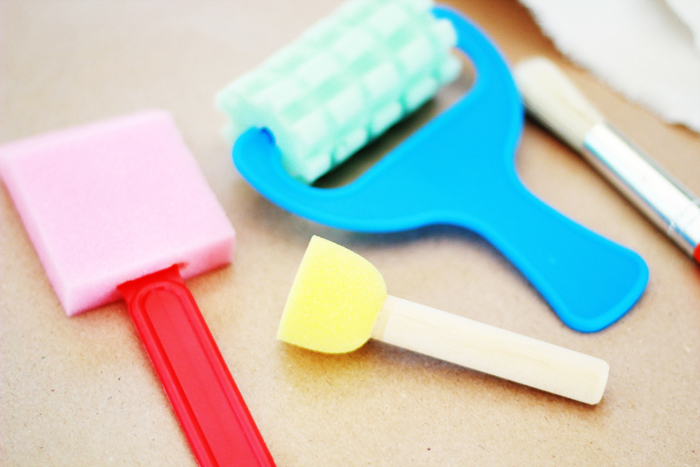
Painting tools – sponges, stamps, brushes etc
What You Do:
1. Take your fabric and cut into large squares. The size of your squares will depend on what you’re wrapping. I made mine around 50cm x 50cm.
2. Iron your fabric so that there are no creases and lay out on a flat surface with paper underneath to catch any bleed through.
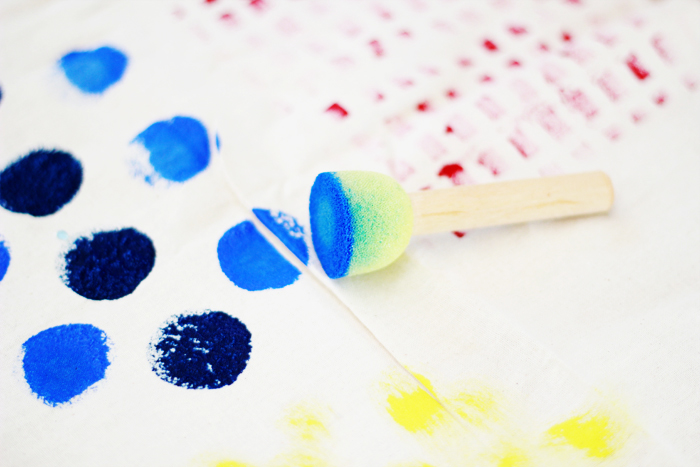
3. Prepare your painting tools; I picked up a kids packet of ‘painter starter kit’ which had a mini textured roller, round sponge stamp, paint brushes etc for about $4. But if you have stamps or shapes you want to use go for it! Pour out a dollop of paint/ink onto a flat pallet and load up your chosen painting tool. Test each one on a scrap piece of fabric until you have even coverage in your pattern.
4. Once you feel confident to start, begin from one side of the fabric creating an even pattern along one edge. Repeat until you reach the alternate side and the whole piece is patterned.
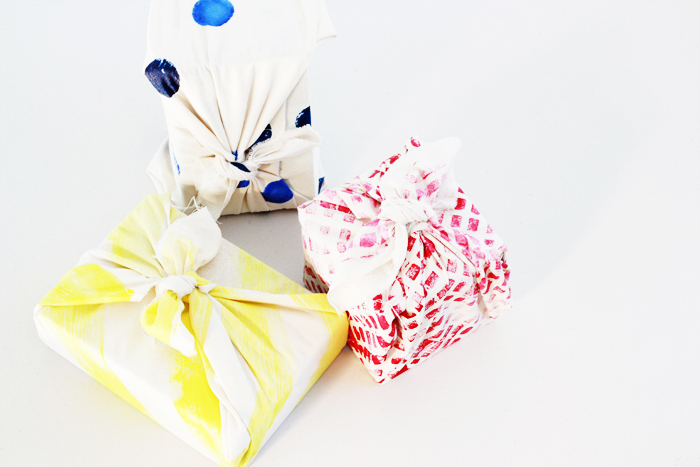
For my three fabrics I chose three patterns:
Yellow stripes - Painted by loading up a large flat sponge brush with paint and dragging across the fabric letting it run out as I went across to create a textured line.
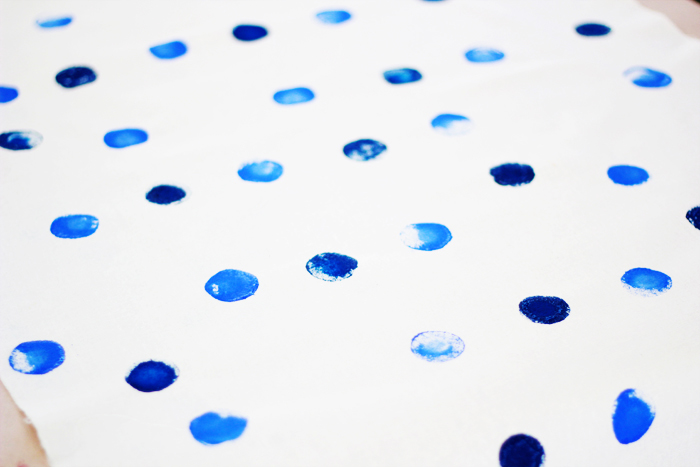
Blue Spots - I chose a light and a dark blue and created even spaced spots across the piece in the lighter colour. I then went back through and added the darker spots here and there.
Pink & Red texture - Using the textured roller, I created a textured effect starting from the middle of the fabric, making the colour lighter as I moved out (by adding a little white paint to the red each time I completed a line)
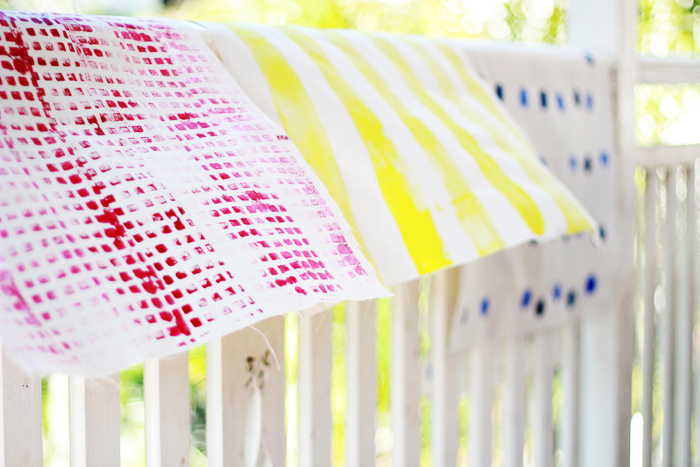
5. Hang the fabric out to dry. Leave until the paint/ink has completely dried. You can then iron the piece (using a protective sheet so that the paint doesn’t come off on your iron) to set the prints.
6. If you would like to hem the edges of the fabric, now is the time to do so. I liked the raw edges, so I left mine as they were (fraying bits and all!)
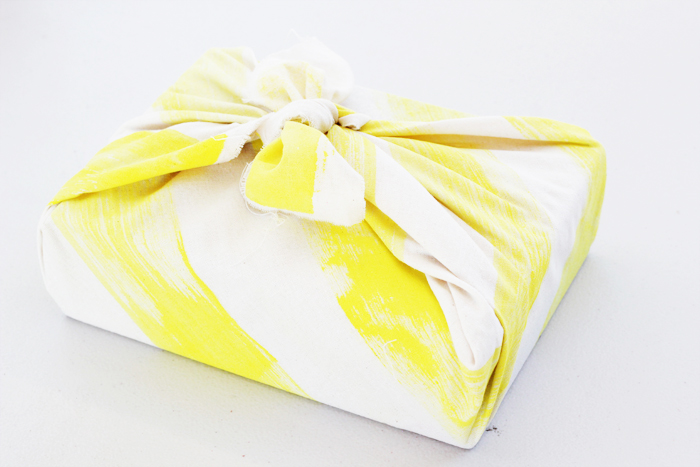
You can now wrap your gifts using your super awesome new fabric wrap! There are many great sites out there that can show you how to wrap gifts using material (check out Chewing the Cud) I used a pretty basic method of wrapping a simple box.
1. Lay the wrap face down and place the box in the middle.
2. Take the diagonally and tuck it around the box.
3. Take the opposite end and bring over the top, folding in the edge to line up with the edge of the box.
4. Gather together to two remaining sides and pull towards the middle of the box. Knot together and spread out the ends to make a ‘bow’ look.
What do you think? Will you give gift wraps a try this festive season?
Today is your last chance to sign up for the Christmas Gift Swap! If you would like to take part, drop me an email me ([email protected]) with your Full Name, Postal Address, Email address and if you have a preference for a local or international swap. As a lot of you guys are international, we’re going to keep it small – we are exchanging a Christmas Card and a gift should be small enough to fit in a small to medium sized envelope (for example; a small piece of art/drawing, stickers, small necklace etc)
This swap is all about making new friends spreading some Christmas cheer! Your gift and card doesn’t have to be fancy or expensive, feel free to make something yourself or pick up something small from local artists and markets. Just a little something to make someone smile and get in the mood for the festive season!I hope you decide to join in on the fun!
The Fine Print:
- I will send the details of your gift recipient by 26th November 2012
- Your Card/Gift will need to be mailed by the 8th December to allow for international postage times.
- You can expect to spend around $10+ on your card and gift (unless you crafty kids opt for a homemade option) Plus potentially postage costs.
- All Contact details will only be provided to your swap partner. I will keep these details private and will not use them nefariously (Ie: for self-promotion or annoying spam)
- If for any reason you cannot send your card/gift, please let me know immediately so that no one misses out!
- This swap is open to international readers!
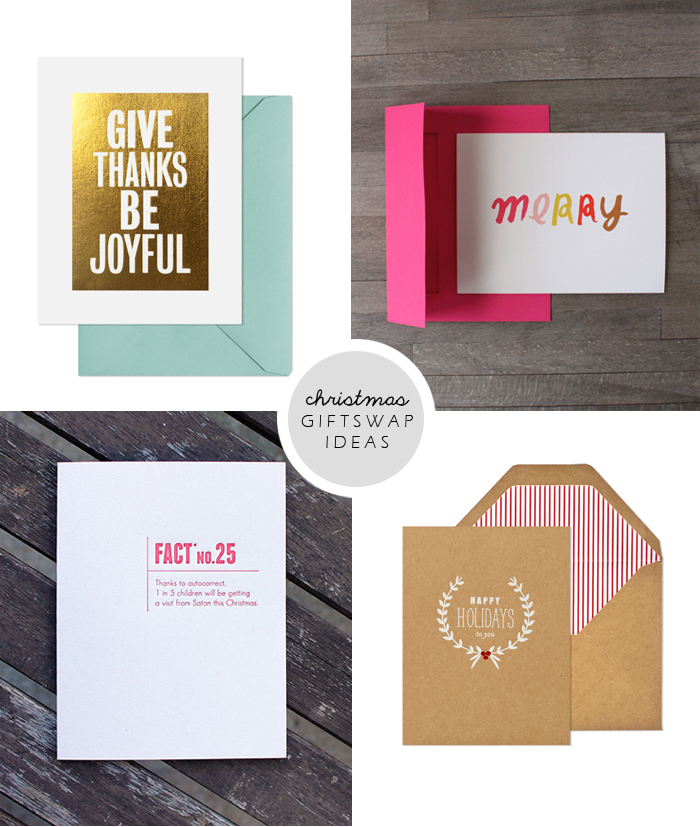
Sometimes the smallest gifts are the hardest to buy. As much as I love taking part in office Secret Santa type gift exchanges, I always find it daunting trying to find a great gift within the low price range. I get a little too ambitious even if I’m giving something handmade. Sometimes I just need a couple of ideas to get my brain on the right track…With this in mind, I thought I’ve give a bit of inspiration of for those of you who have decided to take part in our Christmas Gift Swaps (or even those of you facing a similar dilemma with your own gift shopping this festive season.) All of these lovelies are around $10 or under and not only would they fit in an envelope quite comfortably (for easy postage), but I think they would also make beautiful little stocking stuffers.
If you would like to sign up there’s still time to join in the fun - just drop me an email at [email protected] with your postal address and I will add you to the list! (Full Details HERE)
ONE / Illustrated Christmas Card Set / An April Idea / $35 (12pk)
TWO / Mini 2013 Calendar / Monkey Mind Design / $12
THREE / Washi Tape Clothes Pins / Back to Zero / $3
FOUR / Garden Fox Animal Sticker / Teva Gallery / $9
FIVE / Geometric Necklace / Bracelet Cool / $8
SIX / Mr Mint Hand Painted Wooden Brooch / Pinkrain Shop / $10
[Image Via: Paper n Stitch]
With Christmas just around the corner (and maybe some office Secret Santa’s or Gift Swaps to start shopping for) I thought I’d share some tips that I have learnt for buying the perfect gift. Now, I don’t like to blow my own horn, but I’m pretty awesome at buying gifts. I would even go so far as to say that its kind of ‘my thing’. This certainly isn’t due to any hidden gift giving talents. I’m no more insightful than the next person, but I have some clever tricks to ensure you’re always buying your loved ones something they’ll really enjoy and not just candles or socks this Christmas.
1. LISTEN
So, this sounds pretty basic, but I know so many people who don’t do this. Listen to the people you care about; what do they like? What are their interests? And I don’t mean just around Christmas or birthdays, I mean all year round. If a loved one mentions that book they’ve been wanting to read or that hobby they’ve been wanting to get into, I open up the notebook app (or even a draft message) make a quick note in my phone. Something like “Tom - Carl Sagan book” and save it for later. The best thing about doing this is that it just looks like you are sending a text message so your target is none the wiser and you have a handy reminder for later.
Speaking of which…
2. Set Up Reminders
In your phone, on your computer, in your calendar. Put a reminder in for the most important people’s birthdays. Not just for the day itself, but a few weeks in advance. This way you will know that birthday is coming up and have ample time to plan what you want to buy for that special someone. Especially if you are like me and you do a lot of your shopping online, you will appreciate the extra time when there is a 2 week wait on shipping!
3. Use Online Searches
And I don’t mean Google; sites like Ebay and Amazon are a veritable treasure chest of items you’ve never even thought of! Whenever I am stuck for gift ideas I head over to Ebay and start searching topics that my recipient might enjoy. Try names of television programs, hobbies, favourite actors or even general items like ‘leather bag’ and see what comes up! I can’t count how many times this has saved me when I was out of inspiration!
4. Bookmark it!
So you come across the perfect art print for your mum on Society6 and you think, ‘oh I should buy this for her birthday!’ But her birthday is months away and you’re a bit poor until payday, so you decide you’ll come back later, closer to the date and get it then.
No, you wont. You’ll forget and then when it comes time to buy her a gift you’ll be sitting there thinking ‘now what was that thing I saw back in June…?’ Bookmark that shit! And don’t let your bookmarks get lost in between links to funny pictures of cats… I have a ‘Buy’ Folder set up, with sub-folders for each of my family members/housemates/close friends. I save anything cool I see in these folders over the year, so when it approaches Christmas or Birthdays I can just open up the relevant folder and browse a ready made list of gift ideas. Just remember to name your bookmarks as what they actually are, (ie: ‘Owl Measuring cups from Anthropology’) instead of the default name so that if you come across a broken link when you come back, you can Google the item and try to find it elsewhere.
5. The Final Test
Many people may disagree with this last tip but it’s my number one rule: Buy something that you would like to receive. This doesn’t necessarily mean that you should buy something to your own taste, but if when you put yourself in the recipients shoes, would you be happy to receive this gift? This is my final test when deciding on gift purchases. Even though tastes may differ, when someone can see the thought and care that has gone into a present, even if it’s not something they would have bought for themselves, chances are they are going to enjoy it regardless. Some of the best gifts I have ever received were items that I would have never in a million years picked out for myself, but I could see the love and thought that went into the purchase and that made me cherish the gift all the more.
So there you have it. Nothing ground breaking or crazy, just some simple ideas that will hopefully help you get through this festive season.
Where has the year gone you guys? It seems like just yesterday that we were talking about Easter and now it is almost Christmas! Which is kind of awesome because, I don’t know about you, but I am CRAZY about Christmas time! (It really is the most wonderful time of the year.) I’m so excited! Trust me, it’s going to be a winter wonderland around here come December! And in preparation I have an idea….
Inspired by Christmas Swap’s I have seen and participated in previous years, I have decided to host a Christmas Gift Swap!
Guidelines:
- If you would like to take part you will be required to send a Christmas card and small gift to a stranger (and potential new friend) and you will receive one in return.
- As a lot of you guys are international, we’re going to keep it small – your gift should be small enough to fit in a small to medium sized envelope (for example; a small piece of art/drawing, stickers, small necklace etc)
- In your card you might want to include an introductory sentence – name, where you are from, blog/website if you have one, a little bit about you and a Christmas Message.
To sign up, email me ([email protected]) with your Full Name, Postal Address, Email address and if you have a preference for a local or international swap. I will do my best to match you up accordingly.
This swap is all about making new friends spreading some Christmas cheer! Your gift and card doesn’t have to be fancy or expensive, feel free to make something yourself or pick up something small from local artists and markets. Just a little something to make someone smile and get in the mood for giving.The Fine Print:
- You must sign up by the 23rd November 2012
- I will send the details of your gift recipient by 26th November 2012
- Your Card/Gift will need to be mailed by the 8th December to allow for international postage times.
- You can expect to spend around $10+ on your card and gift (unless you crafty kids opt for a homemade option) Plus potentially postage costs.
- All Contact details will only be provided to your swap partner. I will keep these details private and will not use them nefariously (Ie: for self-promotion or annoying spam)
- If for any reason you cannot send your card/gift, please let me know immediately so that no one misses out!
- This swap is open to international readers!
I will share some gift and card ideas over the coming week to give you some inspiration. If you have any questions please email [email protected]
SAY HELLO!


FEATURE POSTS


SUBSCRIBE