thumb-recipe-french-toast

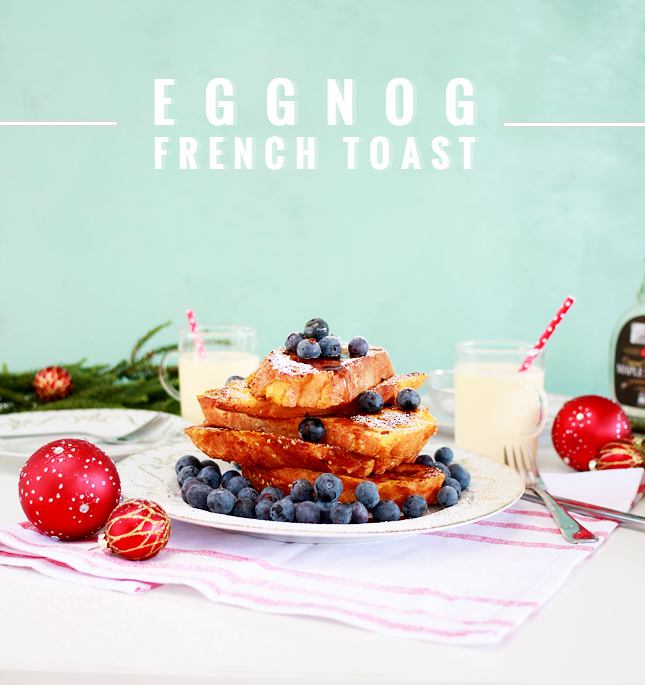
EAT | Eggnog French Toast

Enjoy a festive breakfast the RIGHT way, with a big helping of  Eggnog French Toast! (Click through for the full recipe)
Now I know all of y’all are super excited for Christmas eats. Glazed hams, roast turkeys, chocolates as far as the eye can see! But you know what meal everyone seems to neglect during the holiday season? Breakfast. Sure, you might still serve yourself up a big ol’ plate of bacon and eggs, but you’re not really getting the most out of the season if you’re not making every  meal a little bit festive!

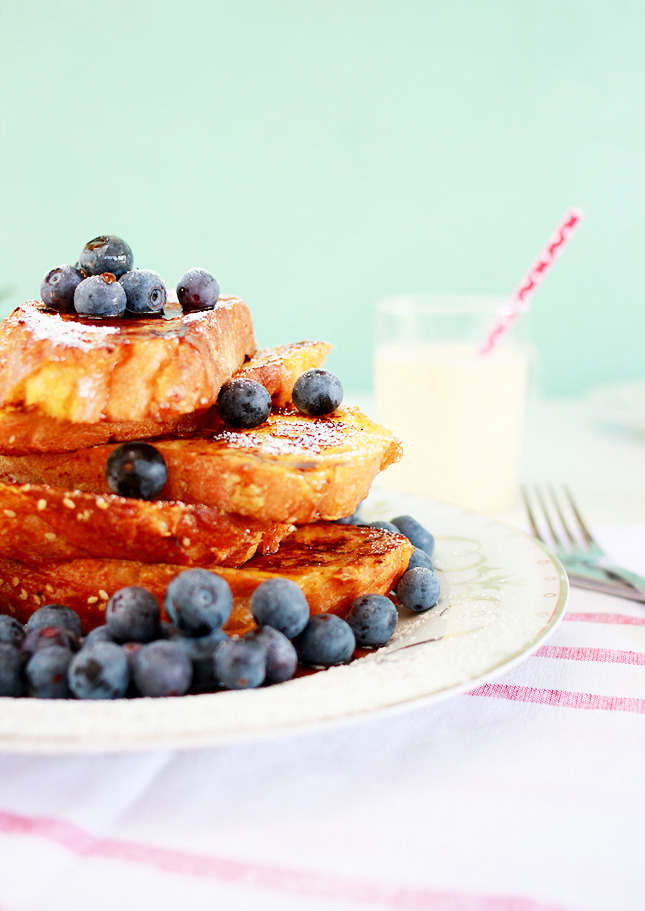
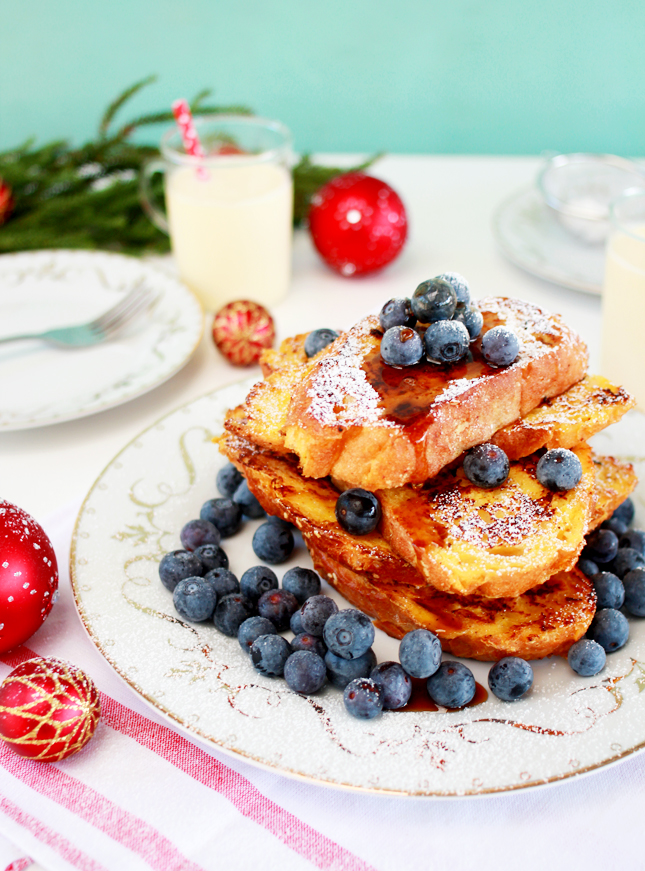
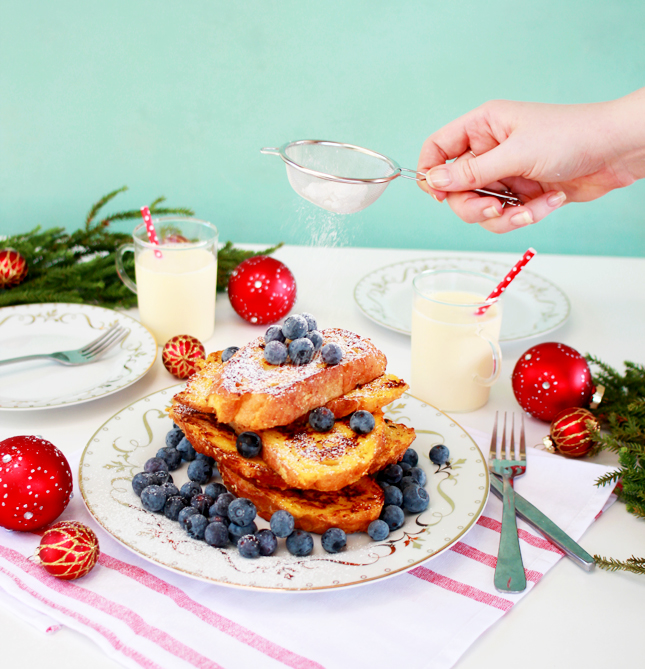
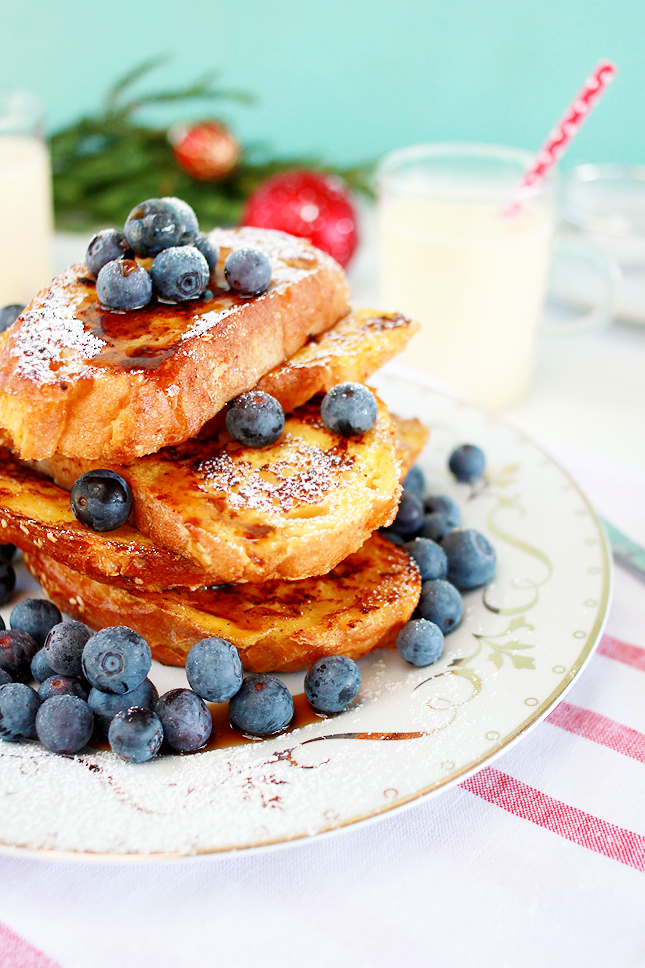
This is your sweeter version of French Toast. It’s light and fluffy on the inside and crisp and crunchy on the outside, but with an unexpected sweetness you don’t normally find that early in the day. The ‘noggy’ flavour isn’t too overpowering, so even if the nog ain’t your speed, you still can get on board with this breakfast. Serve with berries and maple syrup or go the whole hog and serve with an iced cold glass of eggnog! Nothing like getting a carried away this time of year!

I do have one caveat on this recipe: please, please - promise me you will use some good quality, thick, crusty bread. This is serious guys. Your average sliced white is not gonna cut it I’m afraid. It doesn’t have to be fancy, just  thickly sliced and the crustier the better. Trust me, this one thing makes a world of difference! You wont regret it.

Enjoy a festive breakfast the RIGHT way, with a big helping of  Eggnog French Toast! (Click through for the full recipe)Enjoy a festive breakfast the RIGHT way, with a big helping of  Eggnog French Toast! (Click through for the full recipe)

Eggnog French Toast

Ingredients

  • 1 cup of eggnog
  • 2 eggs
  • 2 tsp of ground cinnamon
  • 1 tsp of sugar
  • 1 tbsp of butter
  • 8 slices of thick, crusty bread
  • Toppings to serve (ie: icing sugar, maple syrup, berries)

Instructions

  1. Place the eggnog, eggs, sugar and cinnamon in a bowl and whisk together until smooth. Pour into a wide, shallow dish.
  2. Heat butter in a large frying pan over medium heat. While the butter melts, place 2 slices of bread into the eggnog mixture and allow to soak for 30 seconds - 1 minute. Turn over and soak the opposite side. Make sure both sides are well covered.
  3. Shake off any excess and place directly into the frying pan, pushing down with a spatula to ensure that the heat is touching the whole piece. Cook each side for around 3-4 minutes or until the bread is brown and toasted. (The surface of the toast should be crisp but not burned - you may need extra time if you are using particularly thick slices)
  4. Repeat the above steps until all slices of bread have been toasted. Place cooked pieces in a low oven to keep warm until you are ready to serve.
  5. To serve, dust with a generous coating of icing sugar. Top with berries and maple syrup if desired or serve plain,with butter.
http://www.highwallsblog.com/2014/12/eat-eggnog-french-toast/
Enjoy a festive breakfast the RIGHT way, with a big helping of  Eggnog French Toast! (Click through for the full recipe)Enjoy a festive breakfast the RIGHT way, with a big helping of  Eggnog French Toast! (Click through for the full recipe) Enjoy a festive breakfast the RIGHT way, with a big helping of  Eggnog French Toast! (Click through for the full recipe)

thumb-recipe-fruitcake

Recipe | Individual Christmas Fruitcakes

Merry Christmas! Try these single serve Cherry Fruitcakes (click through for full recipe)

Forget those sticky store bought fruitcakes you buy in a cheesy tin. And forget the dry, crusty slab of fruitcake your great aunt is always trying to serve you on Christmas Day. I was a fruitcake nay-sayer until I started making these individual cherry fruitcakes for Christmas. They are moist and sweet, and they are just so damn festive!

These fruity little treasures are “single serve” but as with most things, are best shared with a loved one.  I mean,  if you (like me) like to gorge yourself, even though you know you’re going to end up feeling a little sick: well then more power to you! But for those more sensible folk out there, while these cakes are small, they are still pretty dense, so going halvsies with a friend, ain’t such a bad idea after all!

On an unrelated note, I’ve been trying out this recipe plugin for my food posts the last few weeks. It’s not as pretty as when I format it myself, but it does add the option of easy print action for recipes. What do you guys think? Good or bad? Should we keep it or go back to the old way?

Merry Christmas! Try these single serve Cherry Fruitcakes (click through for full recipe) Merry Christmas! Try these single serve Cherry Fruitcakes (click through for full recipe)

Individual Christmas Fruitcakes

Ingredients

  • 1 cup of raisins
  • 1 cup of mixed peel
  • 1 cup of dried cranberries
  • 1 orange (juice and zest)
  • 1/2 cup of sherry*
  • 225g of butter
  • 1 & 1/2 cups of white sugar
  • 3 eggs
  • 2 & 1/2 cups of flour
  • 1 teaspoon of baking powder
  • 1 teaspoon of vanilla essence
  • 1 cup of glacé cherries
  • 1 cup of icing sugar
  • 2 - 3 tablespoons of citrus juice
  • Fresh cherries and vanilla ice cream to serve (optional)

Instructions

  1. Soak your dried fruit the night before you want to make your fruitcake: combine the cranberries, raisins, mixed peel and the zest of 1 orange into a bowl. Cover with the juice of 1 orange and 1/2 cup of sherry* ensuring that the fruit is completely submerged (add a little water if needed). Cover with plastic wrap and leave to sit overnight.
  2. The next day, drain the liquid away reserving the soaked fruit. Set aside until needed.
  3. Preheat your oven to 150 degrees Celsius and grease 6 mini bundt tins.
  4. In a mixing bowl, cream together the sugar and butter until light and creamy.
  5. Add the vanilla and eggs, one at a time, beating well in between additions.
  6. In a separate bowl, combine the flour and baking powder and then fold into the wet mixture, adding in small parts until combined.
  7. Slice the glacé cherries in half and add to the soaked fruit. Stir the fruit into the cake mixture gently, until well combined.
  8. Pour into the prepared tins and smooth the top. Bake for approximately 65 - 70 minutes or until a toothpick comes out cleanly (this may vary depending on your oven so keep at eye on it from the 1 hour mark onwards)
  9. Allow to cool completely before removing from the tin.
  10. Once the cake has cooled, mix together 1 cup of icing sugar and 2 - 3 tablespoons of citrus juice until a smooth glaze forms. Spoon onto each of the cakes, allowing the glaze to spill over the sides.
  11. Serve as is or with fresh cherries and a scoop of vanilla ice cream.

Notes

* The sherry can be omitted and replaced with water if you prefer a less boozy cake.

http://www.highwallsblog.com/2014/12/recipe-individual-christmas-fruitcakes/

Merry Christmas! Try these single serve Cherry Fruitcakes (click through for full recipe) Merry Christmas! Try these single serve Cherry Fruitcakes (click through for full recipe) Merry Christmas! Try these single serve Cherry Fruitcakes (click through for full recipe)

thumb-recipe-almond-cake

EAT | Lemon, Ricotta and Almond Flourless Cake

Lemon, Ricotta and Almond Flourless Cake

Flourless cakes stress me out.There. I said it. Given that my pet hate, when it comes to baking, is when cakes don’t rise enough, the idea of a cake that isn’t supposed to rise should be totally my jam! But that’s just it! Flourless cakes are so moist, so dense and decadent that I simply do not know what to do with them! I constantly second guess myself; is it cooked properly? Did I fold the egg whites correctly? Why does this stress me out so much when it is so damn easy?!

This bout of cake related neuroses is probably why I only make this cake when requested. Sure, the mix of zesty lemon with the creamy ricotta and flakey almond IS pretty friggen amazing. And YES, if you’re gonna hound me about it, maybe I did eat 2 or 3 slices while I was taking these photos. But really, is the completely self-inflicted stress that comes with making this cake worth it in the end? (Yes! YES! A thousand times YES!)

… touché dear readers. You know me too well. Maybe this is more about my own insecurities, than any actual problems with flourless cake. I’m so glad we talked this out. Now let’s celebrate this breakthrough with my 4th a slice of delicious lemon, ricotta and almond cake!

Lemon, Ricotta and Almond Flourless Cake Lemon, Ricotta and Almond Flourless Cake Lemon, Ricotta and Almond Flourless Cake

Lemon, Ricotta & Almond
Flourless Cake

Ingredients

  • 120 grams of unsalted butter, softened
  • 1 1/3 cups of caster sugar
  • 1 vanilla bean, split and seeds scraped
  • 1/4 cup of lemon zest
  • 4 eggs, separated
  • 2 1/2 cups of almond meal
  • 300 grams of ricotta
  • Flaked almonds
  • Icing sugar

Instructions

  1. Preheat the oven to 160 degree Celsius and line the base and sides of a 20cm round cake tin with baking paper and set aside.
  2. Place the butter, 165 grams of the caster sugar, vanilla seeds and lemon zest in an bowl and beat with an electric mixer for 8-10 minutes or until pale and creamy.
  3. Scrape down the sides of the bowl and then add the egg yolks, one at a time, beating in between each addition, until fully combined.
  4. Add the almond meal and beat to combine. With a spoon or spatula, fold the ricotta through the almond meal mixture.
  5. In a separate bowl, beat the egg whites with an electric mixer (using a whisk attachment) until soft peaks form.
  6. Gradually add the remaining sugar to the egg whites mixture and continue to whisk until stiff peaks form.
  7. Add 1 third of the egg whites to the cake mixture and gently fold to combine/ Repeat with the rest of the egg whites.
  8. Pour the mixture into the prepared cake tin and smooth the top.
  9. Sprinkle the top with almond flakes (or place in a pattern) and place in the oven to bake for 40-45 minutes or until firm to touch.
  10. Allow to cool completely in the cake tin. To serve, dust with a generous helping of icing sugar.

Notes

(Adapted from Donna Hay Magazine)

http://www.highwallsblog.com/2014/11/eat-lemon-ricotta-and-almond-flourless-cake/

Lemon, Ricotta and Almond Flourless CakeLemon, Ricotta and Almond Flourless Cake

thumb-recipe-frozen-yoghurt-bars

EAT | Frozen Yogurt & Berry Bars

A sneaky treat that is totally healthy! Frozen Yogurt and Berry Bars! (click for the full recipe)

Oh, hey! Remember me? It’s been a while, but I used to blog around these parts! Where I’ve been is a story for another time, because right now I have something sweet and creamy to distract you from my neglect.

It’s no secret that I have a bit of sweet tooth, which makes it all the harder for me when I try to buckle down and reduce the amount of sweets in my diet. With Christmas practically beating down the door already, I just know the holiday season is going to be the usual cavalcade of cakes, chocolate and candy canes (I’m sure somewhere my dentist is shuddering at the thought!) So I’ve been trying to behave myself… it’s…. kind of lame.

Because I have absolutely no will-power, I have to trick myself into believing that I am still getting that sweet sweet sugar hit I crave so much. Doing this is simple: freeze anything and it gives the impression what you’re eating is a sneaky treat, even if its actually healthy! Add the tangy bite of berries, and you have a winning combination my friend! Take some good old fashioned Greek yogurt, mix in a bit of honey and berries, there ain’t nothing bad for you in these icy snacks!

A sneaky treat that is totally healthy! Frozen Yogurt and Berry Bars! (click for the full recipe)     A sneaky treat that is totally healthy! Frozen Yogurt and Berry Bars! (click for the full recipe)      A sneaky treat that is totally healthy! Frozen Yogurt and Berry Bars! (click for the full recipe) A sneaky treat that is totally healthy! Frozen Yogurt and Berry Bars! (click for the full recipe)

Frozen Yogurt & Berry Bars

Ingredients

  • 2 cups of greek yogurt
  • 1/3 cup of honey
  • 1 tbsp vanilla extract
  • 2 cups of berries (fresh or frozen)

Instructions

  1. Place the yogurt, honey and vanilla in a bowl and mix to combine.
  2. Line a small slice tray with baking paper and scatter the berries evenly across the tray.
  3. Pour the yogurt mixture onto the berries, spreading out across the whole tray making sure that all the berries are covered.
  4. Place in the freezer overnight to set.
  5. To serve, remove from the freezer and and allow to sit for 5 minutes before eating. Slice into squares and enjoy!
http://www.highwallsblog.com/2014/11/frozen-yoghurt-berry-bars/

A sneaky treat that is totally healthy! Frozen Yogurt and Berry Bars! (click for the full recipe)A sneaky treat that is totally healthy! Frozen Yogurt and Berry Bars! (click for the full recipe)

thumb-animalcracker

EAT | Animal Crackers

animal-crackers2

I have a serious question for you: What the hell happened to animal crackers? They were the BEST thing EVER! Sweet little, chocolate covered, cookies in the shape of your favourite circus animals; you know the ones. Where did they go? Do they still exist in other parts of the world? Guys, you gotta tell me if they do! But don’t even try to pass off the non-chocolate covered versions, because you know those do not count!

Any ways, a few weeks ago I finally found some awesome animal cookie cutters and ever since I’ve been keeping our kitchen well stocked with chocolate covered beasts. My childhood self must be so damn proud of me! (My adult self is less impressed with the impact these tiny zoo animals are undoubtedly going to have on my waistline…)

EDIT: I found these cookie cutters on ebay!

animal-crackers5

INGREDIENTS:1 Cup of butter
1 Cup of white sugar
1 teaspoon of vanilla extract
1 egg
2 teaspoons of baking powder
3 cups of all purpose flour
1 packet of chocolate melts
1. Preheat oven to 180 degrees celcius.2. Place the butter (softened) and sugar into a large mixing bowl and cream together using an electric mixer until smooth.3. Add the vanilla and egg and beat again to combine.4. Combine the flour and baking powder together and add to the butter mixture in small amounts, mixing in between each addition. When the dough becomes too thick to mix with the electric mixer, turn out onto a floured surface and knead with your hands.5. Place in the fridge for 15-20 minutes or until the dough is firm.6. Divide in half and roll the dough onto the floured surface, to about 1/4 of an inch thickness.7. Using the animal cookie cutters, cut as many cookies as you can, transferring to a baking tray lined with baking paper. Roll any left over dough into a ball and repeat steps 6 and 7 until the dough has all been used.

8. Bake for 6 - 8 minutes or until the cookies are just golden. Allow to cool completely on a wire rack. (Set the paper lined tray aside to use again in the next step.)

9. Once the cookies have cooled completely, take half a cup of chocolate melts and place them in a shallow dish in the microwave for around 30 seconds, or until the chocolate is mostly melted. (Stir to ensure it all melts together). Place each cookie, face up, into the chocolate, ensuring the whole back of the cookie is covered. Transfer to the paper lined tray and put directly into the freezer to set.

animal-crackers3animal-crackers4

thumb-blueberry-cake

EAT | Blueberry & Lemon Baked Cheesecake

Blueberry & Lemon Baked Cheesecake | www.highwallsblog.com

Usually, when I share recipes, they are dishes I have made multiple times until I am happy with the recipe. However, I thought it might be fun to share my first attempt at a new recipe.

Cheesecake is one of those things that when it’s good, its DAMN good, but if you mess it up, (well, it’s probably still pretty good!) but you can end up with something that is overly rich and dense and, for me at least, a little too much for the pallet. With this in mind, I have always been wary of making my own baked cheesecakes, in fear of ending up with the latter result. That’s no way to live your life!! As Theodore Roosevelt once said, “It is hard to fail, but it is worse never to have tried to succeed.” So, this week in a bought of cheesecake craving, I armed myself with this recipe and set out to conquer my fear.

She might not be the prettiest of cheesecakes, but for a first attempt, I’m pretty darn pleased with how it turned out! I tweaked the recipe slightly to taste, but it honestly turned out delicious! I think you could even remove the berries and it would still be a great recipe. Do you have a favourite cheesecake recipe? I’m going to keep trying out a few until I’ve mastered the art of the cheesecake and I can start to develop my own perfect recipe. So if you know  a good one, let me know - I’d love to try it out!

Blueberry & Lemon Baked Cheesecake | www.highwallsblog.com   Blueberry & Lemon Baked Cheesecake | www.highwallsblog.com

INGREDIENTS:
200g of Scotch Finger biscuits
80g of melted butter
375g of cream cheese
3/4 cup of caster sugar
150ml of cream
1 teaspoon of lemon zest
2 tablespoons of lemon juice
1 teaspoon of vanilla extract
3 eggs
1 1/2 cups of Frozen Blueberries
Icing sugar (to dust)
STEPS:
1. Preheat oven to 150 Celsius and grease a 22cm springform cake tin and line with baking paper.2. Place the biscuits in a food processor and process until they resemble fine bread crumbs. Add the melted butter and pulse again until the mixture comes together.

3. Pour into the prepared cake tin and press firmly into a crust. Refrigerate while preparing the filling.

4. Clean the processor before adding the cream cheese, sugar, cream,  lemon zest & juice and vanilla. Process until smooth and creamy.

5. Add eggs, one at a time, and pulse in short bursts to combine.

6. Remove the crust from the fridge and scatter with half the blueberries. Pour the cream cheese mixture into tin and smooth to ensure the the crust is coverered. Scatter the remaining berries across the top.

7. Bake for 1 hour (the cheesecake should still be slightly wobbly in the centre) Allow to cool completely in oven and refrigerate overnight.

8. To serve, dust cheesecake with icing sugar and scatter with additional berries.

Blueberry & Lemon Baked Cheesecake | www.highwallsblog.comBlueberry & Lemon Baked Cheesecake | www.highwallsblog.comBlueberry & Lemon Baked Cheesecake | www.highwallsblog.com

thumb-strawberry-cake

EAT | Strawberries & Cream Cake

Strawberries and cream layer cake | www.highwallsblog.com

It is a well known fact that birthdays require cake. Birthdays and cake go together like strawberries and cream, so why not combine these duo’s to make something spectacular?

I normally don’t make my own birthday cake, my lovely housemate has taken to making me a cake every year. It’s super sweet considering he’s never baked anything in his life other than my birthday cakes! Seeing as it’s not actually my birthday yet, I figured that it was acceptable to have a teeny one of my own making. You know, in preparation for the main event! Kind of like training before a marathon, right?

This cake has long been a favourite of mine. It’s sweet and fresh and looks ever so pretty, without having to take the time to ice it properly.  I know you guys are into it. Layers and layers of soft cake sponge, silky cream and  the sweet tang of strawberries, why wouldn’t you want this all up in your face?

Strawberries and cream layer cake | www.highwallsblog.comStrawberries and cream layer cake | www.highwallsblog.com

INGREDIENTS:
2 cups of self-raising flour
1 tsp of cornflour
1/2 tsp of baking powder
200g of softened butter
2 cups of caster sugar
4 eggs
1 tbs of boiling water
1 tsp of vanilla extractFILLING:
2 punnets of strawberries,
1/4 cup of icing sugar
300ml of thickened cream
125ml of cream cheese
1. Preheat oven to 180 degrees celsius and grease and line 3 medium round cake tins.2. Combine the flour, cornflour and baking powder together in a bowl and set aside.3. Using an electric mixer, beat the butter and sugar together in a large mixing bowl until pale and creamy (5 - 8 minutes).

4. Add the eggs, one at a time, beating in between each addition. Add the water and vanilla and mix to combine.

5. Fold the prepared dry ingredients into the butter mixture and divide evenly into the cake tins, ensuring the mixtures are smooth and flat.

6. Bake for 20-25 minutes until the cakes are golden and the top springs back lightly when pressed with a finger. Remove from oven and cool in the tins for 5 minutes, before transferring to a wire rack to cool completely.

7. Meanwhile, place half the strawberries into a small saucepan with 2 tablespoons of icing sugar and 2 tablespoons of water and bring to the boil. Reduce heat to low and simmer for 10 minutes. Remove from heat and set aside to cool before using.

8. Whip cream with remaining icing sugar until stiff peaks start to form. Fold into cream cheese.

9. Place the first cake layer onto a plate and spread with cream, drizzle with the strawberry syrup. Scatter with sliced strawberries and place the next cake layer on top. Repeat for the remaining layers and drizzle the whole thing with the remaining syrup to serve.

Strawberries and cream layer cake | www.highwallsblog.com Strawberries and cream layer cake | www.highwallsblog.com Strawberries and cream layer cake | www.highwallsblog.com Strawberries and cream layer cake | www.highwallsblog.comStrawberries and cream layer cake | www.highwallsblog.com

thumb-herb-pullapart

EAT | Easy Herb and Cheese Pull Apart

5 Minute Recipe: Herb & Cheese Pull Apart | high walls

It’s been a sugar overload around here lately, so let’s take a beat and instead have something a little more savoury. Let me introduce you to your new best friend: the Cheese & Herb pull apart. It’s quick and easy and can be made with whatever you have floating around in your fridge. Isn’t that the best kind of recipe?

Like many things in life, this recipe is best enjoyed with friends. Not casual acquaintances, actual friends. The kind that  you will feel comfortable calling out when they try to steal that bit of cheesy, herby goodness you were eyeing off seconds before they reached for it. Everyone will have their paws all over this meal. There will be mess. There will be greasy fingers. But don’t worry, because it will be awesome.

As far as cheese and herb combinations; feel free to use whatever you have or whatever you like the most. The best part about this dish is that you really can’t go wrong! Try different cheeses! Top with diced up meats! sneak in some spices! The power is yours – go crazy!

5 Minute Recipe: Herb & Cheese Pull Apart | high walls 5 Minute Recipe: Herb & Cheese Pull Apart | high walls

INGREDIENTS:

1 loaf of crusty bread

Cheese (your choice)

Herbs (ie: basil, parsley)

Butter

Olive oil

1. Using a bread knife, slice into the top of the bread: cutting a cross hatch about 3/4 of the depth of the bread. Leave around an inch in between each cut.

2. With a long knife or spatula, generously butter the inside parts of the bread in between the cuts.

3. Roughly chop your choice of herbs and stuff into the cuts in the bread and across the top. (I used parsley and lemon thyme because that’s what I had)

4. Grate your choice of cheese and stuff half deep into the cuts in the bread. Scatter the rest across the top, I used jarlsberg cheese and added extra tasty and parmesan cheese on top.

5. Drizzle the whole thing with olive oil and place in the oven, preheated to 180 degrees celcius. Cook for 5 - 10 minutes or until the cheese is melted. Serve immediately.

5 Minute Recipe: Herb & Cheese Pull Apart | high walls 5 Minute Recipe: Herb & Cheese Pull Apart | high walls

thumb-citrus-cakes

EAT | Ombre Citrus Cakes

 Ombre Citrus Cakes - in lemon, lime and orange! | www.highwallsblog,com
Hey! Guess what! Today marks the 4th anniversary of this blog! Way back when I started this blog in 2010 we had a different name, a different format and the only person who read it was me! Look how far we’ve come! 4 years isn’t exactly one of the big milestones, but why not celebrate with cake, right? There’s always room for cake!

Let’s talk about cakes and the pressures of making a cake look ‘perfect’. With the amazing talent showcased on Pinterest and food blogs, it’s easy to feel like your cake needs to have that perfect frosting, be perfectly even and always look ready to be splashed across the pages of a magazine. While I am a perfectionist of the highest degree, I gotta say: there’s something kind of special about a messy cake.

Ombre Citrus Cakes - in lemon, lime and orange! | www.highwallsblog,com Ombre Citrus Cakes - in lemon, lime and orange! | www.highwallsblog,com

READ MORE

thumb-thumbprint-cookies

EAT | Strawberry Jam Thumbprint Cookies

Thumbprint Cookies with Strawberry Jam | www.highwallsblog.com

Do you want some jam? No seriously, let me give you some. I don’t know why or how, but we seem to have accumulated vast amounts of strawberry jam. Store bought, homemade, you name it: we got it. Where did it come from? Is there a jam fairy? Maybe it’s like when you lose a tooth and the tooth fairy leaves a dollar under your pillow. Maybe every time I clean my fridge, the jam fairy sneaks in under the cover of darkness and leaves me another jar of strawberry jam to thank me for my cleanliness.

So what does one do with this much jam…? That’s not a segue, I’m actually asking. Help me out guys! Give me suggestions of your favourite jam related recipes, because I am already totally over jam sandwiches. Sandwiches are lame. Cookies are what the people really  want!

And to be honest, these cookies are the bomb. The recipe is so easy even a child can make them. It goes a little something like this: Put ingredients in mixer until you make dough -  Roll into little balls – smoosh your finger or thumb down onto each ball to create a little cookie bowl –  fill with jam – get said jam everywhere because you always overfill the cookies. Rinse and repeat as many times as necessary until you no longer have any jam or you develop diabetes. Whichever comes first. (please don’t get diabetes) I think I’m delirious from a jam overdose. I’ve eaten so many of these cookies that I’ve lost count. Send help!

Thumbprint Cookies with Strawberry Jam | www.highwallsblog.com

Thumbprint Cookies with Strawberry Jam | www.highwallsblog.com

INGREDIENTS:
1 cup of butter
2/3 cup of sugar
2 egg yolks
1 teaspoon of vanilla extract
2 cups of plain flour
1/2 teaspoon of salt
Jam
1. Preheat oven to 180 degrees celcius and prepare a baking tray with baking paper.2. With an electric mixer beat together the butter and sugar on medium-high speed until the mixture is light and fluffy. Add the egg yolks and vanilla extract and beat again to combine.3. In a separate bowl, mix together the flour and salt and then  add to the butter mixture in small amounts, mixing in between each addition until dough forms together in a ball.

4. From the dough, roll small amounts into balls roughly 1 inch in size. Place the balls on the prepared baking tray and flatten balls slightly with your thumb (or the back of a small spoon) to leave an indent in the center.

5. Place in the oven and bake for r 8 to 10 minutes or until the bottom is just golden. Remove from the oven and carefully press down again on the indentations to re-define them.

6. Fill each cookie with jam and then return to the oven to bake until the jam melts slightly and edges of cookies are lightly golden (around 3 or 4 minutes). Allow to cool on a wire rack before serving.

NOTE: Another option is to use honey instead of jam- it wont look as aesthetically pleasing as the honey will melt more than the jam, but as it melts the honey soaks into the cookies for a deliciously sweet alternative.

Thumbprint Cookies with Strawberry Jam | www.highwallsblog.com Strawberry Jam Thumbprint Cookies | www.highwallsblog.comThumbprint Cookies with Strawberry Jam | www.highwallsblog.com