thumb-oil-lamo

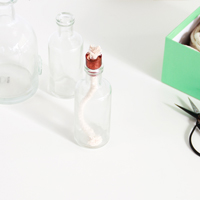
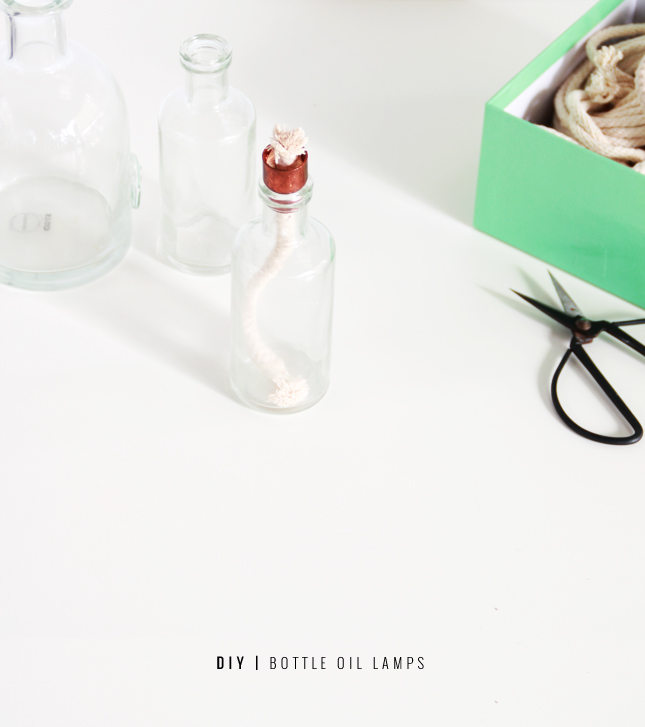
DIY | Bottle Oil Lamps

Make your own oil lantern from any glass bottle | Full steps at www.highwallsblog.com

Hi. My name is Dani, and I’m addicted to collecting bottles and jars. Phew! It feels good to get that off my chest!

I can’t recall when my obsession began, but what I do know is that I now have way too many glass vessels that I never use. My collection has started to get a little out of control as of late, to the point where I am running out of places to keep them all. Faced with the choice between culling some of the jars and bottles or finding ways to re-purpose them; I think we all know what I chose. Re-purposing all the way! It’s good for the environment and totally why I’m doing this, not because I couldn’t bare to part with any of my precious bottles…. Anyway, lets make Bottle Oil Lamps!

One of the great things about making your own oil lamps is that, not only can you make them from items from around your home, they are super useful for outdoor parties, keeping away those pesky mosquito or just for looking damn pretty. Depending on what oil you use you can use them indoors or outdoors. Citronella oil will keep the bugs away, you can buy kerosene based oil from your local hardware store or, like me, you can use good old olive oil. It burns cleanly (meaning not too much smoke) and I found it kind of smells like popcorn. Yum!
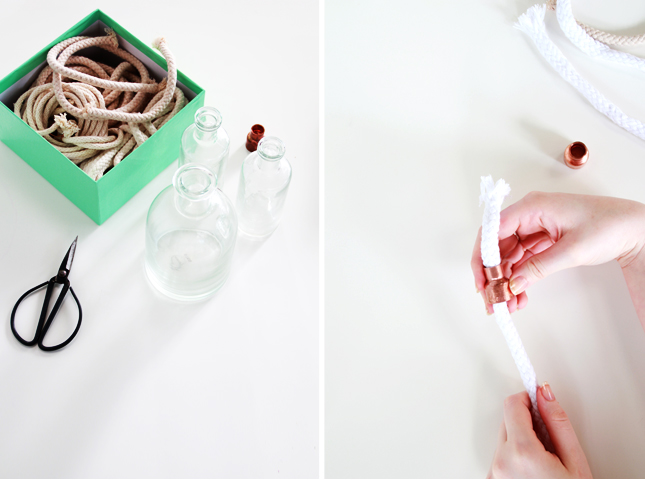
Make your own oil lantern from any glass bottle | Full steps at www.highwallsblog.comMake your own oil lantern from any glass bottle | Full steps at www.highwallsblog.com

You Need:

A glass bottle or Jar
Copper Capillary Coupling (15mm)
Cotton Rope/Lantern Wicks
Oil of your choice

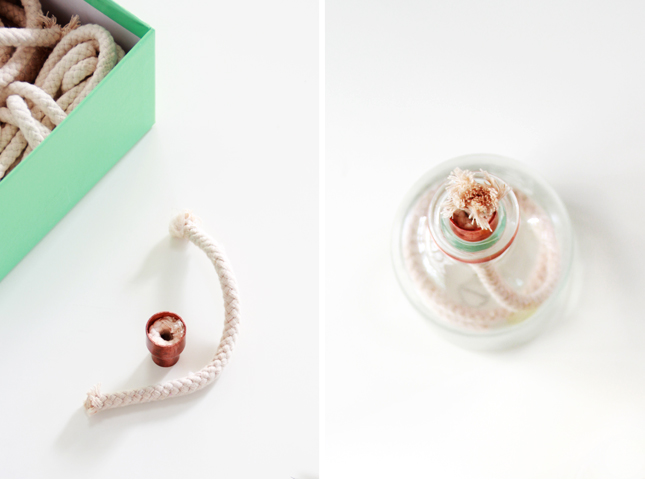
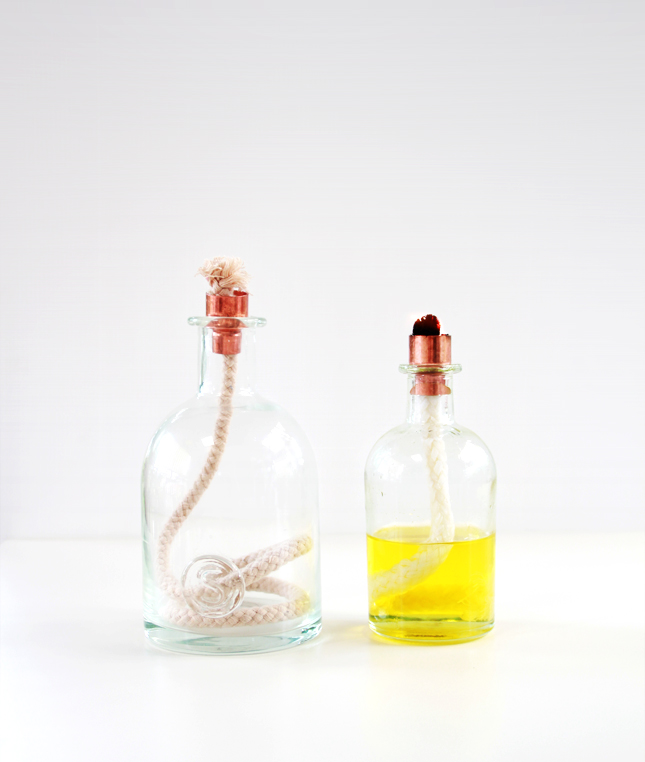
What You Do:

1. Cut a length of rope (or lantern wick) at least as tall as the bottle plus 1 inch. For a longer lasting lantern cut the rope double the length of the bottle. Ideally you want to use a rope thickness similar to that of your copper coupling (ie: 15mm for this project) however don’t worry if you have thinner rope, we can fix that later.

2. Thread the rope through the copper coupling. You can pick up a copper or brass coupling from your local hardware store for less than a dollar. Choose a size appropriate for your bottle, but the thinner part of the coupling should fit inside the bottle opening with the thicker part sitting on top. I found a 15mm diameter fits most bottles (ie: wine, beer, small decorative bottles etc). Thread the rope so that you have a couple of cm out the thicker end and the rest of the rope out the thinner side.

3. If you are worried about your rope slipping through the coupling and into the bottle, cut a piece of thin rope around 2 -3 cm long. Wrap it around to form a circle and press into the top (thicker side) of the coupling around your rope wick. This can be fiddly, so trim the piece accordingly so that the wick is snug but you can still pull it through.

4. Fill your bottle 3/4 with oil and thread your wick into the oil and your done! You will need to let the wick soak overnight  before you can light it. If you are using rope rather than purpose made wicks it may take longer as the store bought wicks are woven loosely compared to rope. The top of the wick should be slightly damp to the touch when it is ready to be lit.

Make your own oil lantern from any glass bottle | Full steps at www.highwallsblog.com________________________________________________________________________________

TIPS & SAFETY:

Always be aware of your surroundings when lighting your lanterns. Remember your dealing with an open flame, you don’t want to catch your house on fire!

When choosing what oil you want to use read any safety warnings on the bottle prior to using.  Olive oil is pretty safe to keep around  as it’s flash point is so high that it is less likely to catch fire and it doesn’t smoke like other fuels usually do. Plus olive oil is pretty easy to get a hold of and isn’t too expensive.

thumb-flower-garland

DIY | Flowers & Bees - Paper Garlands for Spring

Make your own pretty garlands from patterned paper | www.highwallsblog.com

At this point, garlands of any kind are basically a DIY staple. Pinterest is a veritable encyclopaedia of all the different ways and styles in which you can make this versatile decoration. And there-in lies the source of its popularity; no matter how many different craft projects you may come across on the subject, there are always different ways to make a garland for your home! As far as decorating goes, it is super easy and cost effective and can be used for so many different reasons or occasions. So with all this in mind; here’s yet another garland DIY. I hope you’re still as into them as I am, because I really love this one!

There is an amazing stationary store in the city that specializes in cards and high end wrapping paper. When I cam across this bee and rose wrapping paper I just knew I needed to buy it and make something pretty out of the beautiful prints! Because the paper was good quality, it is quite thick and strong, so it was ideal for this project as it still holds its shape when cut out. Keep this in mind when choosing your own paper for this project as if it is lighter paper you may need to adhere it it to something stronger before starting if you want your garlands to last.

Make your own pretty garlands from patterned paper | www.highwallsblog.com READ MORE

thumb-rope-bracelet

DIY | Wrapped Color Blocked Rope Bracelet

Make your own color blocked rope bracelet with this easy DIY | www.highwallsblog.com

Remember my copper and rope bracelet DIY from a couple of weeks ago? Well, I loved it so much that I thought I would make some more rope bracelets, this time with a little more colour! The full steps are featured in Drifter & the Gypsy‘s DIY Craft column, but all you really need is some rope and thread in as many shades and colors as you so desire. It’s super easy you can even do it while sitting in front of the television. Let me know what you think :)

clicktoreadMake your own color blocked rope bracelet with this easy DIY | www.highwallsblog.com

thumb-caketoppers

DIY |Candy Colored Letter Cake Toppers

Make your own Candy Coloured Letter Cake Toppers | www.highwallsblog.com

Confession time: I have the most ridiculously huge collection of (mostly unused) nail polishes! When my collection went from normal to excessive is unknown, but the end result is the same: a drawer full of vibrant colours out of which I probably only use around 4 or 5 (but let me tell you - those babies are on high rotation!) Every time I open the drawer I feel a twinge of guilt for my poor neglected colours. So, rather than let them sit there gathering dust, I’ve been on the hunt for other uses for my trusty nail polishes…

My favourite thing about using nail polish on surfaces other than actual finger nails, is how glossy and opaque the colour is. It reminds me almost of hard candy coating, which was my inspiration for these letter toppers! After I shared my recipe for mini strawberry crumb cakes, a few of you asked about the letter cake toppers featured along with the crumbly dessert.  What better time to share my first nail polish related project? Ask and ye shall receive! (I’m so good to you guys!)

Make your own Candy Coloured Letter Cake Toppers | www.highwallsblog.com READ MORE

DIY | Rope & Copper Bracelet

DIY Rope & Copper Bracelet | www.highwallsblog.com

While cleaning up my desk the other day, I found I had accumulated a collection of random off cuts and assorted items. So naturally I mashed a few together to make something pretty. To make this rope  and copper bracelet you’re going to need (wait for it…) rope, some white paper tape and a copper fixing around about the same thickness as your rope.

Take a length of rope and measure around your wrist so that it can slip over your hand, cut to size. Thread your copper fixing onto the rope. Tape the ends together securely , you can dab a bit of strong hold glue between the ends if you want to but it’s not required. Thread the copper fixing back over the join so that it covers the tape - the taped area should fix snugly in the fixing so that the copper piece wont move. If it is too loose add in an extra layer of tape.

Voila! I’ve been rocking my new creation all week and I gotta say; I kind of love it!

DIY Rope & Copper Bracelet | www.highwallsblog.com

DIY | Clay Ring Bowl

   DIY | Clay Ring Bowl by www.highwallsblog.com for Drifter & the Gypsy

Some projects are best kept simple. I needed something to hold my jewellery in between daily use and my jewellery box, somewhere safer than my bathroom sink. I put together this beautiful little clay bowl. Simple and effective. Check out the full steps over at Drifter & the Gypsy and you can make your own as well!

clicktoread

DIY | Clay Ring Bowl by www.highwallsblog.com for Drifter & the Gypsy

DIY | Pretty Lightbox Picture Frame

light-frame

Who doesn’t love fairy lights? No, really. I want to know, so I can find them and convert them to my way of thinking! The teeny, twinkling lights have this uncanny ability to make anything awesome in my eyes. My boyfriend, being the clever boy he is, bought me a few sets of battery powered lights for my birthday and I have been brainstorming all of the ways to use them.

For this project you need battery operated Fairy Lights (you can get these from most dollar stores), an Ikea Box Frame and White Tape. It’s pretty easy to complete; start by separating the frame from the glass and the backing. Start from the end of the lights, run the string around the inside of the frame, securing with tape around the corners. Once you have attached all of the string, go back around, tucking the  lights in under the string and securing any loose areas with more tape. Put your frame back together with the glass. One of the backing corners is cut off, so you can thread the battery pack through the gap when you secure the backing. Tuck it behind your frame and turn on your new lit up display! Oh, so pretty! 

light-frame-2 light-frame-3

DIY | Beaded Pot Holder

DIY | Beaded Pot Holder for Drifter & the Gypsy (by www.highwallsblog.com)

 In our house we cook a lot of oven baked dishes that are served straight from the oven, so to combat this we usually put down hand towels or dish cloths to protect the table. U-uuuugly! It isn’t usually a problem when it’s just the housemates and I, but whenever we have guests over it’s kind of embarrassing. So to combat this little problem I came up with a more stylish solution: with the aid of some pretty wooden beads and some cord, I made a whole set of adorable beaded pot holders. You can make some yourself with this easy DIY shared over at Drifter & the Gypsy!

clicktoread

DIY | Beaded Pot Holder for Drifter & the Gypsy (by www.highwallsblog.com)DIY | Beaded Pot Holder for Drifter & the Gypsy (by www.highwallsblog.com)DIY | Beaded Pot Holder for Drifter & the Gypsy (by www.highwallsblog.com)

DIY | Washi Tape Pegs

DIY |  Washi Tape Pegs by www.highwallsblog.com

This week we’re going to forego the formal steps; I know you guys will be all over this project, in fact, I don’t even know if I should call it a project. Up-cycling maybe? I’m not sure. But what I do know is that it is an awesome way to jazz up all those pegs you have lying around your house. Don’t look at me like that. I know you crafty folks are just like me and you hoard things like wooden pegs because you saw this one cool picture on Pinterest and everything on Pinterest is a good idea!

All you need is a pack of wooden pegs (any size you like) and a few different rolls of patterned washi tape. Run the tape along the length of the peg, with the edge lined flush with one side. Take a sharp pair of scissors or a craft blade and cut away any excess tape from the other sides. There will be a small dip in the wood where the metal bracket sits. Run the blade along each side of the dip and carefully peel away the centre piece. Ensure the tape is pressed down securely and your done! Repeat for each peg and each side. Easy Peasy!

DIY |  Washi Tape Pegs by www.highwallsblog.com