
DIY | Paper Snowflakes
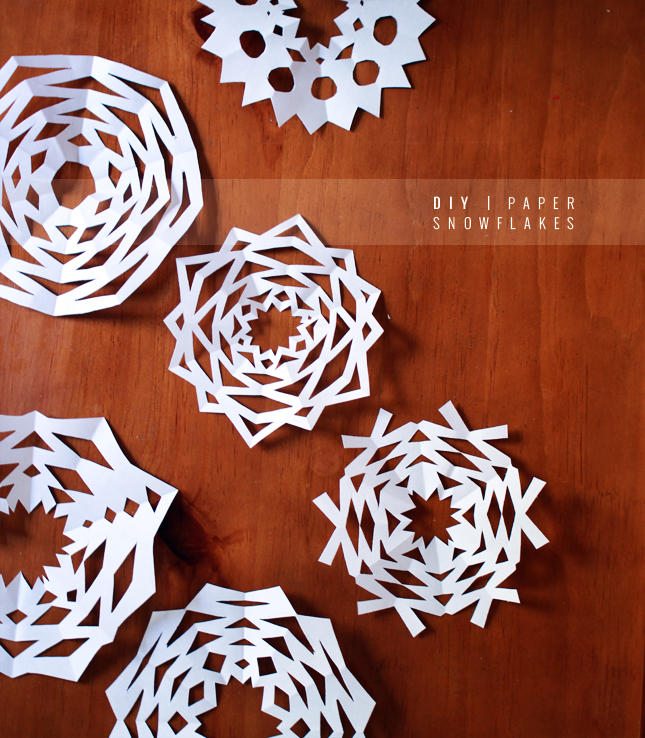
Paper snowflakes, in my opinion, are totally underrated. They are one of those things teachers got you to make during the last few lessons of the school year (basically to keep you out of their hair so close to Christmas!) I don’t think many people ever retained this skill into adulthood.
The thing about snowflakes is that all you need to know is how to make the first few folds to get the basic shape. Once you have these folds you can hack away at the sides to create a multitude of completely different snowflake designs. Even the first few folds don’t need to necessarily be all that exact, it’s such a forgiving project and it enables you to be create something completely different every time you attempt it.
I decided to revive my paper craft skills this year to pretty up some ugly windows in my house. Our living room has windows that give us an amazing view of…. our neighbors outside wall. It is literally about a foot from our house. Ugh. So I set to creating a winter wonderland to cover up the ugliness…. and now I kind of want to do the same to every window in my house ;)
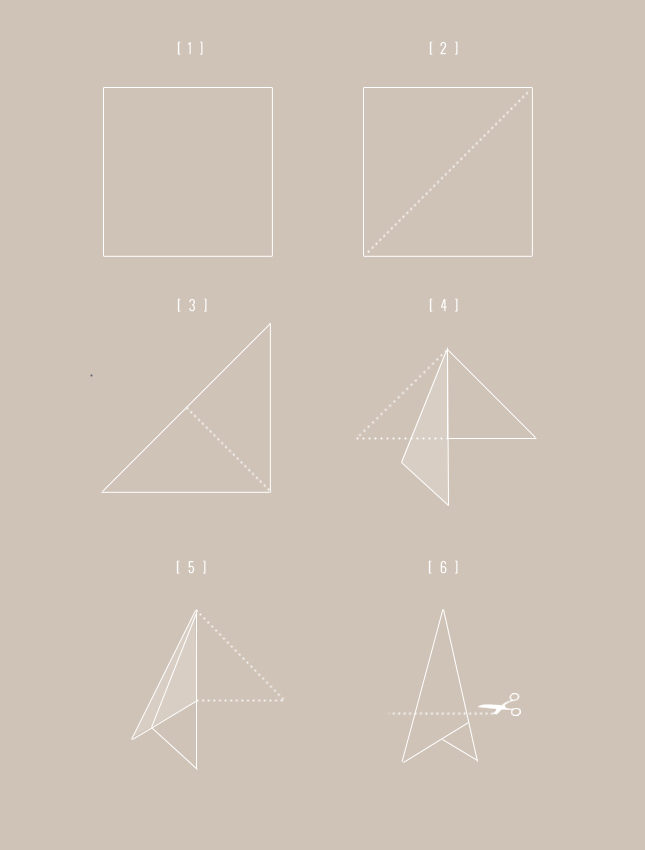
What You Do:
1. Starting with a square piece of paper.
2. Fold in half diagonally to make a large triangle.
3. Fold the triangle in half diagonally again, to make a smaller triangle.
4. Fold in one side of the triangle against itself so that the corner lines up with the bottom point.
5. Fold in the other side over the previous fold. You may need to adjust these folds to get the sides to match up, but don’t worry too much about making the folds perfect.
6. You should be left with a shape like that pictured above in [6] - Once you have this shape, cut straight across the bottom.
7. Now that you have the basic shape, you can start to cut into the sides of the folded paper. Experiment with straight and curved lines, and big and small cuts.
8. Once you have cut away as much as you want too, gently unfold the paper completely to reveal your snowflake. Adhere to a window or surface with double sided tape.
emma
December 4, 2013 at 12:55 amI completely agree they are definitely underrated! I was thinking of making some this year.
Shanondoah
December 4, 2013 at 1:20 pmI tried to make some last year, they didn’t look nearly this good. I will try again with your instructions!
Honey & Ginger Pfeffernusse | The Sugar Hit
December 4, 2013 at 6:55 pm[…] do you like my paper snowflakes? I made them myself using this tutorial over on High Walls. They’re talented over there that’s for sure. I am 100% craftily […]
Victoria | Oh So Pretty
December 5, 2013 at 2:17 pmYes, completely agree, totally underrated! Love the ones you made, and they’d make great additions to my window as well! :)
December 16th: Decorate | Vita Magica
December 17, 2013 at 6:48 am[…] DIY Paper Snowflake Tutorials here, here, and here […]
Myrna Burke
December 31, 2014 at 3:51 pmIt’s still snowflake time…January is perfect..fill Windows..hang from ceilings..put a snowflake wreath on the door!! In February .. Valentine’s go nicely with white..especially if it’s snowing..yay! I’ve always loved making paper snowflakes!