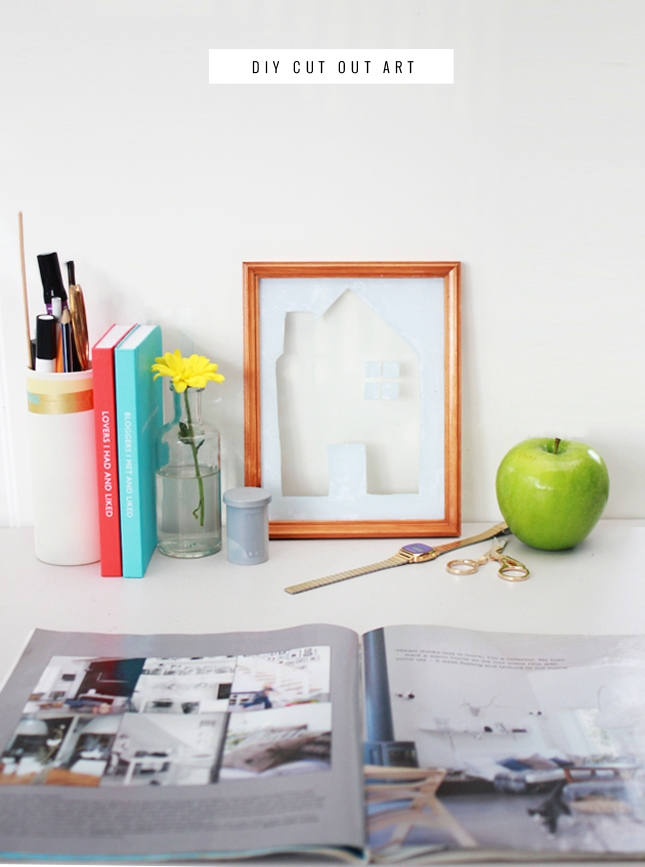
Sometimes you come across something and you think ‘oh my god! I must have this!’ Maybe you see it in a magazine, or on TV. Somewhere there are no handy links to where you can pick one up yourself. So you cry. Curse the heavens for bestowing such sorrow on your life. Then you realise you’re being a little melodramatic and really, if you think about it, that thing you wanted so bad is really quite simple. You could probably make one yourself, so stop whining about your stupid first world problems and get off your ass and make one! You quietly wonder when you started being so mean to yourself, but come to the conclusion that you’re probably right…
So maybe this happened to me recently. I spotted this adorable house art piece in a friends house. It was basically a little frame with a house cut out of a white board so the house shape was transparent. I was instantly smitten with the simplicity of the piece and demanded to know where she got it from. As always seems to happen when you ask someone where they got something, she had been gifted the piece from her husbands family (overseas family no less!) Feeling a little disappointed, I vowed to attempt my own, home made version.
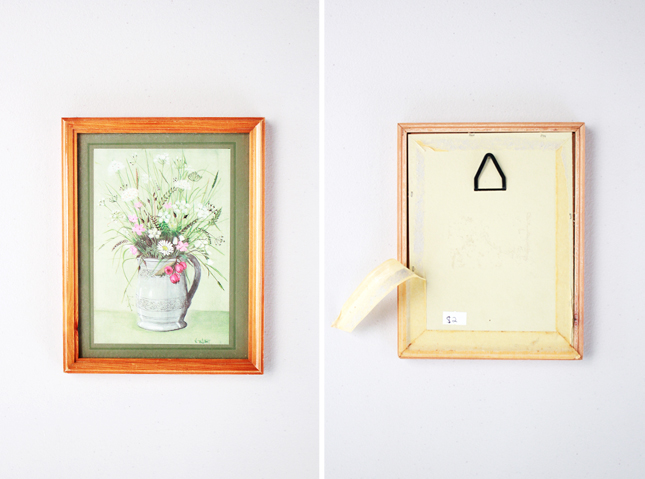
What You Need:
An old photo frame
Plain white paper or stock card
PVA Craft Glue
Super Glue
Pencil
Craft Knife
A clean, damp Cloth
Window Cleaner
Cotton Bud/Cotton Swabs
What You Do:
1. Choose an old photo frame to use, ensuring that it still has the glass. I picked up a frame from my local thrift store for a couple of dollars. I chose a frame that had the proper tacks and framing tape instead of the re-usable frames as it meant it was a little cheaper and as we are discarding the backing of the frame, you don’t need the stand part anyway.
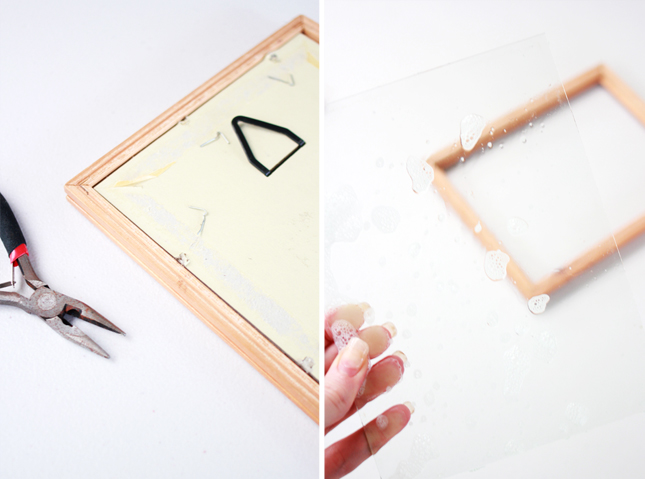
2. Carefully remove the backing from the frame. Take away any tape, staples, tacks etc so that all you have is the wooden frame part and the glass panel.
3. Separate the glass from the frame and give the panel a good wash in warm soapy water. Dry thoroughly making sure that there is no water or dust residue left on the glass.
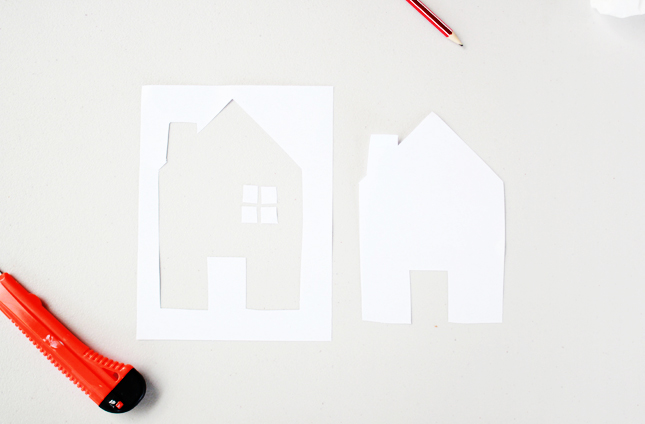
4. Take a piece of white paper or card stock and cut to match the size of your glass panel. With a pencil, lightly sketch out the shape you would like to cut out. I decided to stick with the house shape, but you can really do what ever you want here. Using craft knife carefully cut out your design and erase any pencil marks left.
5. Take you glass panel and, using a paintbrush, coat all the areas that the paper will cover with an even coat of glue. Be generous, but ensure that the coat is even all the way across. Dont worry if your glue covers more that the paper does.
6. Carefully, starting from one corner of the glass, line up the paper cut out onto the glass panel. Smooth out the paper against the glue as you go, ensuring there are no air bubbles as you will be able to see these from the other side of the glass. Once you are happy with the positioning and you are sure there are no air bubbles visible, coat the paper with a generous coat of glue.
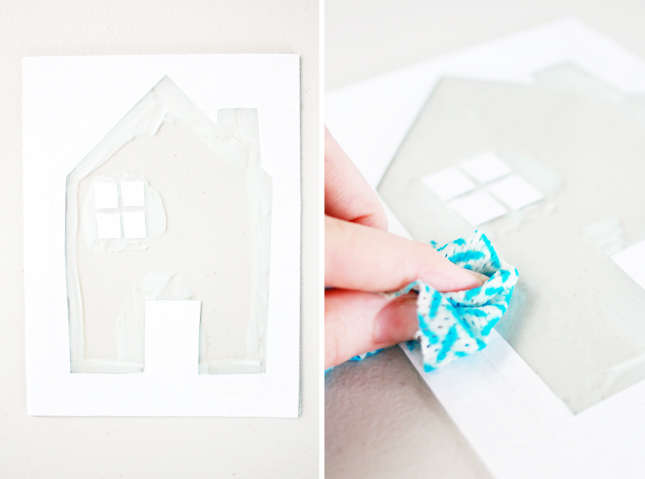
7. Take a clean cloth and dampen with warm water. Carefully and gently use the cloth to clean away glue from any areas of glass that are not covered with paper. Don’t worry to much about the immediate edges and light smudges for now. Once you have cleaned the bulk of the glue, leave until the glue and paper are completely dry (Overnight if possible)
OPTIONAL STEP: If you find that your paper has dried a little transparent, paint a couple of layers of acrylic paint over the paper to ensure you have a nice opaque finish.
8. Once dry, take a cotton ball and cotton swab and spray with Windex or any similar glass cleaner. Gently wipe the clear areas of glass until completely clear. Use the cotton swab to go around the edges.
9. Using super glue, run a line of glue around the inside of your frame and press the glass panel back into it with the paper side facing inwards (so it will face the wall when you display it). Make sure the glue is not visible from the front and allow to dry.
10. Flip over to see your finished piece. If required clean off the front of the glass with some more window cleaner and prop your art piece up on a table or shelf. Admire how brilliant you are.
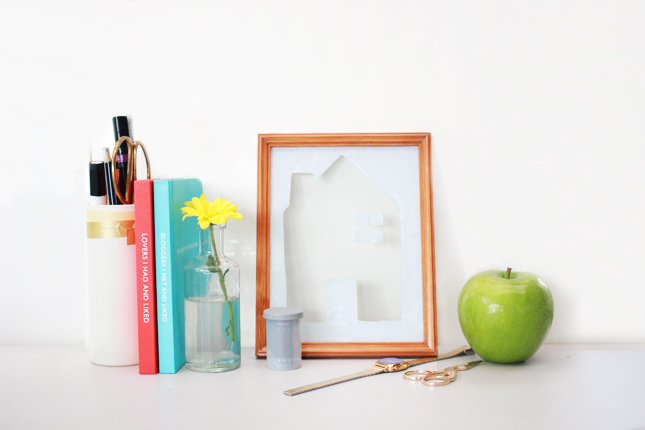
I’m all about clean lines and simple design (as I’m sure you would have picked up from reading this blog), but I’m also inherently lazy. I like low maintenance additions to my home. While the original was simply a frame and some thick card, I opted to make something a little more sturdy and (hopefully) something that will last the distance and be easy to clean.
Another way you can complete this project would be if you had two frames the same size. Instead of gluing the paper to the glass what you can do is sandwich the paper between the panels from the two frames and glue together. However this will rely on you purchasing two frames the same size, which could be difficult if you go the second hand route like I did. You can also rig your piece to hang if you ensure that your hanging wire or hooks are also white and will be covered by the paper.
The best part of this piece is the transparent ‘cut out’. I love the effect it gives, the white background, especially against a white wall is so subtle and effective. But then again, I’ve always been a sucker for a bit of minimalism art :)





you have a thing for houses :) I love how this turned out!
Haha omg I totally do!
Absolutely adore the clean, refreshing look of this photography. stunning.
Check out my free people giveaway!
http://www.freelyronnie.blogspot.com/2013/03/free-people-accessory-giveaway.html
xo sharon
Thanks Sharon :)
Just found your blog. Love it!!!
http://thecoyotethistle.com
http://instagram.com/thecoyotethistle
Thanks Annie :)
Just completely gaga for this idea!