Growing up, we were always encouraged to make homemade gifts instead of spending lots money. As a child I was never able to think of something that I could make that could compare, in my young mind at least, to a store bought gift. Now that I’m all grown up I’ve learnt to appreciate the value of something homemade, and as my parent’s before me, I hope to instill this quality in the younger ones in my life. Starting with my god daughter and her brothers and sisters.
My best friend lives in my hometown with her little family, so I only get to see them when I visit a couple of times a year. I’m determined to be the cool ‘auntie’ who brings awesome presents when she visits, but it’s hard when you don’t get to see the little ones very often. I never know what to get them! But this year I think I’ve nailed it! I figure pretty much anything with sweets involved is going to be a winner with kids and although their mother is probably going to kill me for supplying them with this much sugar, at least it’s ultimately a useful gift…
What You Need:
Various sized Jars (I used mason jars, but any screw top jars will do)
Small Toy Animals
Spray Paint in colour/s of your choice
Sealer or Top Coat (optional)
Sealer or Top Coat (optional)
Delicious Fillings
Paper/drop sheet
Superglue
Paper/drop sheet
Superglue
What You Do:
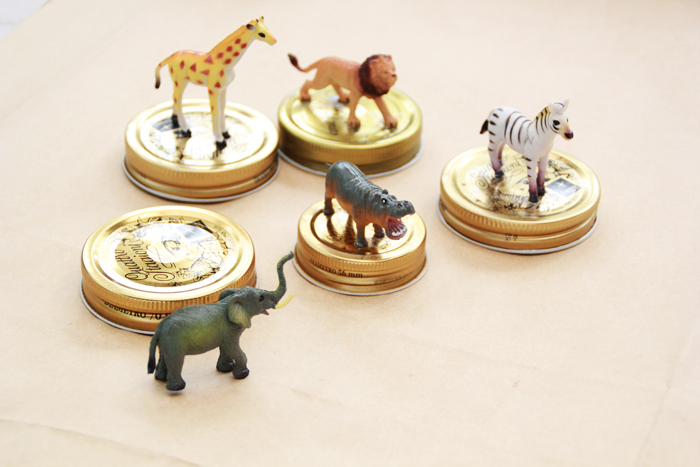
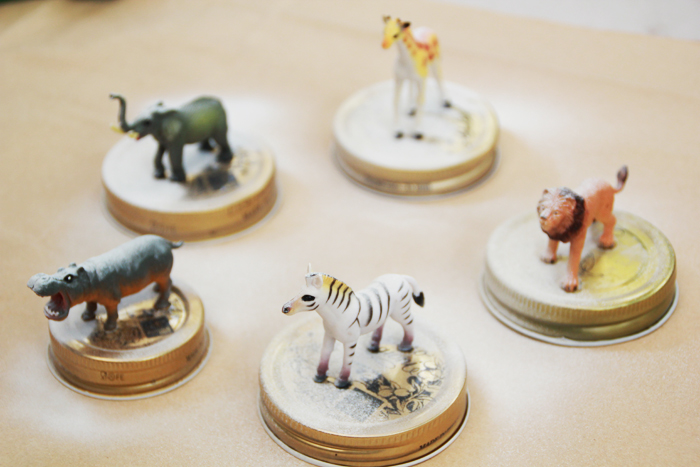
1. Take your toy animals and arrange them on your jars to your liking. Try different combinations until you are happy with the combinations of jar and animal sizes.
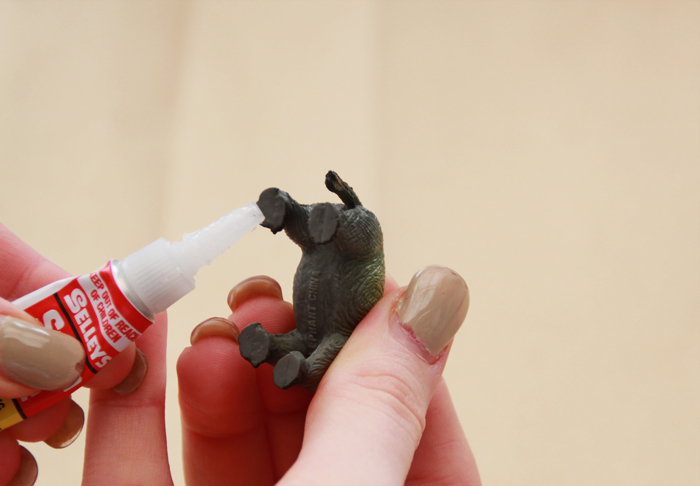
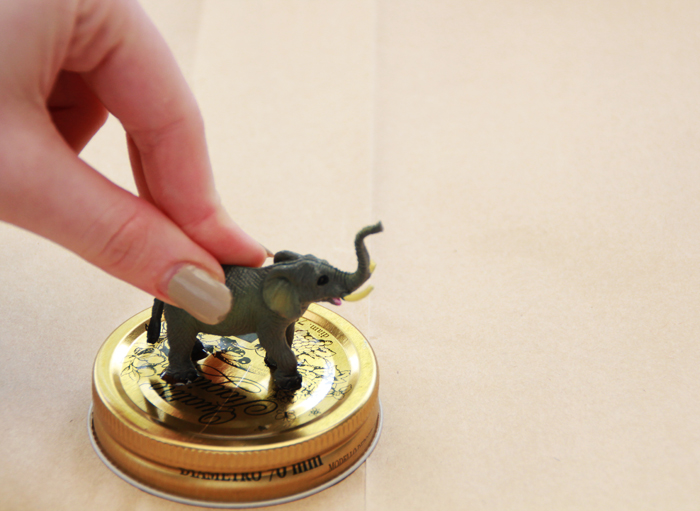
2. Remove the Jar lids and carefully glue the base/feet of the animals, pressing down firmly for 30 seconds. Allow to dry completely.
3. Place the animals/lids evenly spaced out on your paper/drop sheet. Shake the spray paint well and cover each lid/animal with a light even coating of paint. If you are painting your animals different colours you may want to do a base coat of white paint before moving onto the colour.
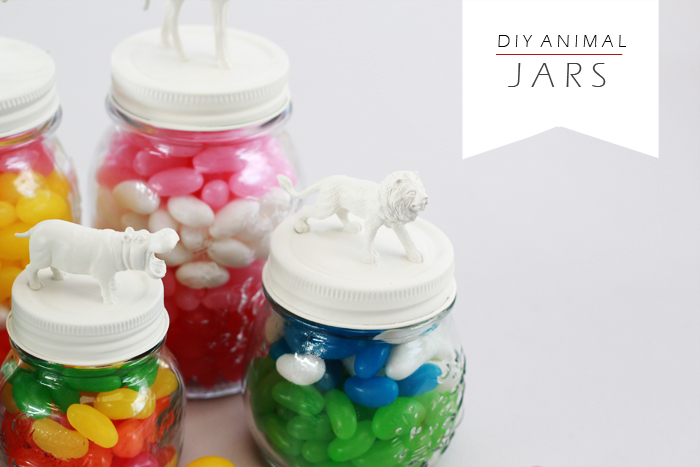
4. Once your animals/lids are a clean white colour - roughly 2-3 coats (and are completely dry) you can start on your colours if you so choose. I decided to keep my animals white so that the fillings really pop with colour! Allow the paint to dry completely in between coats and ensure each coat is light and even. Be patient.
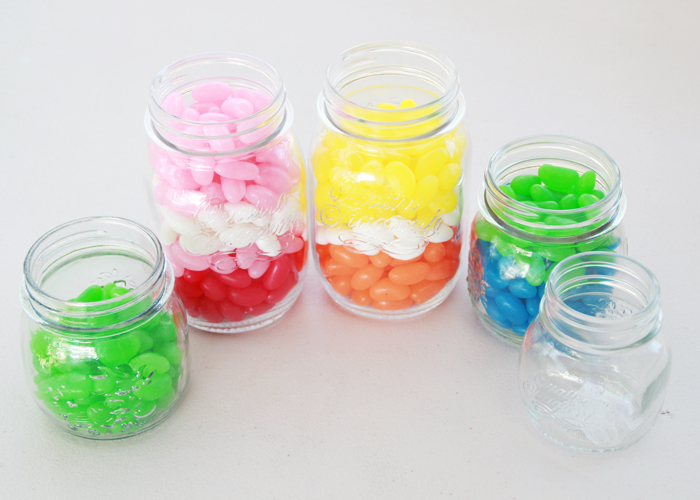
5. Once you have achieved the depth of colour you are after, now is the time to add your top coat if you have it and allow the animals/lids to dry overnight. Once dry you can fill your jars with whatever you like and screw your animals back onto the jars. Voila! You’re done!
2. Remove the Jar lids and carefully glue the base/feet of the animals, pressing down firmly for 30 seconds. Allow to dry completely.
3. Place the animals/lids evenly spaced out on your paper/drop sheet. Shake the spray paint well and cover each lid/animal with a light even coating of paint. If you are painting your animals different colours you may want to do a base coat of white paint before moving onto the colour.
4. Once your animals/lids are a clean white colour - roughly 2-3 coats (and are completely dry) you can start on your colours if you so choose. I decided to keep my animals white so that the fillings really pop with colour! Allow the paint to dry completely in between coats and ensure each coat is light and even. Be patient.
5. Once you have achieved the depth of colour you are after, now is the time to add your top coat if you have it and allow the animals/lids to dry overnight. Once dry you can fill your jars with whatever you like and screw your animals back onto the jars. Voila! You’re done!
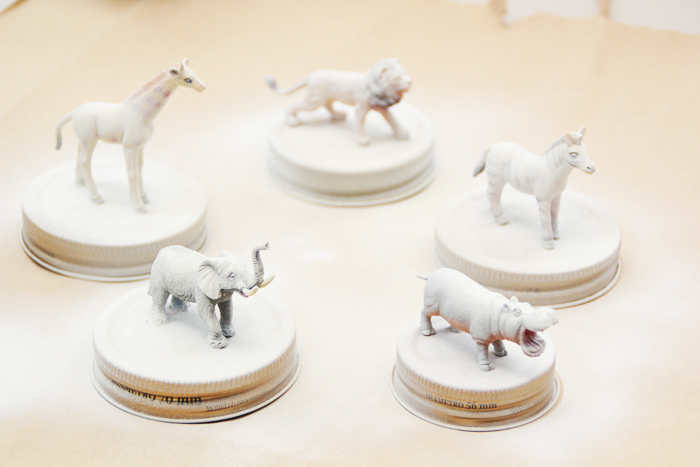
I love how the animals look after the first coat of white. It’s like they got caught in a snowstorm with little patches of their stripes and spots peeking through.
My whole house smelt like jellybeans the day I put these together. I had the spread out in piles on our dining table, I felt like a little kid sorting them into their colours - it was so much fun! Honestly, I had a little too much fun in general making these guys. Now my biggest problem is that I kind of love them where I have them sitting on my shelf waiting for Christmas. I’m probably going to have to make some for myself!


Love it! A nice unique idea, and simple to boot.
Thanks :) I’m glad you like it
this is awesome, dani! I would not mind getting something like this myself - especially jelly beans! I love the snowed-in look on the animals after the first coating :D
I just wanted to stop by and say hi! I really, really love this DIY (it’s given me some great ideas for christmas presents) and your whole blog - I think it’s really cute and beautifully designed. I’m about to go through the archives! Much love, Annika xxx
I don’t know if I love THESE or the planters more. These come with sugar . . . Have I told you yet how genius this is?? I love your photos, also - so crisp and eye catching.
Hey you, I made these! http://pineneedle-collective.blogspot.com.au/2012/12/happy-holidays.html
Thanks for such a great gift idea!
xx Annika
Love these! What a great idea! I have a vintage shop called The Brass Giraffe, so I’m especially drawn to the giraffe one! I just love the way you did the photography and the layering of the jelly beans.
Thanks Amanda! :) It took ages to sort those jelly beans into colours! haha