
DIY | How to turn anything into a brooch!
Remember the Flair Guy from the movie Office Space? You know the guy. He worked with Jennifer Aniston’s character at a restaurant and he was positively covered in pins, badges and brooches: aka -Flair. You guys, I *am* the Flair Guy. I may not wear my flair all at once (or be as much of a jerk!) but I sure as hell hoard pins and brooches like he does!
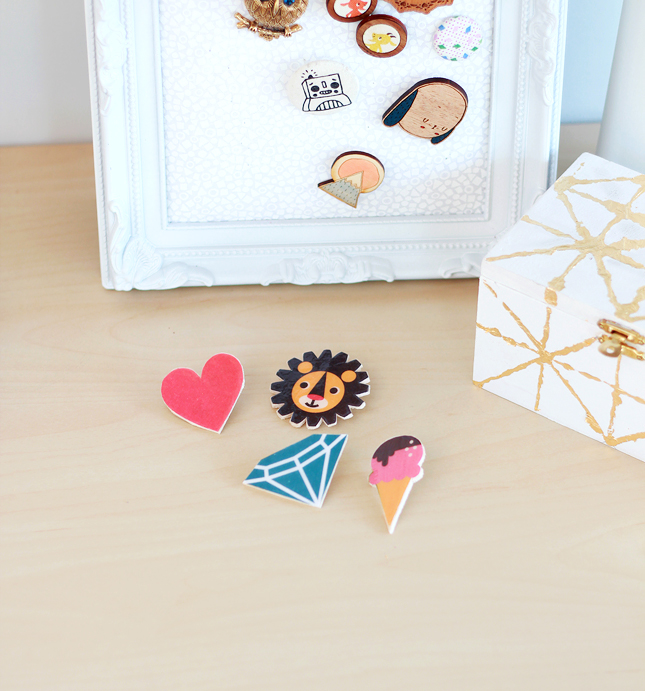
Okay, so maybe this love of brooches doesn’t come as much of a surprise. Perhaps my DIY brooch display frame project gave me away or maybe you are a kindred brooch lover and you just sensed it. Either way, I have possibly the best and most dangerously easy craft project to share with you:
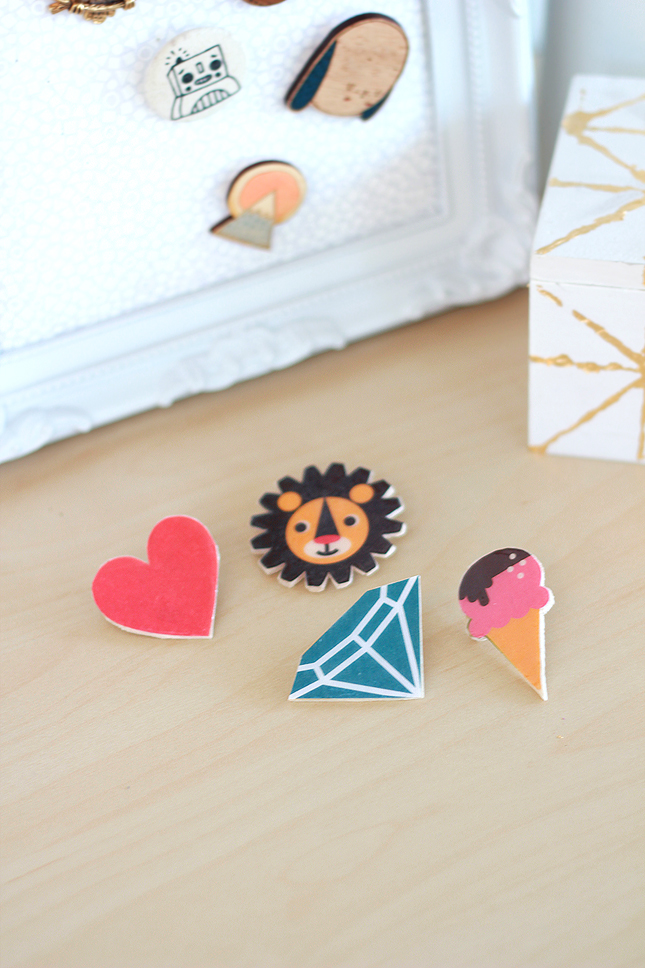
Every now and then I will come across something that makes me think ‘oh man, I would totally wear that!’ Sometimes if from wrapping paper, a poster or an old birthday card. All you need to turn that pretty little something into a pretty little wearable something is some balsa wood, ModPodge and a brooch pin! It take’s about 20 minutes to make and you have a totally unique pin or brooch you can love forever!

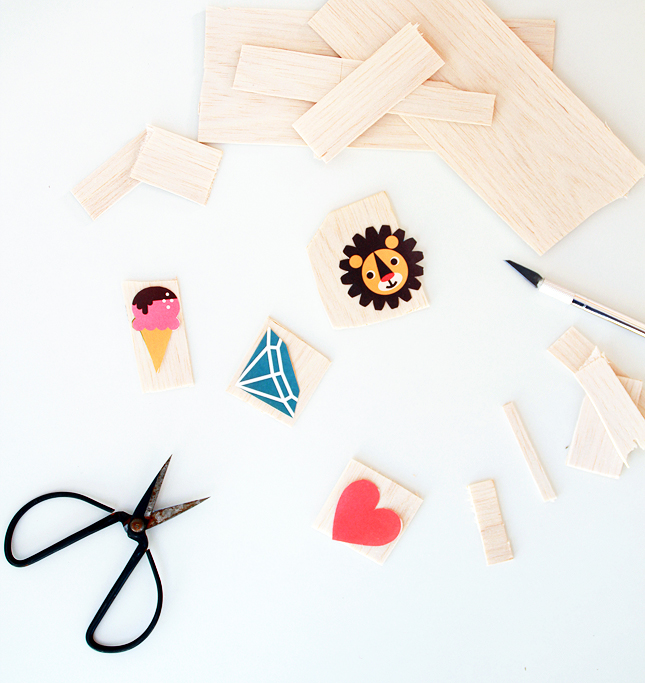
| Materials:Balsa wood Magazine cut outs/wrapping paper etc. Brooch pins ModPodge Clear Sealer or Nail Polish Strong hold glue Scalpel |
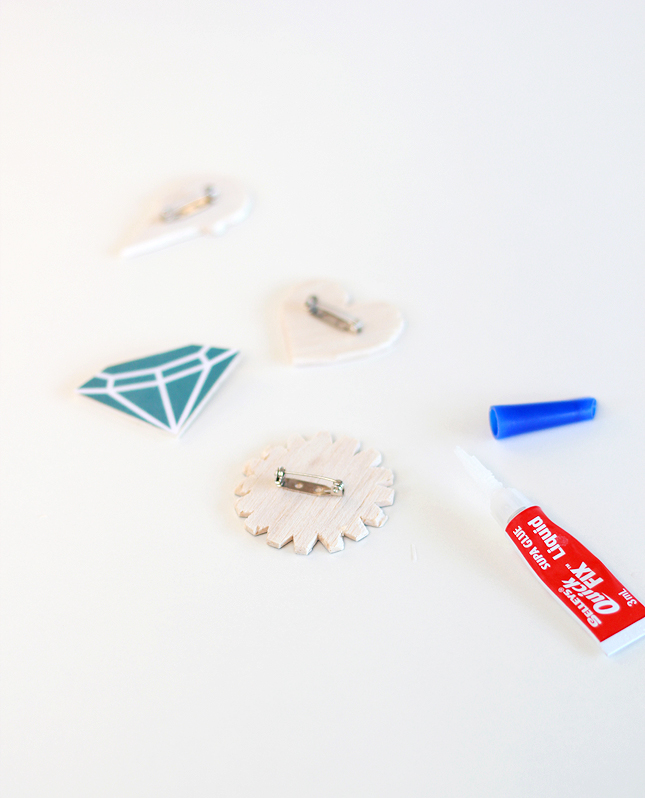
Steps:1. Start by cutting out your images from a magazine, wrapping paper, cards, whatever. Thicker paper will work better as if you use thin paper that has a darker design on the other side it may bleed through when you coat it with glue.2. Cut a square of balsa wood slightly bigger than your image.
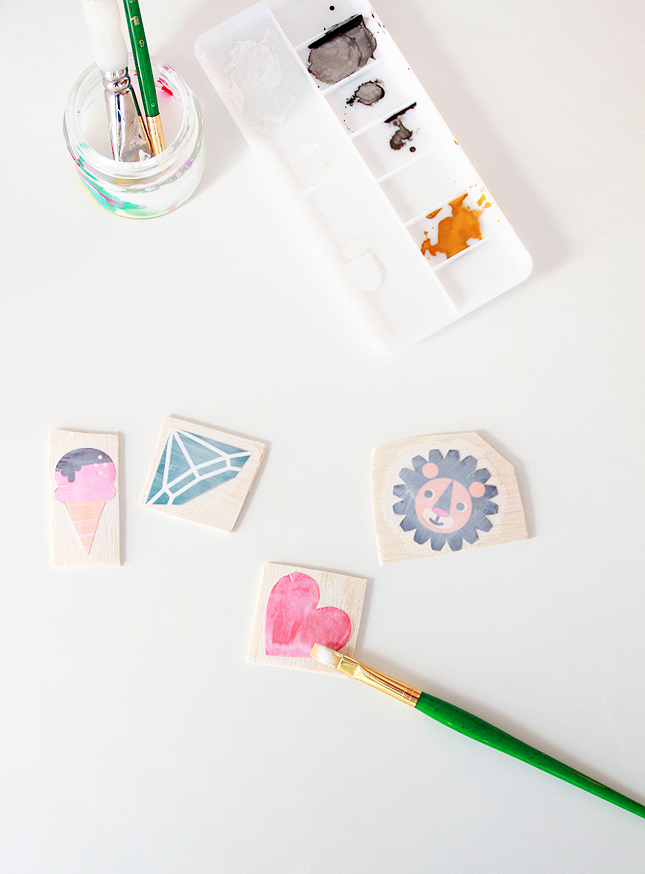
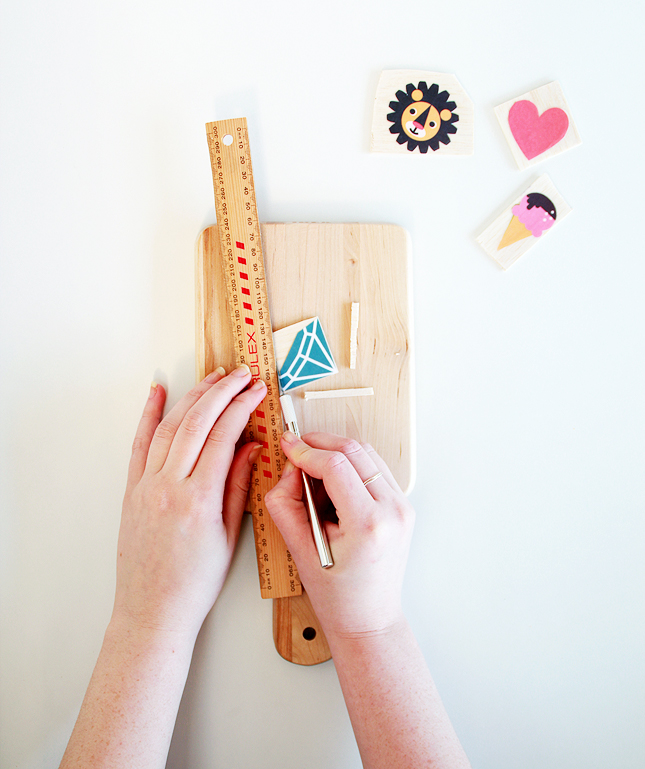
3. Glue the image down onto the balsa wood and then coat with a thin layer of ModPodge. Allow to dry completely before adding a second coat. Coat 3 -5 times, allowing to dry in between each layer. Keep your coats thin so as to keep the surface smooth. 4. Using a scalpel and ruler, cut away the excess wood from around your image. Cut small amounts at a time to ensure that the wood doesn’t split, especially when working with round images. Remember to use a backing board to cut onto. 5. Glue the brooch pins onto the center of the back of the wood and allow to dry. 6. Depending on your Mod Podge, you may find that the colors have dulled when coating the brooch. Seal the image with a coat of gloss sealer or clear nail polish. This will both strengthen your brooch and bring out the colours in your images. |
chelsea
August 20, 2014 at 5:08 amSuch a great idea!!
annarosamos
August 20, 2014 at 7:56 pmThis looks fun :)
Simplette
August 21, 2014 at 12:17 amSo clever. And cute !