
 Finding time to sit down and not only complete a DIY project but also put together a photo shoot can be difficult to juggle with daily life. As much as I try to keep my DIY projects easy as pie, sometimes you need to get back t basics with a projects are so easy and quick you can pull it together on a Sunday afternoon as I did with this one; I found myself needing some push pins for the pin board I have in my office and decided to spruce them up a bit. Nothing like a little bit of colour and fun to brighten a boring work day.
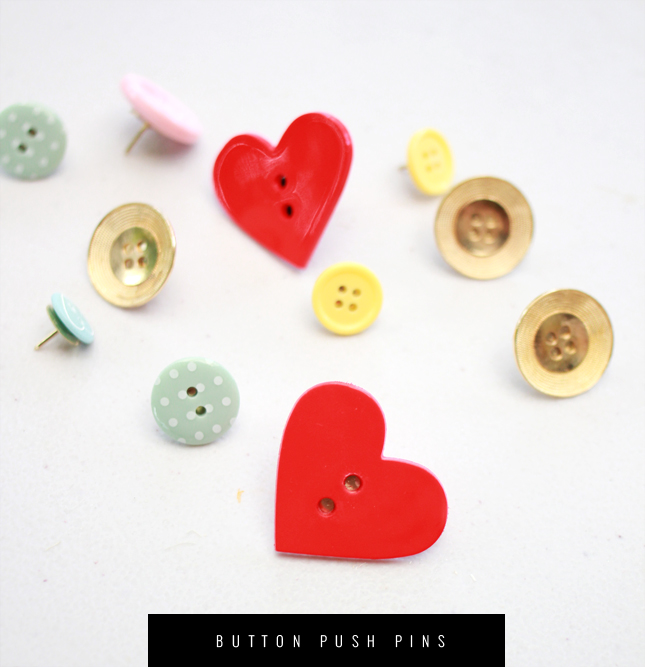
There’s obviously nothing to technical for this DIY project. All you need is some thumb tacks, buttons of various shapes and colours (any size larger than the head of the thumb tack), some super glue and a pair of pliers. We’re basically going to glue the tacks and buttons together.
Prior to gluing the thumb tacks to the buttons, take the pliers and gently straighten out the head of the thumb tack so that it sits flat instead of concave, the metal is quite flexible so it shouldn’t be too difficult to straighten out. This can be a little fiddly, so if you’re having difficulties, use a second pair of pliers to hold the tacks while you bend. You can skip this step if you prefer, however by straightening the tops out you will ensure the whole surface area will stick to the button and will ensure your pins last the distance.
Once you’ve straightened the head of the thumb tack you can secure it to the back of a button with a small dab of super glue- don’t use too much or else the glue will seep through the button holes and discolour the front of your buttons. Allow to dry completely and you’re done! I made a whole set of different button push pins in various shapes and sizes. It’s certainly made my office wall a little more fun to look at and I’ve even snagged a few compliments from co-workers!


Wow this is so simple but so smart! What a cute idea and I love the spring colors you used! I desperately need to decorate my apartment (I just moved in!) and this is a great idea for that. Thank you :)
xo
Melyssa
http://thenectarcollective.com/
I adore this! I may actually do this this weekend because those buttons are so cute! Thanks for sharing!
This is such a great project for the weekend! :)
Very cute idea! I’ll be trying it this weekend!