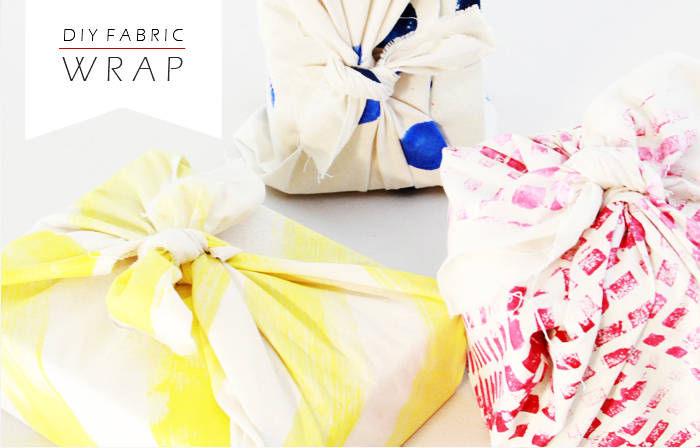
Ever since I went to Japan, I’ve been obsessing over fabric wraps, in particular, for gift wrapping. There are so many different ways to gift wrap presents, but fabric wraps still seems to be one style that doesn’t get used anywhere near as much, which is a shame considering what an art form it can be! Using fabric to wrap your gifts is also a little friendlier for the environment, as they can be used again and again, or even kept to be used as scarfs or linen.
These wraps can definitely be made to last. If you want to go out and purchase some fabric inks and nice material, you’ll make a long lasting gift within a gift. For me however, I chose to use what I had on hand, which still turned out beautifully, but probably wont last the distance long term.
What You Need:
Plain Calico or cotton fabric – as much as you might need to make a few large squares. I got around 2m
Fabric Dye/Paints – I used acrylic paints which worked just as well.
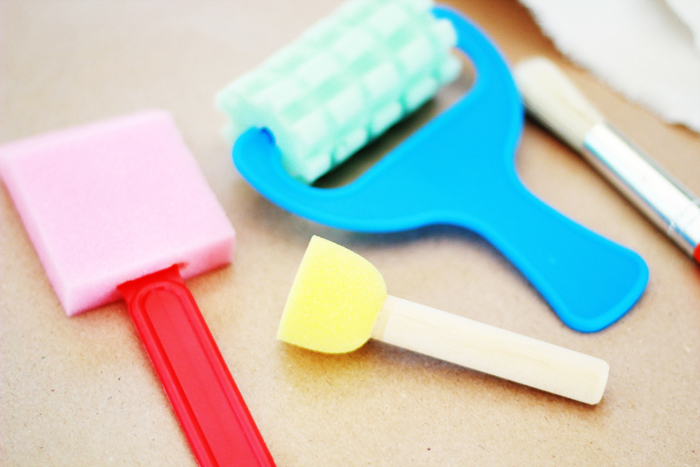
Painting tools – sponges, stamps, brushes etc
What You Do:
1. Take your fabric and cut into large squares. The size of your squares will depend on what you’re wrapping. I made mine around 50cm x 50cm.
2. Iron your fabric so that there are no creases and lay out on a flat surface with paper underneath to catch any bleed through.
3. Prepare your painting tools; I picked up a kids packet of ‘painter starter kit’ which had a mini textured roller, round sponge stamp, paint brushes etc for about $4. But if you have stamps or shapes you want to use go for it! Pour out a dollop of paint/ink onto a flat pallet and load up your chosen painting tool. Test each one on a scrap piece of fabric until you have even coverage in your pattern.
4. Once you feel confident to start, begin from one side of the fabric creating an even pattern along one edge. Repeat until you reach the alternate side and the whole piece is patterned.
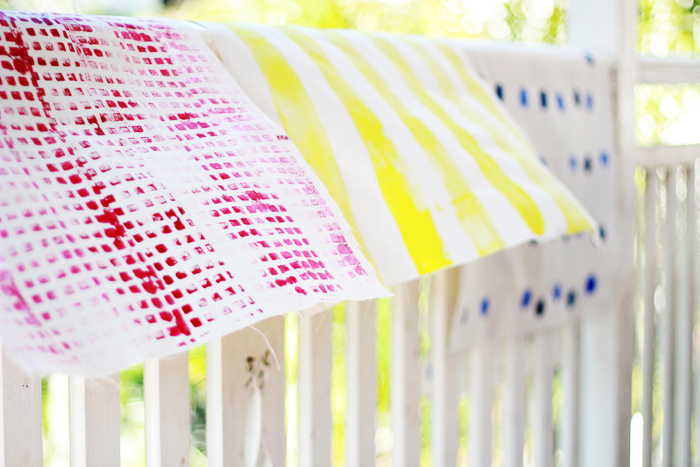
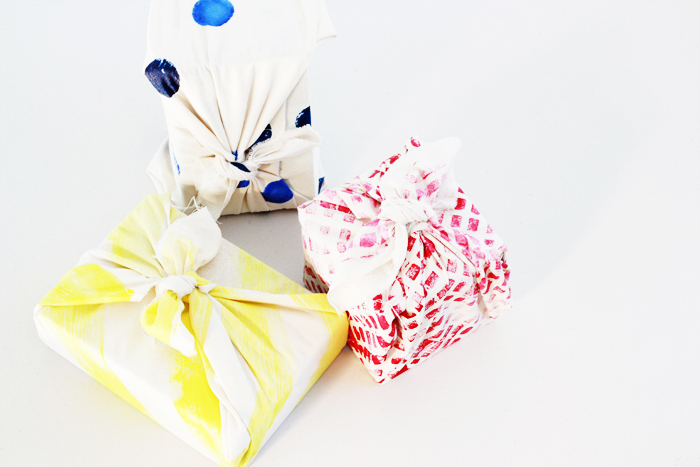
For my three fabrics I chose three patterns:
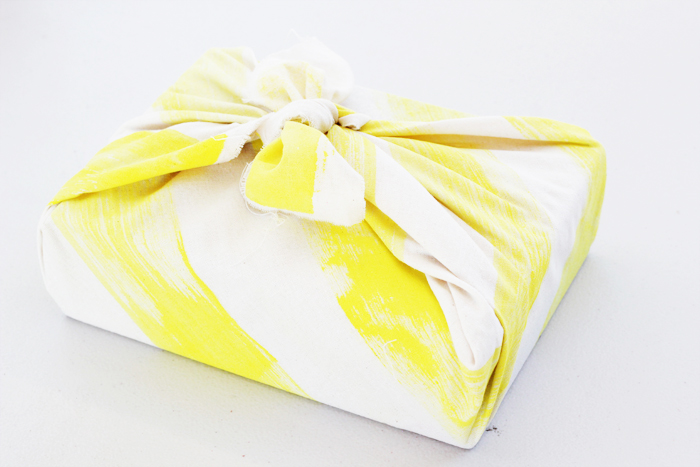
Yellow stripes - Painted by loading up a large flat sponge brush with paint and dragging across the fabric letting it run out as I went across to create a textured line.
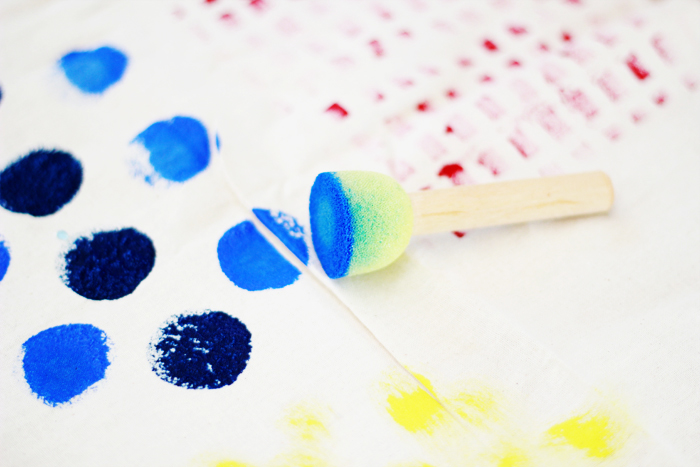
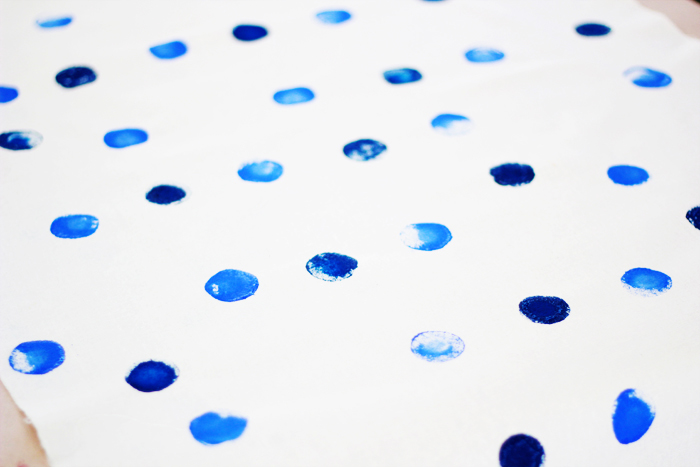
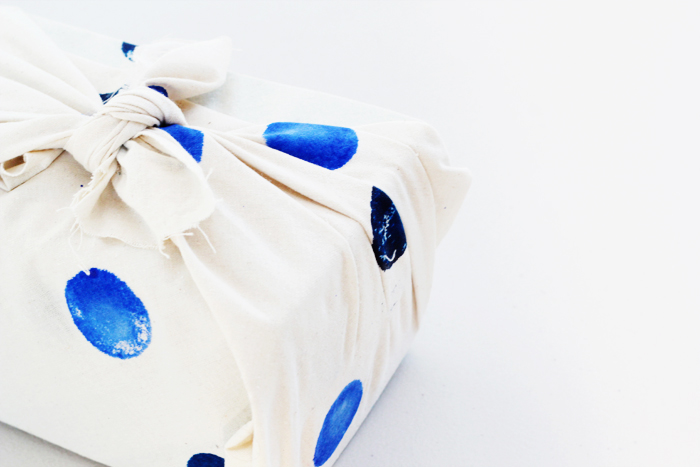
Blue Spots - I chose a light and a dark blue and created even spaced spots across the piece in the lighter colour. I then went back through and added the darker spots here and there.
Pink & Red texture - Using the textured roller, I created a textured effect starting from the middle of the fabric, making the colour lighter as I moved out (by adding a little white paint to the red each time I completed a line)
5. Hang the fabric out to dry. Leave until the paint/ink has completely dried. You can then iron the piece (using a protective sheet so that the paint doesn’t come off on your iron) to set the prints.
6. If you would like to hem the edges of the fabric, now is the time to do so. I liked the raw edges, so I left mine as they were (fraying bits and all!)
You can now wrap your gifts using your super awesome new fabric wrap! There are many great sites out there that can show you how to wrap gifts using material (check out Chewing the Cud) I used a pretty basic method of wrapping a simple box.
1. Lay the wrap face down and place the box in the middle.
2. Take the diagonally and tuck it around the box.
3. Take the opposite end and bring over the top, folding in the edge to line up with the edge of the box.
4. Gather together to two remaining sides and pull towards the middle of the box. Knot together and spread out the ends to make a ‘bow’ look.
What do you think? Will you give gift wraps a try this festive season?


I’d love to give this a try. I’ve always loved the Japanese gift wrapping methods, but have never tried it. Time to change that!
blueeyednightowl.blogspot.com/